Geophysical Survey Systems, Inc.
StructureScan™ Mini XT
Manual
MN 70-813 Rev E
7
•
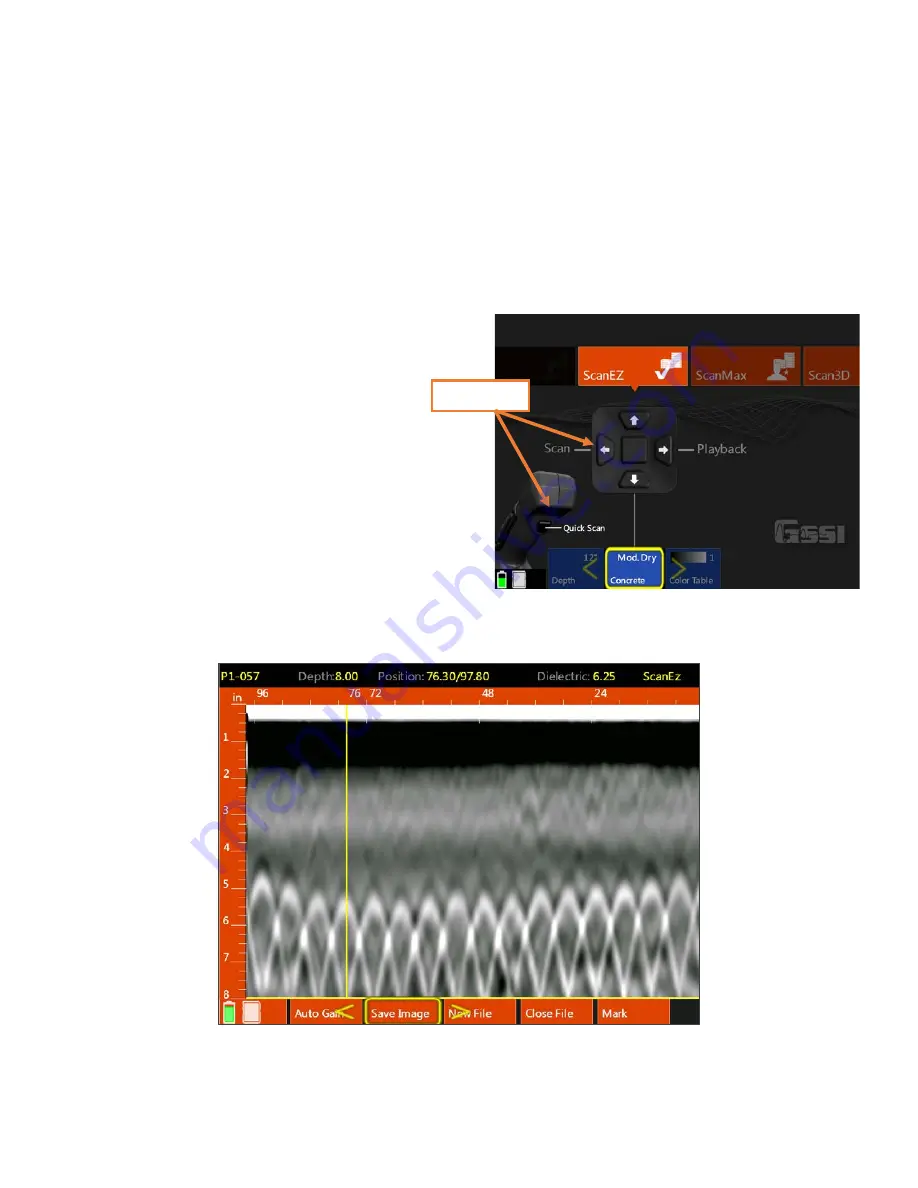
New File:
This will stop and save your current file and begin collecting a new one. The file number
in the top-left corner will advance by 1.
•
Close File
:
This will stop and save the current file and return you to the ScanEZ menu screen.
•
Mark:
This will write a red-dashed user mark to the Backup Cursor location when the option is
pushed. This is useful to note the location of something you want to remember.
Collecting Data and Marking Targets
This section covers the steps to locate and mark out objects in 2D.
1
From the ScanEZ Main menu, pull the trigger or
select Scan from the handle keypad to begin.
Roll the Mini XT along the area to be
scanned. The system will display data in
real time as you are rolling it.
2
Back the Mini XT up in a straight line. You will see
a yellow vertical line (the backup cursor) appear on
the screen. The position of this cursor is tied to the
Mini XT’s survey wheel. Stop when the cursor
bisects a hyperbola.
3
Mark the survey surface at both side laser points,
and then back the Mini XT up a little further and
make an
“X”
in the middle between those laser
marks. Note that objects you are imaging run perpendicular to the track of the Mini XT.
After each line, select New File to collect a new line.
Start Scan
Содержание StructureScan Mini XT
Страница 1: ......
Страница 6: ...Geophysical Survey Systems Inc StructureScan Mini XT Manual ...
Страница 12: ...Geophysical Survey Systems Inc StructureScan Mini XT Manual ...
Страница 42: ...Geophysical Survey Systems Inc StructureScan Mini XT Manual MN 70 813 Rev E 30 ...
Страница 58: ...Geophysical Survey Systems Inc StructureScan Mini XT Manual MN 70 813 Rev E 46 ...
Страница 64: ...Geophysical Survey Systems Inc StructureScan Mini XT Manual MN 70 813 Rev E 52 ...
Страница 68: ...Geophysical Survey Systems Inc StructureScan Mini XT Manual MN 70 813 Rev E 56 ...


