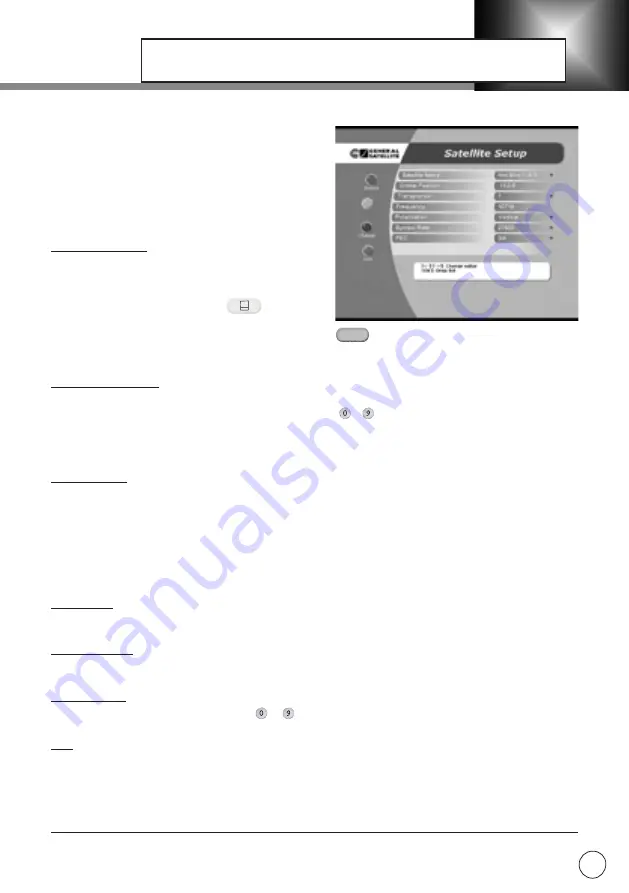
The menu “Satellite setup” allows you to select
the desired satellite from the list, add a new
satellite, delete a satellite or rename a satellite,
change it’s parameters and information about its
orbital position. You can also change parameters
of transponders or add new transponders.
SATELLITE NAME
Satellite names are listed in alphabetical order.
If the name of the desired satellite is absent in
the list, please select the “New” option (last string
in the list) and press the yellow button on
the Remote Control. In the list of satellites a New
Satellite will appear. To change its name press the blue button. Using a keyboard input the
name. You can change any satellite name this way.
ORBITAL POSITION
To enter the desired orbital position go to the “Orbital Position” option.
Type the desired position of the satellite using the digital ~ buttons in “xxx . x” format (4 symbols).
After typing the 4th symbol, a list consisting of 2 variants of direction (“W” or “E” ) will appear. Verify
your choice. Orbital Position must be within 0 - 180 degrees.
TRANSPONDER
This option contains a list of transponders of the selected satellite. Every transponder has such param-
eters as: Frequency, polarization, Symbol Rate, FEC.
Attention: To have opportunity for editing the list of transponders or their parameters it is necessary to
switch on the Expert mode in menu “Installation” – “System settings” – “Other settings” – “Installation
Mode” - Expert.
FREQUENCY
Enter the frequency of the transponder. Frequency must be within 3400-12750 MHz.
POLARISATION
Select polarization type: vertical, horizontal, left, right.
SYMBOL RATE
Select symbol rate. Enter optional using ~ buttons.
FEC
Select parameter for errors correction from: 1\2, 2\3, 3\4, 5\6, 7\8.
* See Keyboard
INSTALLATION
UHF
SATELLITE SETUP
17


