GROWSPAN
™
ROLLING PREMIUM HIGH TUNNELS
12
Revision date: 01.01.16
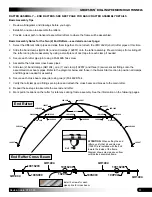
RAFTER ASSEMBLY — END RAFTERS (continued)
Gather the parts:
• Rafter Chord #30R1902 and #30R1903
• End Clamps (102857) and Tek Screws (FA4482B)
• Nut Setter 3/8'' x 2-9/16" Magnetic
Use the following photos and diagrams and the diagrams
in the Quick Start section of this document. It is best to
assemble all the rafters and then set them in place to
assemble the frame. If there are enough assistants, the
frame can be assembled as the rafters are completed.
Complete these steps to assemble the two (2) end rafters.
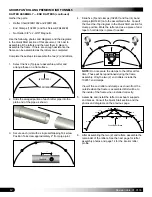
1. Select the five (5) pipes to assemble a rafter and
arrange these on a flat surface.
(#30R1902)
(#30R1903)
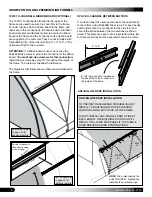
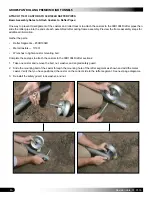
2. Slide the swaged portion of each rafter pipe into the
plain end of the pipe as shown.
3. Secure each joint with a single self-tapping Tek screw.
Position Tek screw approximately 2" from pipe joint.
2˝
FA4482B
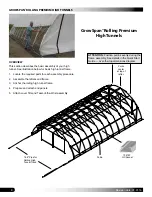
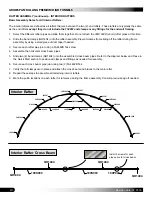
4. Slide five (5) end clamps (102857) and four (4) band
clamps (QH1440) onto the assembled rafter.
Consult
the Over-the-Top diagram in the Quick Start section for
clamp position.
Mark the rafter and use a piece of duct
tape to hold clamps in place if needed
NOTE:
Do not secure the clamps to the rafter at this
time. These will be repositioned during the frame
assembly. Only the two (2) end rafters include the
102857 end clamps.
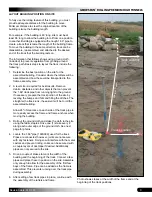
View of the end rafter and clamps as shown from the
outside when the frame is assembled. Bolt will be to
the inside of the frame when installed correctly.
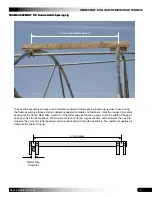
5. Assemble and install the rafter cross beam supports
and braces. Consult the Quick Start section and the
photos and diagrams on the previous page.
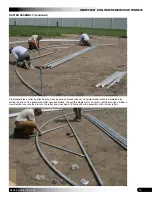
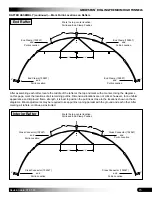
6. After assembling the two (2) end rafters, assemble the
remainder of the rafters. See the next page for rafter
assembly photos and page 14 for the interior rafter
profile.
190P040
102547
102547
102547
102547
102547
QH1304
190S099
190S099
30R1902
30R1902
30R1902
30R1902
30R1903
QH1404
QH1404
QH1404
QH1404
Cross Beam Brace


