-22-
Model G1015 (Mfg. since 7/99)
3. Hold onto the sanding arm assembly to keep
it from moving, then loosen the threaded
knobs and the lock collar cap screw shown in
Figure 20.
4. Adjust the height of the sanding arm assembly
so there is the correct amount of tension on
the sanding belt, then re-tighten the threaded
knobs to hold the assembly in place.
5. Adjust the lock collar so that it is firmly seated
on the pivot arm top, then re-tighten its cap
screw.
Note: The lock collar ensures the stability
and position of the sanding arm beyond the
holding power of the threaded knobs.
6. Re-check the sanding belt tension. If neces-
sary, repeat this procedure until the correct
belt tension is achieved.
Adjusting Sanding Belt Tracking
To ensure a safe operation, the sanding belt must
stay centered on the idler and drive wheels while
the machine is
ON. This is a trial-and-error pro-
cess that requires some patience.
To adjust the sanding belt tracking:
1. DISCONNECT MACHINE FROM POWER!
2. Make sure the sanding belt is correctly
installed and tensioned.
3. Rotate the drive wheel several times by hand
and watch the sanding belt as it tracks on the
idler and drive wheels.
— If the sanding belt is centered on the idler
and drive wheels, and does not move to
one side or the other after several rota-
tions, no further adjustments are neces-
sary.
— If the sanding belt moves to one side or
the other while rotating, continue with this
procedure.
4. Make a small adjustment to the tracking
adjustment knob, then rotate the drive wheel
several times while observing the sanding
belt (see
Figure 21).
— If the sanding belt moves to the right, rotate
the adjustment knob clockwise.
— If the sanding belt moves to the left, rotate
the adjustment knob counterclockwise.
5. Repeat Step 4 until the sanding belt stays
centered on the idler and drive wheels after
several rotations.
6. To verify the sanding belt tracking, turn the
machine
ON and watch the belt tracking.
— If the belt does not wander, then it is
tracked correctly.
— If the belt does wander, very slowly adjust
the tracking adjustment knob until the belt
stays centered on the wheels.
Figure 20. Sanding belt tension controls.
Threaded
Knobs
Lock Collar
Cap Screw
Sanding Arm
Assembly
Figure 21. Sanding belt tracking adjustment
knob.
Tracking Adjustment Knob
Содержание G1015
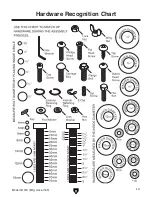
Страница 15: ...Model G1015 Mfg since 7 99 13 5mm Hardware Recognition Chart...
Страница 40: ......


