-16-
Model G1015 (Mfg. since 7/99)
Assembly
Mounting
The Model G1015 is a top-heavy machine.
Pressure applied to the sanding arm during
operation could easily tip the machine over,
causing personal injury or property damage. To
prevent this, you must firmly mount this machine
to a flat, stable surface, such as a workbench,
before beginning operations.
Note: During assembly, the position of the sanding
arm bracket will change in relation to the motor
assembly. DO NOT mount the machine to a
surface until instructed to in the setup procedure.
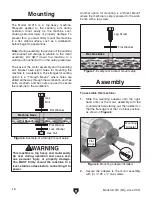
The base of the motor assembly and the sanding
arm bracket have eight holes for mounting the
machine to a workbench. The strongest mounting
option is a "Through Mount," where holes are
drilled all the way through the workbench, and hex
bolts, washers, and hex nuts are used to secure
the machine to the workbench.
Machine Base
Workbench
Hex
Bolt
Flat Washer
Flat Washer
Lock Washer
Hex Nut
Figure 6. Example of a through mount setup.
Machine Base
Workbench
Lag Screw
Flat Washer
Figure 7. Example of a direct mount setup.
Another option for mounting is a "Direct Mount"
where the machine is simply secured to the work-
bench with a lag screw.
This machine is top heavy and could easily
tip over during operation and cause seri-
ous personal injury or property damage.
You MUST firmly mount the machine to a
level, stable surface before connecting it to
power.
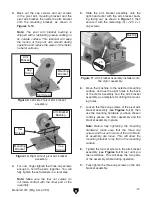
To assemble this machine:
1. Slide the mounting adapter onto the right-
hand arbor of the motor assembly with the
countersunk holes facing out, then rotate it so
that the flat edge is at the 10 o'clock position,
as shown in
Figure 8.
2. Secure the adapter to the motor assembly
with (3)
1
⁄
4
"-20 x
1
⁄
2
" cap screws.
Figure 8. Mounting adapter installed.
x 3
Mounting
Adapter
Flat
Edge
Содержание G1015
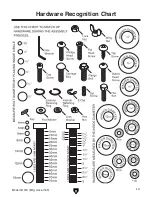
Страница 15: ...Model G1015 Mfg since 7 99 13 5mm Hardware Recognition Chart...
Страница 40: ......


