34
FINAL FIXING
VENT INSTALLATION
NN
416
410
481
541
543
543
Vent hinge
1.
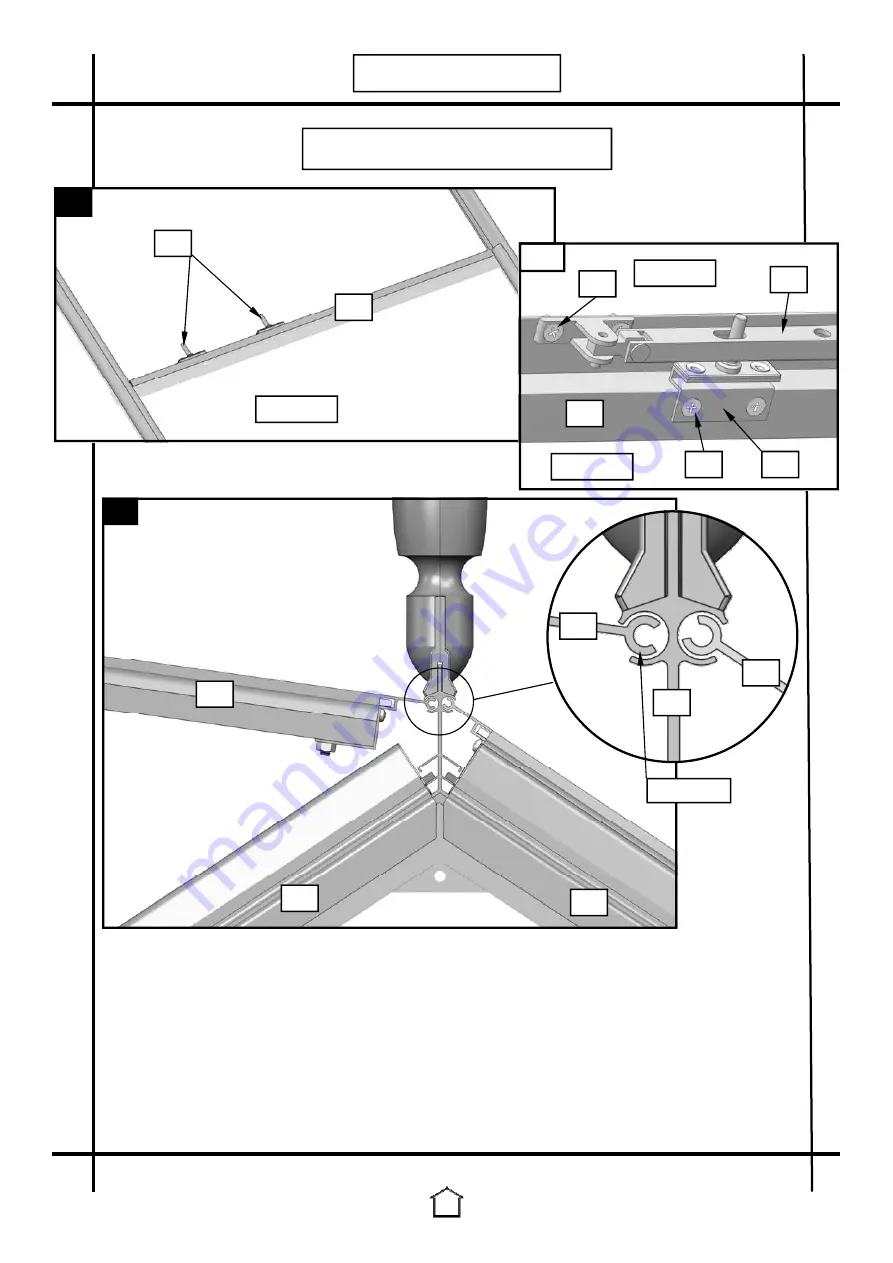
If you are using a casement stay attach the vent pegs to the slam bar using M4
countersunk screws and M4 nuts (you may find it easier to use needle nose pliers to hold
the nut as you tighten the bolt). The bolts should be inserted through the vent peg into the
slam bar (Diagram MM
¹
). (Ignore this step if you are using an autovent).
2.
Take the slam bar and slot it onto the bolts inserted in the roof glazing bars during the main
building assembly, loosely fit the nuts. Now slide the slam bar onto the top of the pane of
glass, below where the vent is going, and tighten the nuts (Diagram MM).
3.
The vents should be slid into the ridge from either end after glazing. Please note that the
rest of the roof should be glazed before the vents are inserted (Diagram NN).
4.
Once the vents are in position use a blob of the clear silicone each side of the vent hinge.
When this dries it will prevent the vent from moving along the ridge.
MM
542
709
610 X 545
542
610 X 545
610 X 610
709
587
587
330
MM
¹
Содержание HE-BLE
Страница 1: ...8 Wide ASSEMBLY INSTRUCTIONS ISSUE 4 Model HE BLE...
Страница 15: ...15 SIDE ASSEMBLY 303 461 461 447 447 447 303 351 588 A B D C 576 576 300 576...
Страница 20: ...20 FRONT ASSEMBLY 416 403 508 576 K M L 403 403 403 576 576 576 406 406 406 404 437 300 406 403...
Страница 21: ...21 N O P FRONT ASSEMBLY 437 588 334 334 526 375 526 300 315 588 334 300 576 430...


