page 4 of 20
Copyright © 2020 Green-GO
MCXD user guiDe
GO
The Main Interface
–
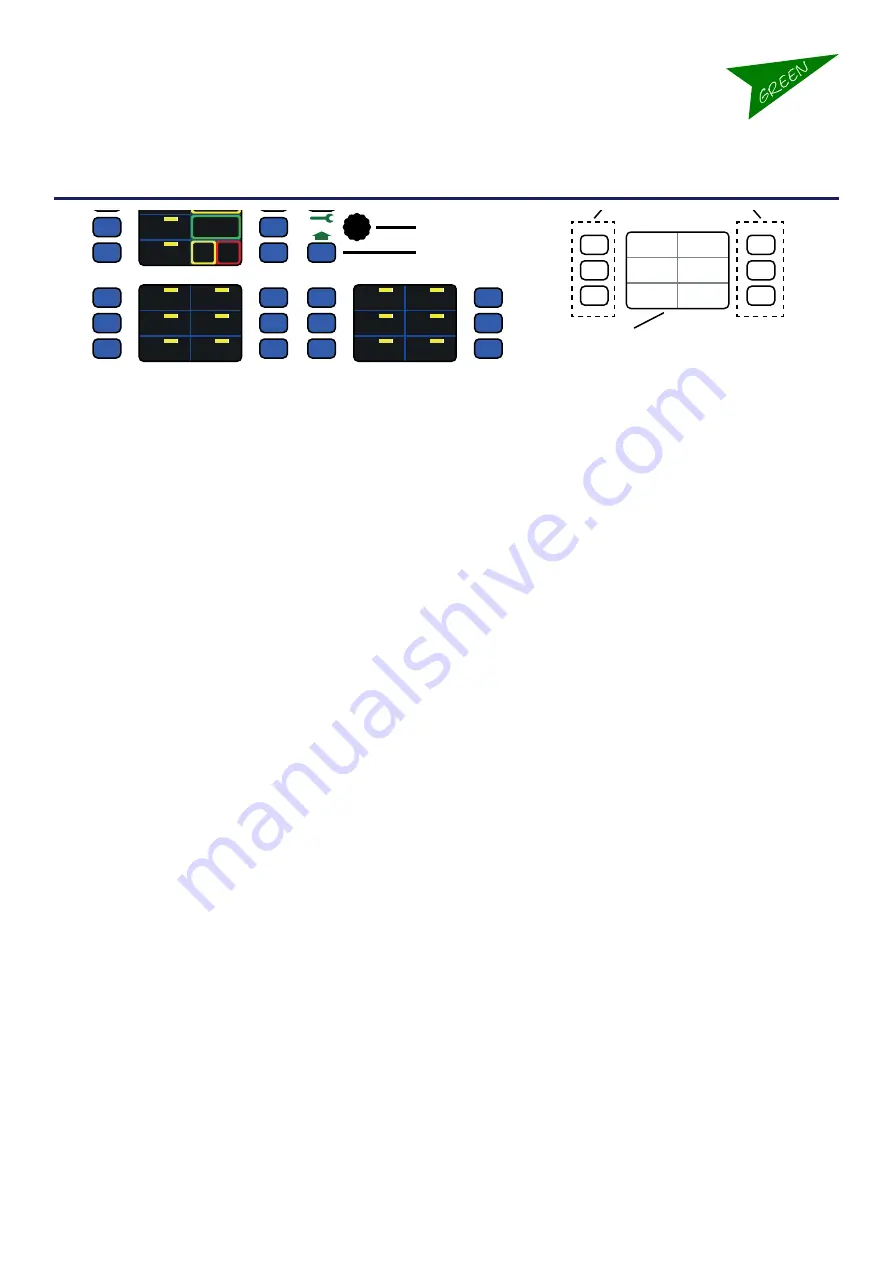
Pushknob:
Used for volume control or inside the setup menu for scroll and select (push)
–
Setup pushbutton:
Used for entering or leaving the setup menu with short presses. Outside the Setup menu
this button can be used as a shortcut to the settings for a selected channel. Make one long press, the button
will start blinking and you can press the Talk button or the touchscreen to select an assigned channel. This will
take you to the settings for the selected channel
–
Shift Pushbutton:
One short press will change between the two pages of assigned channels. A Long press will
make the button blink and the Talkbuttons turn Magenta, this takes you to the button assignment menu. Here
you can choose which function to assign to the selected button. The functions are:
–
No Function:
The button does nothing.
–
Default function:
The button controls the next channel in succession.
–
Program audio:
Controls the volume of program audio. *
–
Speaker Volume:
Controls the volume of the Speaker. *
–
Headset Volume:
Controls the volume in the Headset. *
–
Sidetone Volume:
Controls the volume of the Sidetone. *
–
Listen/Call mode:
Assign the Listen/Call mode selector to the button.
–
Listen mode:
Assign the Listen mode selector to the button.
–
Call mode:
Assign the Call mode selector to the button.
–
Cue mode:
Assign the Cue mode selector to the button.
–
Isolate:
Assign the Isolate function to the button.
–
Answer:
Assign the Answer function to the button.
–
Mic Kill:
Assign the Mic Kill function. Switches off the local speech input as long as the button is pressed.
Mic Kill Latch: Assign the Mic Kill Latch function. Switches off the local speech input. Press for OFF and
ON. Audio Input Select: The Deskstation can remember two sets of audio input settings. When choosing
–
Mic Kill Latch:
Assign the Mic Kill function. Switches off the local speech input as TOGGLE
–
Audio Source Select:
you get access to switch between the two. See following pages.
–
Channel 1- 32:
Select a channel to assign to the button.
* Press the button down and simultaneously adjust the volume with the Pushknob
–
18 Channel pushbuttons:
The remaining 18 pushbuttons relates to the area of the touchscreens next to
them. They can be assigned different functions using the Shift pushbutton (see above). The default setup is:
–
Page one:
–
15 Pushbuttons for the first fifteen channels. Push the button to Talk.
–
1 Pushbutton for the Isolate function: When isolate is on, Talking on a channel will mute all others. 1 Cue
mode Pushbutton: Selecting Cue mode allows you to send Cues. See following pages.
–
1 Listen/Call mode Pushbutton: Choose between Listen and Call mode. See following pages.
– Page two:
–
17 Pushbuttons for channels 16-32 + 1 Pushbutton for Program Audio
–
The Color Codes
the color codes, in the Display and the Indicator LED’s, mean:
–
Blue: Inactive
–
Green: Channel open for you to Talk
–
Yellow: Someone is Talking on the channel
Pushknob
Shift Pushbutton
Setup Pushbutto
n
ch 1
All
Sound
Light
Stage
Video
Chat
ch 2
ch 3
ch 4
ch 5
ch 6
ch 7
All
Sound
Light
Stage
Video
Chat
ch 8
ch 9
ch 10
ch 11
ch 12
Listen
Cue Mode
Isolate
Call
ch 13
All
Sound
Light
ch 14
ch 15
Channel Push buttons
TFT Touchscreen - divided into 6 sections
relating to the Pushbutton ne
xt to it.


