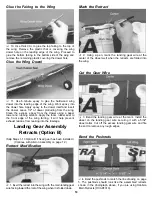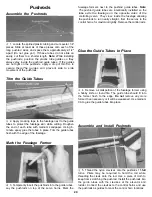
Install the Spacers
2. Locate and glue the two aluminum spacers into the
bottom tail section of the fuselage.
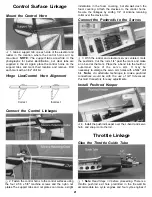
Install the Tail Gear Bracket
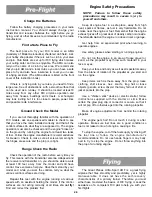
Gluing the Hinges
Check the Control Surfaces
1. Check each of the ailerons and the elevator to be
sure that they are secure. If any of them seem loose, apply
a few drops of thin CA glue to both sides of the hinge as
shown above. Do not remove the hinge to do this. The
glue will wick into the wood and provide a strong joint.
Glue the Rudder in Place
3. Locate the metal tail gear mount bracket and slide it
2. Before mounting the rudder, use a hobby knife to
over the tail gear wire. Secure the bracket to the fuselage
with one #4 x 1/2" sheet metal screw. Use the hole closest
to the tail gear at this time.
Mount the Tail Wheel
4. Mount the tail wheel using two 3/32" wheel collars.
enlarge the slot in the leading edge of the rudder to
provide plenty of clearance for the tail gear wire. Clean the
tail gear wire off with rubbing alcohol.
Note: The hinge material supplied with this kit consists of a
3-layer lamination of mylar and polyester. Properly
installed, this type of hinge provides the best combination
of strength, durability and ease of installation. We trust
even our best show models to the hinges, but it is essential
to install them correctly. Please read the following
instructions and follow them carefully to obtain the
best results.
The most common mistake made by modelers when
installing this type of hinge is not applying a sufficient
amount of glue to fully secure the hinge over its entire
surface area; or, the hinge slots are very tight, restricting
the flow of CA to the back of the hinges. This results in
hinges that are only "tack glued" approximately 1/8" to 1/4"
into the hinge slots. The following technique has been
developed to help ensure thorough and secure gluing.
17

