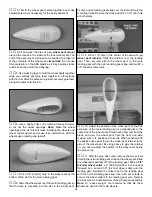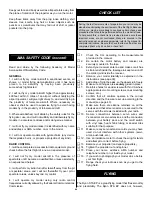
We used Top Flite MonoKote White (TOPQ0204), Red
(TOPQ0201) and Black (TOPQ0208) to cover our Ryan STA EP.
Fuselage and Tail:
❏
1.
1/4" strips at fin and stab as described
❏
2.
Red on fuselage lower right side wrapped around
the bottom
❏
3.
Red on fuselage lower left side wrapped around the
bottom
❏
4.
White on fuselage upper right side wrapped around
the top
❏
5.
White on fuselage upper left side wrapped around
the top
❏
6.
Stab bottom, followed by top
❏
7.
Fin left side, followed by the right side
❏
8.
Elevator bottoms, followed by the top
❏
9.
Rudder right side followed by the left side
❏
10. Battery hatch
❏
11. Black stripe on right side then the left
❏
12. Pin striping on stab and fin
❏
13. Black checkerboard on bottom of stab
Wing:
❏
1.
Bottom right, followed by the left wing panel
❏
2.
Top right, followed by the left wing panel
❏
3.
Aileron LE, followed by the bottom and top
❏
4.
Pin striping on top and bottom of the wing
❏
5.
Black checkerboard on bottom of wing
The black squares for the checkerboard are installed over
the white covering. Each black square should be put into
position and ironed down starting at the center of the square
and working towards the edges to work out any air bubbles.
Top Flite LustreKote
®
high quality paint perfectly matches
Top Flite MonoKote film. The paint is well suited to putting a
high quality finish on ABS (cowl and wheel pants), but does
have a tendency to curl materials such as styrene and
butyrate (windshield and side windows).
If you have any doubt about the material you are painting,
we suggest that you try painting on a small piece of leftover
material and watch it for a few days to be sure that you are
satisfied with the end results.
❏
1. Cut the covering from the hinge slots in the elevator
and stab. Also cut the covering from the groove for the
elevator joiner wire and the tailgear wire.
❏
2. Clean the elevator joiner wire with alcohol and a paper
towel to remove any oil residue.
❏
3. Reinstall the CA hinges in the elevator without glue.
Install the Hinges
FINAL HOOKUPS & CHECKS
We used LustreKote White (TOPR7204) and Red (TOPQ7227)
to paint the cowl, wheel pants and headrest. The inside of the
cockpit was first coated with thinned epoxy and was then
brushed with flat black. The epoxy will prevent the black paint
from bleeding through.
Do not paint the frame of the clear windscreen with LustreKote
directly from the can. It can cause the plastic to curl. We
recommend Formula-U for painting the clear windshield directly
from the can.
Painting Your Model
Suggested Covering Sequence
Again, with the white film flat on the glass, position the red
film so that it overlaps the white film by approximately 1/4"
[6.4mm]. With a covering iron set close to high, iron down
the seam between the two colors.
Allow the covering to cool for a minute and carefully start
lifting one end of the white covering. The two pieces
should be connected along the seam. If they are not,
increase the heat of the covering iron and repeat the
process. It may require more heat than normal for the film
to seal, because the glass absorbs some of the heat.
After removing the film from the glass, position the film on
the structure. Use a covering iron to tack the film down
every few inches. Then go back and seal the covering to
the wood all over.
A heat gun can be used to shrink the covering, but care
must be taken to not pull the seams apart.
40
Содержание Ryan STA EP
Страница 7: ...7 DIE CUT PATTERNS...
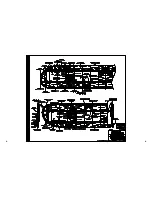
Страница 48: ...TWO VIEW DRAWING Use copies of this page to plan your trim scheme...
Страница 49: ...B C...
Страница 50: ...D A...


