❏
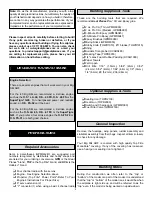
3. Carefully cut away the covering from the bottom of the
fuselage in the stab saddle.
❏
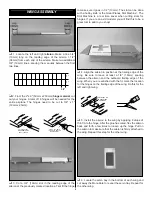
4. Mount the wing to the fuselage using the
nylon bolts
.
Lay the plane upside down and place the horizontal stabilizer
into position. Check the alignment as shown in the photo.
❏
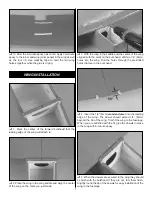
5. Stand back 8 to 10 feet (2.5 to 3 meters) and view the
model from the front and rear. The stabilizer tips should be
equally spaced in relation to the wing. If not, lightly sand the
high side of the stabilizer saddle to correct the problem.
Work slowly and check the alignment often.
❏
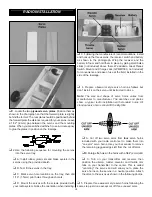
6. When the alignment looks good, mark the outline of
the fuselage onto the stabilizer. Remove the stabilizer and
trim the covering 1/32" (.8mm) inside of the lines,
being
careful not to cut into the underlying wood
. Re-check
your alignment and glue the stabilizer to the fuselage with
6-minute epoxy.
C
C
C = C
Horizontal Stabilizer
Wing
9


