❏
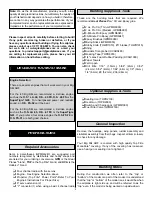
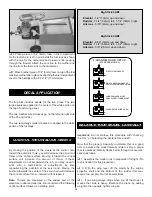
2. Place a piece of 1/4" (6mm) foam in the compartment
for the fuel tank to rest on and install the fuel tank as shown
with the line for the carburetor and pressure line passing
through the firewall. Attach the vent line to the muffler and
the line from the fuel clunk to the carburetor.
❏
3. Place another piece of 1/4" (6mm) foam on top of the fuel
tank. Secure the tank in place by attaching the fuel compartment
cover to the fuselage with a #2 x 1/2" (13mm) screw.
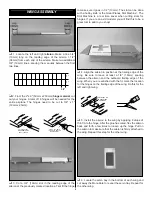
The Big Stik includes decals for the Iron Cross. The two
large decals are applied in the center of the white portion on
the top of each wing panel.
The two medium sized crosses go on the left and right side
of the fin and rudder.
The two remaining smaller crosses are applied to the white
portion of the fuselage.
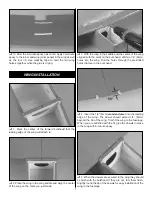
By moving the position of the clevis at the control horn
toward the outermost hole, you will decrease the amount of
throw of the control surface. Moving it toward the control
surface will increase the amount of throw. If these
adjustments do not accomplish the job, you may need to
work with a combination of adjustments by also
repositioning the pushrod at the servo end. Moving the
pushrod towards the center of the servo horn will decrease
the control surface throw - outward will increase it.
Note:
Throws are measured at the widest part of the
elevators, rudder and ailerons. We recommend the following
control surface throws as a starting point.
Important:
Do not confuse this procedure with “checking
the C.G.” or “balancing the airplane fore and aft”.
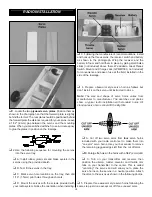
Now that the plane is basically completed, this is a good
time to balance the model laterally (side to side). A plane
that is balanced laterally tracks better through maneuvers,
especially loops.
❏
1. Assemble the model in as in preparation for flight. (No
fuel is needed for this procedure.)
❏
2. With the wing level, lift the model by the engine
propeller shaft and the bottom of the rudder (this may
require two people). Do this several times.
❏
3. If one wing always drops when you lift the model, it
means that side is heavy. Balance the plane by adding
weight to the opposite, lighter wing tip.
BALANCE YOUR MODEL LATERALLY
CARBURETOR WIDE OPEN
NOSE WHEEL TURNS RIGHT
RUDDER MOVES RIGHT
LEFT AILERON MOVES DOWN
RIGHT AILERON MOVES UP
ELEVATOR MOVES UP
4-CHANNEL
TRANSMITTER
(STANDARD MODE 2)
4-CHANNEL RADIO SETUP
TRANSMITTER
4-CHANNEL
TRANSMITTER
4-CHANNEL
TRANSMITTER
4-CHANNEL
Big Stik .40 ARF
Elevator
- 1/2" (13mm) up and down
Rudder
- 1-1/4" (32mm) left, 1-1/4" (32mm) right
Ailerons
- 5/16" (8mm) up and down
Big Stik .60 ARF
Elevator
- 9/16" (14mm) up and down
Rudder
- 1-1/2" (38mm) left, 1-1/2" (38mm) right
Ailerons
- 3/8" (9.5mm) up and down
CONTROL THROW ADJUSTMENTS
DECAL APPLICATION
16


