background image

13


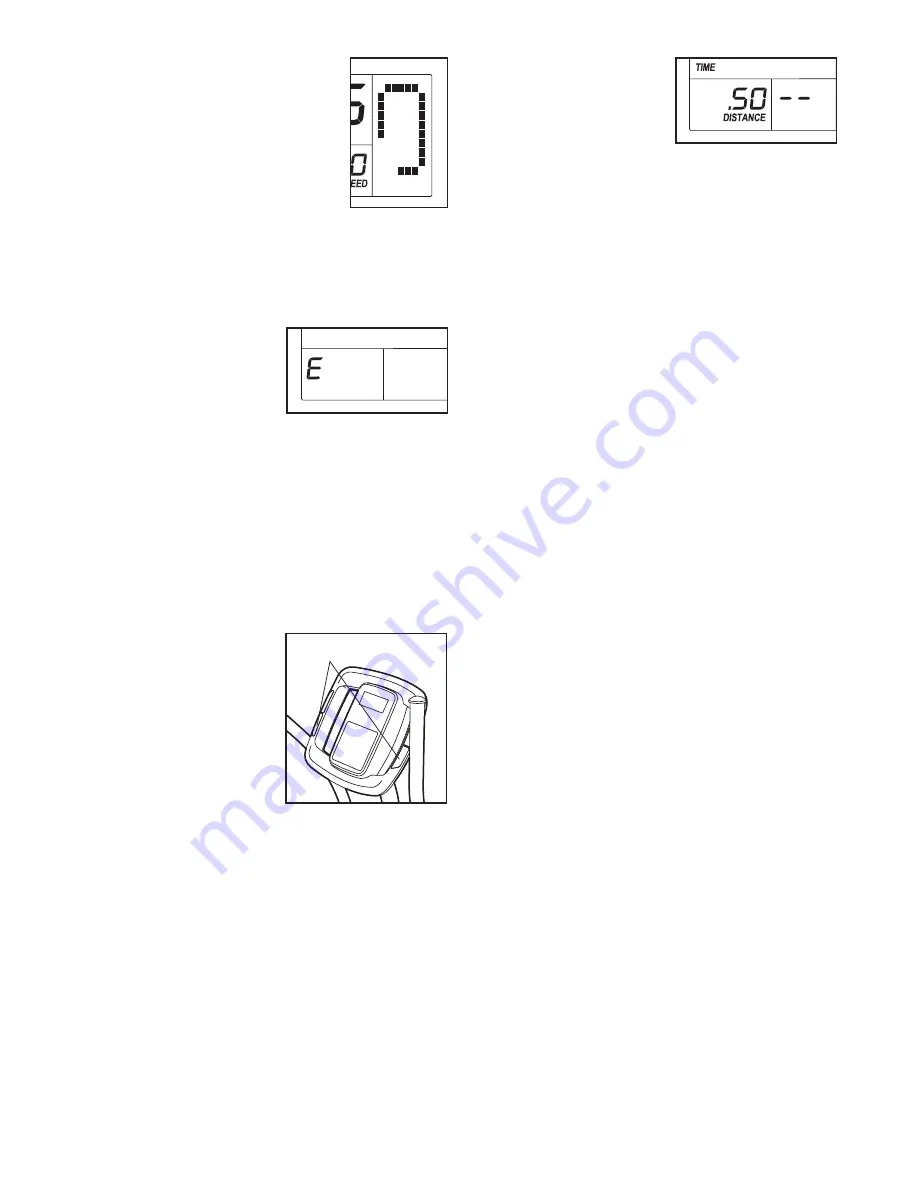
The right display

 will show a 

track that represents 1/4 mile 
(400 meters). As you exercise, 
indicators will appear in suc-
cession around the track until 
the entire track appears. The 
track will then disappear and 
the indicators will again begin to 
appear in succession. 


 To reset the displays, press the On/Reset button. 
To pause the console, stop pedaling. When the 
console is paused, the time will 

 ash in the display. 

To continue your workout, simply resume pedaling.


Note: The console 
can show speed and 
distance in either 
miles or kilometers. 

To select the unit of 
measurement, hold 
down the Priority 
Display button for several seconds. An ““E”” for 
English miles or an ““M”” for metric kilometers will 
appear in the lower left display. To change the unit 
of measurement, hold down the On/Reset button 
for several seconds until the desired unit of mea-
surement appears in the display. Then, press the 
Priority Display button to save your selection.

3.  Measure your heart rate if desired. 


 If there are sheets of 
plastic on the metal 
contacts on the 
handgrip heart rate 
monitor, remove the 
plastic.


In addition, 

make sure that your 
hands are clean.

 To 

measure your heart 
rate, hold the handgrip 
heart rate monitor 
with your palms resting against the metal contacts. 

Avoid moving your hands or gripping the con-
tacts tightly.


 When your pulse is 
detected, the heart-
shaped indicator in the 
lower right display will 

 ash and one or two 

dashes will appear. 
After a moment, your 
heart rate will be shown in the display. For the 
most accurate heart rate reading, continue to hold 
the contacts for about 15 seconds. 


 If your heart rate is not shown, make sure that your 
hands are positioned as described. Be careful not 
to move your hands excessively or to squeeze the 
metal contacts tightly. For optimal performance, 
clean the metal contacts using a soft cloth; 

never 

use alcohol, abrasives, or chemicals to clean 
the contacts.

4. 


When you are 

 nished exercising, the console 

will turn off automatically.


 If the pedals do not move for a few seconds, the 
time will flash in the display and the console will 
pause. If the pedals do not move for a few minutes, 
the console will turn off and the display will be 
reset.

Contacts

Содержание WHIRLWIND 390

Страница 1: ...his manual for future reference QUESTIONS If you have questions or if parts are damaged or missing DO NOT CONTACT THE STORE please contact Customer Care IMPORTANT Please register this product see the...

Страница 2: ...ver LIMITED WARRANTY Back Cover TABLE OF CONTENTS This drawing shows the location s of the warning decal s If a decal is missing or illegible see the front cover of this manual and request a free repl...

Страница 3: ...cluding the user s movement may affect the accuracy of heart rate readings The heart rate monitor is intended only as an exercise aid in determin ing heart rate trends in general 12 When adjusting the...

Страница 4: ...s designed to let you enjoy this healthful exer cise in the comfort and privacy of your home For your bene t read this manual carefully before you use the exercise bike If you have questions after rea...

Страница 5: ...ing materials Do not dispose of the packing materials until assembly is completed In addition to the included tool s assembly requires an adjustable wrench and a Phillips screwdriver Use the drawings...

Страница 6: ...tward insert the Seat Post 6 into the Frame 1 and then release the Seat Knob Move the Seat Post upward and down ward slightly to make sure that the pin on the Seat Knob is engaged in one of the adjust...

Страница 7: ...t of the included grease to the Handlebar Axle 33 Insert the Handlebar Axle into the Frame 1 and center it 5 31 1 Grease 33 Avoid pinching the Reed Switch Wire 31 6 6 While another person holds the Up...

Страница 8: ...tery cover and insert the batteries into the battery compartment Make sure to orient the batteries as shown by the diagram inside the battery compartment Then reattach the battery cover 3 Battery Cove...

Страница 9: ...49 49 78 33 85 85 84 84 9 9 Identify the Right Handlebar 9 and the Right Handlebar Base 10 which are marked with Right stickers Orient these parts so that the wide side of the tube on the Right Handle...

Страница 10: ...g Make sure that there is a Custom Washer 86 a Pedal Spring 42 a Blue Washer 71 a Pedal Bushing 43 a Black Pedal Washer 79 and a Pedal Spacer 44 on the shaft of the Pedal In addition make sure that th...

Страница 11: ...stationary mode the link arms must be disconnected from the pedals Pull the link arms outward against the blue washers until the link arms are free of the pedal bushings see drawing 2 at the left Be...

Страница 12: ...ed The lower right dis play can show your pedaling speed in miles or kilometers per hour and the approximate number of calories you have burned When you use the handgrip heart rate monitor the lower r...

Страница 13: ...s of plastic on the metal contacts on the handgrip heart rate monitor remove the plastic In addition make sure that your hands are clean To measure your heart rate hold the handgrip heart rate monitor...

Страница 14: ...ight the bearings may be damaged if the belt is too loose the fan may be damaged If the belt causes excessive noise or slips as you pedal follow the steps below Carefully remove the four Guard Clips 7...

Страница 15: ...ll the top of the Right Shield away from the Left Shield 17 Next locate the Reed Switch 31 Turn the Crank Arm 26 until the Magnet 48 is aligned with the Reed Switch Loosen but do not remove the M4 x 1...

Страница 16: ...c Exercise If your goal is to strengthen your cardiovascular system you must perform aerobic exercise which is activity that requires large amounts of oxygen for prolonged periods of time For aerobic...

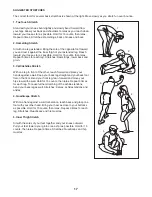
Страница 17: ...lles Stretch With one leg in front of the other reach forward and place your hands against a wall Keep your back leg straight and your back foot flat on the floor Bend your front leg lean forward and...

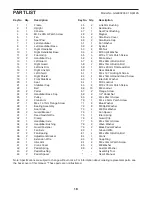
Страница 18: ...all Axle Cover 50 2 Small Axle Cap 51 1 Fan Washer 52 2 Eyebolt 53 2 M6 Nut 54 3 M10 Split Washer 55 3 M10 x 17mm Patch Screw 56 4 M6 Locknut 57 4 M6 x 38mm Button Bolt 58 2 M8 x 74mm Button Bolt 59 1...

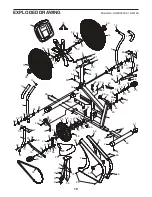
Страница 19: ...8 38 39 40 41 41 42 43 44 42 43 44 45 45 46 47 48 49 78 50 50 74 51 52 53 52 53 54 54 55 55 56 56 57 57 58 58 59 64 66 66 65 66 67 68 67 68 27 69 69 69 69 69 77 62 70 71 71 63 73 73 75 78 49 55 76 79...

Страница 20: ...to freight damage to the product This warranty will automatically be voided if the product is used as a store display model if the product is purchased or transported outside the USA if all instructio...

Отзывы: