24
Filling
When filling the sprayer it is necessary to
use an external water source and wear the
appropriate PPE.
The following steps should be followed when
filling the tank:
1. Connect the sprayer to tow vehicle and
park on level ground.
2. The pump should be turned off.
3. Remove the tank lid.
4.
Add 20% of the tanks volume of clean
water, or more, if the chemical is in a
denser form e.g. powder.
5.
Add chemical as required. Some agitation
will take place as the rest of the water is
added.
6.
Use external water source to fill main tank
(Do not exceed the tank capacity).
7. Replace the tank lid and ensure that it is
secure prior to switching on pump. You are
now ready to use the sprayer.
Spray Application
NOTE
: It is the responsibility of the operator
to ensure that the chemical mix is sufficiently
agitated and that the conditions are right
to start spraying. Operators must wear the
appropriate PPE.
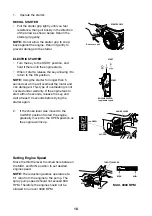
1. If wanting to spot spray only, then turn off
the ball valve to the boom line.
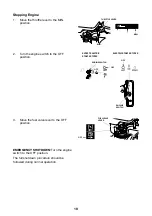
2. Start the engine with the bypass valve open
to allow it to start with no load.
3.
Gradually raise the engine speed and allow
pump to build pressure, then close the
bypass.
4. It is recommended to set the regulator
to maximum pressure 45 PSI (3 BAR)
when using the spray gun only. Adjust the
regulator if necessary.
5.
Engage the trigger on the spray gun to
commence spot spraying.
6.
If fitted,to spray from the boom only, make
sure the ball valve leading to it is open.
Adjust the nozzle pattern by rotating the
nozzle in the appropriate direction as
required.
7. Adjust the pressure regulator to raise or
lower the spray rate to suit application. This
will ensure even and consistent coverage of
the target. Do not exceed 290 PSI (20 BAR)
NOTE
: Refer to your chemical manufacturer's
information for determining appropriate spray
rates or consult an agronomist for further help.
Agitation should take place when filling or
through another method as deemed suitable
by the operator.
Flushing
The following information is provided as a
general guide for flushing your sprayer after a
spray application
For more specific information regarding
flushing, and decontamination, specific
to the products that you are applying, it is
recommended that you consult the chemical
label or your chemical supplier.
1. Turn pump off.
2. Drain main tank by removing drain plug.
3. Add a quantity of fresh water to main tank
and allow to drain through plug.
4. Replace plug and add a quantity of fresh
water, and decontaminating agents if
required, to main tank.
5. Turn on pump, and spray fresh water
through the lance. This will ensure that
fresh water has circulated through the
pump and lance.
6. Drain remaining contents of fresh water
and replace tank drain plug. The sprayer is
now ready for storage.
Storage
If the sprayer is to be stored for a long period
of time without use, there are several tasks
that need to be performed.
1. Clean the sprayer thoroughly as described
under “flushing”.
2. Store the sprayer out of direct sunlight and
where it will not be affected by frosts.
3. Ensure that the main tank is empty.
4. Protect hoses and electrical connections.

