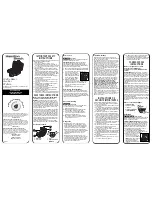
16.
Plug the connector of the Module
Connection Wire into the so
cket on
Ethernet module.
17.
Use power connector cable to push all
connection wires that o
n the right side of
mainboard to lean against the wall of
bottom case.
18. Plug the power connector into the
mainboard.
19. Put the middle compartment and the top
cover back into the bottom case of printer.
Pleas
puttin
to en
corre
【
Note
】
e organize all cables and wires well before
g middle compartment and top cover back
sure that the printer can be assembled
ctly.
20. Assemble the Front Cover Plate.
21. Tighten the bottom case screws.
22. The Ethernet Module installation is
complete.
【
Note
】
After the Ethernet module installation is
completed, please send the
"^XSET,USBETHERNET,1" printer command to
printer for activating the Ethernet connection
function. Please mind that USB port will be
deactivated once the Ethernet connection
function is activated.
EZ-DT-2/EZ-DT-4 User’s Manual
22
Содержание EZ-DT-2
Страница 1: ...User s Manual EZ DT 2 EZ DT 4 P N 920 012511 03 Rev A 08 2009 ...
Страница 34: ...Appendix 1 EZ DT 2 Certifications EZ DT 2 EZ DT 4 User s Manual 33 ...
Страница 35: ...EZ DT 2 EZ DT 4 User s Manual 34 ...
Страница 36: ...EZ DT 2 EZ DT 4 User s Manual 35 ...
Страница 37: ...EZ DT 2 EZ DT 4 User s Manual 36 ...
Страница 38: ...EZ DT 2 EZ DT 4 User s Manual 37 ...
Страница 39: ...2 EZ DT 4 Certifications EZ DT 2 EZ DT 4 User s Manual 38 ...
Страница 40: ...EZ DT 2 EZ DT 4 User s Manual 39 ...
Страница 41: ...EZ DT 2 EZ DT 4 User s Manual 40 ...
Страница 42: ...EZ DT 2 EZ DT 4 User s Manual 41 ...
Страница 43: ...EZ DT 2 EZ DT 4 User s Manual 42 ...
Страница 44: ...EZ DT 2 EZ DT 4 User s Manual 43 ...


