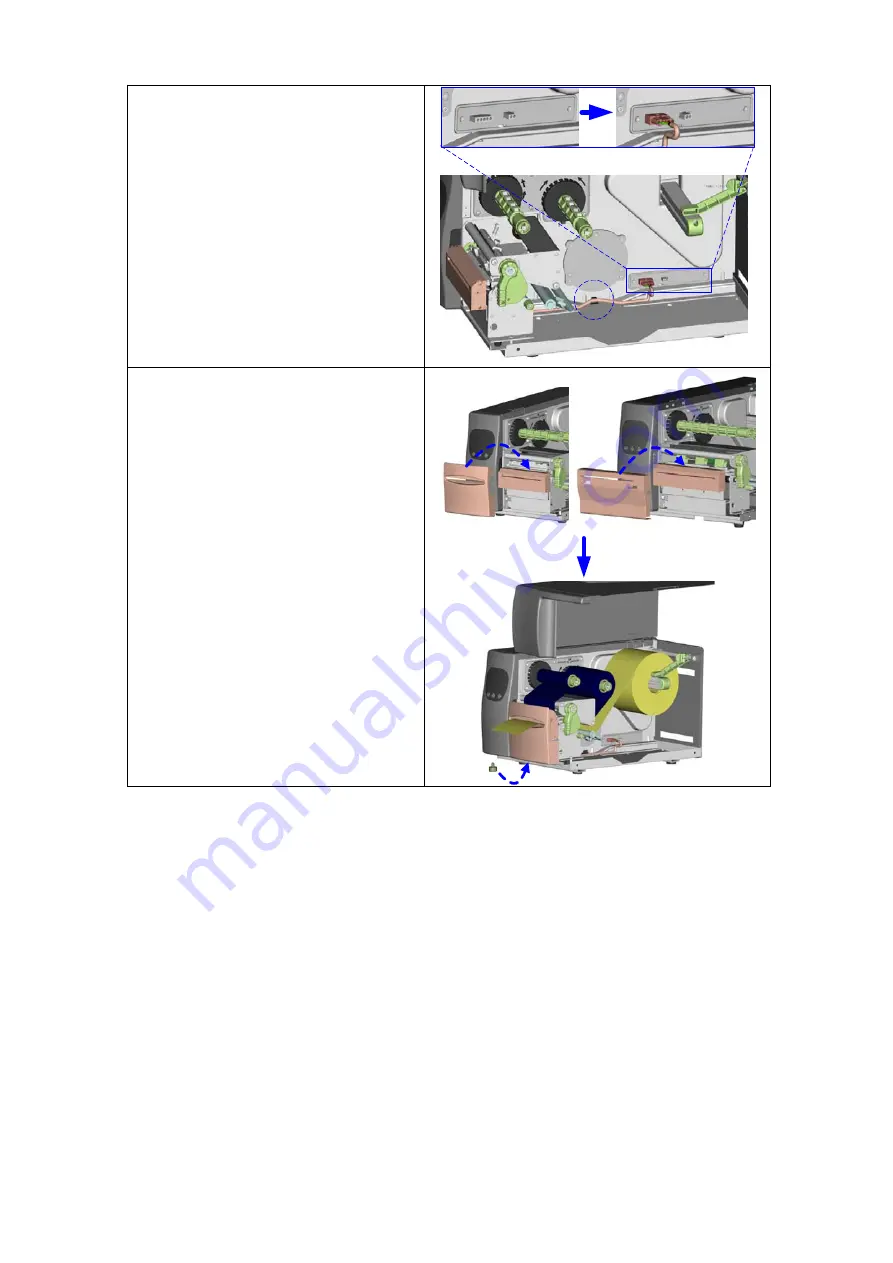
4.
Plug the cutter cable connector onto
the cutter connector.
5.
Tie the cables with the Cable Tie
Mounts, and stick it onto the bottom
plate.
6.
Hang up the cutter cover to the cutter
and screw the bottom cover screw.
7.
Install the media into the printer.
Close the Top Cover to complete the
cutter installation.
【
Note1
】
Make sure the printer is set to activate
cutter function on.
【
Note2
】
The label / paper that used for cutting is
suggested to be at least 30mm in height.
【
Suggestion
】
When printing with cutter module, it is
suggested to set the stop position (^E) to
26 (for EZ-2000Plus)or 27
(for EZ-6000Plus).
EZ-2000Plus
EZ6000Plus
EZ-2000+/6000+ User’s Manual
37
Содержание EZ-2000 PLUS
Страница 1: ...User s Manual EZ 2000Plus EZ 6000Plus P N 920 011911 02 Rev C 06 2009 ...
Страница 69: ...Appendix 1 EZ 2000Plus Certifications EZ 2000 6000 User s Manual 68 ...
Страница 70: ...EZ 2000 6000 User s Manual 69 ...
Страница 71: ...EZ 2000 6000 User s Manual 70 ...
Страница 72: ...EZ 2000 6000 User s Manual 71 ...
Страница 73: ...EZ 2000 6000 User s Manual 72 ...
Страница 74: ...2 EZ 6000Plus Certifications EZ 2000 6000 User s Manual 73 ...
Страница 75: ...EZ 2000 6000 User s Manual 74 ...
Страница 76: ...EZ 2000 6000 User s Manual 75 ...
Страница 77: ...EZ 2000 6000 User s Manual 76 ...
Страница 78: ...EZ 2000 6000 User s Manual 77 ...


