background image

BlueSense - Modbus   


GO Systemelektronik GmbH  Faluner Weg 1    24109 Kiel     Germany  Tel.: +49 431 58080-0 

Fax: -58080-11 

Page 44 / 55 


www.go-sys.de    

                    [email protected]


2.4 Analogue Input Register (Read Only) 


Number 

Address  Description 

Data format  Size 

0x0000 

first measurement value 

Double 

1 Register 

0x0001 

second measurement value 

Double 

1 Register 

0x0002 

third measurement value 

Double 

1 Register 

0x0003 

fourth measurement value 

Double 

1 Register 

0x0004 

first pulse input 

Double 

1 Register 

0x0005 

second pulse input 

Double 

1 Register 

0x0006 
to 
0x000F 

reserved for future functions 

-N/A- 

-N/A- 

0x0010 
to 
0x0011 

first unit of the first measurement value 

Char 

2 Register 

0x0012 
to 
0x0013 

second unit of the first measurement value  Char 

2 Register 

10 

0x0014 
to 
0x0015 

first unit of the second measurement value  Char 

2 Register 

11 

0x0016 
to 
0x0017 

second unit of the second measurement 
value 

Char 

2 Register 

12 

0x0018 
to  
0x0019 

first unit of the third measurement value 

Char 

2 Register 

13 

0x001A  
to 
0x001B 

second unit of the third measurement value  Char 

2 Register 

14 

0x001C 
to 
0x001D 

first unit of the fourth measurement value 

Char 

2 Register 

15 

0x001E 
to 
0x001F 

second unit of the fourth measurement 
value 

Char 

2 Register 

16 

0x0020 
to 
0x0040 

reserved for future functions 

-N/A- 

-N/A- 


Содержание BlueSense

Страница 1: ...Manual BlueSense Transducer Version of the manual 3 1 en www go sys de ...

Страница 2: ...rs which could arise from the interaction between hardware and soft ware and from the use of other components Effective product observance is only possible with adequate information from the end user about the planned field of application and the hardware and software used If the conditions of use change or if the hardware or software has changed due to the complex relationships between hardware a...

Страница 3: ...BlueSense GO Systemelektronik GmbH Faluner Weg 1 24109 Kiel Germany Tel 49 431 58080 0 Fax 58080 11 Page 3 55 www go sys de info go sys de blank page ...

Страница 4: ...setup control parameter 17 5 1 1 1 Calibration 18 5 1 1 1 1 Example 1 point calibration oxygen 18 5 1 1 1 2 Example 2 point calibration ORP 19 5 1 1 2 Relay 20 5 1 1 3 Current Output 21 5 1 1 4 Change Name 22 5 1 1 5 Parameter 22 5 1 1 5 1 Minimum value and Maximum value 23 5 1 1 5 2 Average and Interval 24 5 1 2 Temperature sensor setup associated parameter 25 5 1 3 Digital In 25 5 2 Reset 26 5 3...

Страница 5: ...stallation notes 41 12 Maintenance instructions 41 Appendix A Modbus 42 Appendix B Connection to a BlueBox 45 Appendix C Adjustment of the touch display 46 Appendix D Housing dimensions 47 Appendix E Status and error messages 48 Appendix F DIP switch configuration 50 Appendix G Differentiation motherboard Version A B 50 Appendix H Multipoint calibration 51 Appendix I Menu structure 53 ...

Страница 6: ...ng principle NTC 5 to 80 C Standard temperature sensor SEMI 833 25 C 83 kΩ Dissolved oxygen measuring principle galvanic cell 0 20 mg l Dissolved oxygen measuring principle fluorescence 0 25 ppm pH glass electrode pH3 pH13 Ion selective electrode Turbidity submersible scattered light 90 wave length 860 nm 0 3000 FNU Turbidity flow through scattered light 90 wave length 860 nm 0 100 FNU ORP 2000 to...

Страница 7: ...ror mes sages on an SD Memory Card The Transducer itself has no memory The Transducer is operated via a touch screen Through a few steps one can for example undertake calibra tions and set switching values The menu options are displayed in simple to understand text Basic structure of the menu navigation see Appendix I Menu structure 1 Oxygen 8 0 mg l 2 Temperature 1 18 4 C 3 Conductivity 414 µS cm...

Страница 8: ...measurement range 0 05 Hz 1000 Hz Outputs 2 current outputs 4 to 20 mA active 2 relays with a low voltage only switching capacity of 24 V 0 5 A 2 relays with a switching capacity of 230 VAC 2 A or 24 VDC 6 A Communications interfaces RS 232 or RS 485 each with 9600 Baud selective EMC or Modbus or CAN bus connector for connection to the BlueBox System Voltage feed 12 VDC 9 V 18 V received power max...

Страница 9: ...BlueSense GO Systemelektronik GmbH Faluner Weg 1 24109 Kiel Germany Tel 49 431 58080 0 Fax 58080 11 Page 9 55 www go sys de info go sys de 2 2 Connection diagram 1 control parameter ...

Страница 10: ...BlueSense GO Systemelektronik GmbH Faluner Weg 1 24109 Kiel Germany Tel 49 431 58080 0 Fax 58080 11 Page 10 55 www go sys de info go sys de 2 3 Connection diagram 2 control parameter ...

Страница 11: ...ensor terminal connection diagram If no temperature sensor is con nected the open input must be closed with a resistor of 82 kΩ see also Appendix G Differentiation motherboard Version A B Jumper slot X20 X21 PE connection to PIN 5 only exists on mothertboard Version B On motherboard Version A the shield cable is connected with PIN 3 of slot X10 ...

Страница 12: ...cable entry is via the PG glands To do list after initial start up language setting see 5 4 Language setting preadjustment english time setting see 5 5 Time Date preadjustment timezone of the customer if applicable sensor calibration see calibration sheet e g for ISE sensors customized settings relay settings switching and hysteresis values current output settings etc if applicable adjustment of t...

Страница 13: ...ed value from a conductivity measurement 6 Pulse 1 value of the first pulse input The names of the sensors are automatically numbered and listed In top left hand corner the time is displayed In top right hand corner the date is displayed In the lower left corner the states of the 4 Digital In inputs and the switching states of the 4 relays are dis played see Sensor terminal connection diagram A fi...

Страница 14: ...5 www go sys de info go sys de 4 1 2 Main Menu Parameter Display Switch to the Setup menu 5 Switch to the Illumination menu 6 Switch to the Memory Card menu 7 Switch to the Programme menu 8 Switch to the display of the firmware version 9 Switch back to the Parameter Display Switch to the Parameter Display Menu ...

Страница 15: ...adjust the settings of the connected sensors and change system parameters Switch to the sensor menu 5 1 Switch to the password protected factory presets User changes are not necessary Switch to the Reset menu 5 2 Switch to the Comport menu 5 3 Switch to language setting menu 5 4 Switch to the time and date entry menu 5 5 Switch back to the Main Menu Switch to the Parameter Display ...

Страница 16: ...r 2 Control parameters Two 2 sensors are connected Two control parameters are measured and where applicable the temperature for each sensor as associated parameters To determine if your transducer has one 1 or two 2 control parameters please refer to your shipping re ceipt The example has 1 Sensor Oxygen sensor first control parameter 2 Sensor Oxygen sensor s integrated Temperature sensor associat...

Страница 17: ...1 2 Switch to the Current Output setup for the first sensor 5 1 1 3 Switch to the Change Name menu of the first sensor 5 1 1 4 Switch between the units mg l and saturation The button is also a status indicator Appears only if two measurement units are possible Switches to the setting of the estimated minimum and maximum measurement value of the sensor needed for a connected BlueBox the setting of ...

Страница 18: ...e entered Aborts the calibration and switches to Sensor control parameter setup Deletes the last entered character Saves the input and switches to the List menu Without a setting the value is set to 0 Not recommended With the List menu you can check the calibration values Aborts the calibration and switches to Sensor setup Saves the calibration and switches to Sensor setup The calibration is saved...

Страница 19: ... of the second value Second value accept the value and switches back to the setup Without a setting the value is set to 0 Not recommended With the List menu you can check the calibration values Aborts the calibration and switches to Sensor setup Saves the calibration and switches to Sensor setup The calibration is saved and completed 1 2 222 mV 0 7 8 9 4 5 6 1 2 3 2 2 462 mV 0 7 8 9 4 5 6 1 2 3 Nu...

Страница 20: ...the input and switches to the next menu Without setting the old value is stored The setting of the relay is saved and completed On Off RHY measured value t SP RSP Switchpoint Switchbackpoint Switchback Hysteresis Example maximum switching value The Switchpoint SP is the value at which when reached a change in state of the switch occurs The switch then stays in this new state until the measured val...

Страница 21: ...nput of a minimum and a maximum value Example Aborts the input and switches to the Current menu Aborts the settings and switches to the Current menu Deletes the last entered character Saves the settings and switches to the Current menu Saves the input and switches to the next menu Without setting the old value is stored The current settings are saved and completed 4 mA 20 mA 4 20 mA 0 4 8 12 16 20...

Страница 22: ...onnected BlueBox Switches to the setting of the estimated maximal measurement value of the sen sor needed for a connected BlueBox Switches to the setting of the estimated maximal measurement value of the sen sor needed for a connected BlueBox Switches to the setting of the measurement interval Switch back to Sensor control parameter setup Switch to the Parameter Display Space character Capitalizat...

Страница 23: ... parameter Input of the estimated minimum and maximum measurement value of the sensor needed for a connected BlueBox input minimum measurement value input maximum measurement value Presently active value is shown as old value Aborts the input and switches to the Parameter menu Deletes the last entered character Saves the input and switches back to the Parameter menu Without setting the old value i...

Страница 24: ... Interval Time in seconds between the start of a single measurement and the start of the next single measurement de fault setting is here 1 s The average and interval values vary depending upon the connected sensor Switches back to the Parameter menu without saving the input Deletes the last entered character Saves the input and switch back to the Parameter menu Without setting the old value is st...

Страница 25: ... digital inputs is displayed If no sensor is connected either 0 or 0 0 is displayed Switch back to the Setup menu Switch to the renaming of the temperature sensor 5 1 1 4 Switches to the setting of the estimated minimum and maximum measurement value of the sensor needed for a connected BlueBox the setting of the number of single measurements from which the measure ment value will be calculated by ...

Страница 26: ...e 26 55 www go sys de info go sys de 5 2 Reset Setup menu No Yes Reset Switch back to the Setup menu Resets all user settings to factory settings Exception Sensor calibration data remains unchanged Switch back to the display of Measured Values Switch back to the Setup menu Switch to the Parameter Display ...

Страница 27: ...l Only visible if a RS 232 RS 485 interface is existing Switch to the input of the Modbus address of the transducer 5 3 2 Only visible if a RS 232 RS 485 interface is existing Sets the CAN bus data transfer rate to 50 kbit s The button is also a status indicator Only visible if a CAN bus interface is existing Sets the CAN bus data transfer rate to 5 kbit s The button is also a status indicator Onl...

Страница 28: ...odbus protocol 5 3 2 Modbus address input Comport menu Here you can enter the Modbus address of the transducer the factory setting is 10 The presently active value is displayed above the input field Switch back to the Comport menu without saving the input Deletes the last entered character Save the input and switch back to the Comport menu Without setting the old value is stored Modbus Protocol Pr...

Страница 29: ... indicator Sets the menu language to English The button is also a status indicator Sets the menu language to Spanish The button is also a status indicator Sets the menu language to French The button is also a status indicator Sets the menu language to Hungarian The button is also a status indicator Sets the menu language to Russian The button is also a status indicator Switch back to the Setup men...

Страница 30: ...onth Day 2009 11 10 Reduces the hours minutes seconds by 1 Increases the hours minutes seconds by 1 Switch back to the Setup menu without storing the entry Save the entry and switch to the Date entry menu Reduces the year month date by 1 Increases the year month date by 1 Switch back to the Setup menu without storing the entry Save the entry and switch back to the Setup menu ...

Страница 31: ...The button is also a status indicator Turns off the backlight of the display The button is also a status indicator Turns off the backlight of the display after 60 s user inactivity Does not apply to input menus and list menus If the backlight is off it can be turned on again by pressing any button The button is also a status indicator Switch back to the Main Menu Switch to the display of Measured ...

Страница 32: ...matted with FAT16 NOT FAT32 or NTFS After inserting the SD card please press The SD Memory Card is detected as long as Please wait appears on the display Thereafter the following menu appears and the SD Memory Card is written If the transducer starts with an inserted SD card e g after a power failure data recording starts auto matically Important The SD Memory Card may only be removed after you ha...

Страница 33: ...0 00 60 m Presently active value is shown as old value From this menu you can set the storage interval in minutes Switch back to the Memory Card menu without saving the input Deletes the last entered character Save the input and switch back to the Memory Card menu Without setting the old value is stored 7 3 Update Firmware Main Menu Starts the Firmware Update Follow the instructions Switch back to...

Страница 34: ...dividual values are separated with a semicolon It is recommended to open these files with a program that displays the data in a clearly arranged way Example opening a csv file with the program Calc from the OpenOffice package Note If you selected English as the menu language of the BlueSense Transducer the decimal separator is a dot Note Columns with entries with leading zeros for example on digit...

Страница 35: ...alues The button is also a status indicator Pressing this button starts the flushing see 8 1 After activating the flushcontrol the measured values of the next ca 60 seconds will not be saved on the SD card Switches the compensation of a chlorine measurement with pH value and temperature on and off The button is also a status indicator Precondition chlorine measuring board and pH measuring board wi...

Страница 36: ...tronik GmbH Faluner Weg 1 24109 Kiel Germany Tel 49 431 58080 0 Fax 58080 11 Page 36 55 www go sys de info go sys de Switch to the Main Menu Switch to the Parameter Display Switch to another programs menu here without content ...

Страница 37: ...sh If flushtime latencytime is greater than the interval then the next flush will occur 1 min after the relaxtime The Relaxtime is the time after the end of the flushtime in which the sensor can adjust to the surrounding medium In this time no new measurement will be acted upon Aborts the setting and switches to the Pro grams Menu Aborts the input and switches to the Programs Menu Deletes the last...

Страница 38: ...ted sensor Desired value is a value from the range of the associated sensor Actuating variable is either a current of 4 mA 20 mA current output 1 or the differ ence between the on and off the relay contact parallel K1 K3 Cycle Cycle Minimum 1 s automatically Minimum switch on time Switch on time Minimum switch on time or 0 Switch on time Minimum switch on time or 0 Calculation of the switch on tim...

Страница 39: ...Switches to the input of the desired value The input range is the measurement range of the associated sensor Presently active values are shown as old value Switch back to the Programs Menu Switch to the Parameter Display Switches to the sensor selection of the PID control The current sensor is displayed on the button Switches between the actuators relay contact parallel K1 K3 and power output curr...

Страница 40: ...u Displays the firmware version here 3 03 7 fc is a service note the serial number S N of the transducer and the serial numbers of the sensor measuring boards KV 0 KV 1 The serial number of the transducer is also the CAN ID in other contexts also called DAM ID of the transducer for a connected BlueBox bls 5 digits SYSTEMELEKTRONIK Faluner Weg 1 D 24109 Kiel 049 431 58080 0 FW 3 03 7 fc S N bls 111...

Страница 41: ... This data must correspond If in doubt ask your electrician Only pull the plug from the Transducer when it is off never when it is on Only use the Transducer when the lid is closed so that no electrical components can be touched The electrical safety of the device and optimal RFI protection are only guaranteed if the device is connected to a properly installed protective conductor system In case o...

Страница 42: ...a Modbus The registers are 32 bit 2 Modbus mapping chart 2 1 Discrete Output Coils Read Write Number Address Description Data format Size 1 0x0000 Relay 1 Bit 1 Bit 2 0x0001 Relay 2 Bit 1 Bit 3 0x0002 Relay 3 Bit 1 Bit 4 0x0003 Relay 4 Bit 1 Bit 5 0x0004 to 0x0070 reserved for future functions N A N A 2 2 Discrete Input Coils Read Only Number Address Description Data format Size 1 0x0000 Digital I...

Страница 43: ... N A 4 0x0010 to 0x0013 name of the first measurement value Char 4 Register 5 0x0014 to 0x0017 name of the second measurement value Char 4 Register 6 0x0018 to 0x001B name of the third measurement value Char 4 Register 7 0x001C to 0x001F name of the fourth measurement value Char 4 Register 8 0x0020 to 0x0023 name of the first pulse input Char 4 Register 9 0x0024 to 0x0027 name of the second pulse ...

Страница 44: ... to 0x000F reserved for future functions N A N A 8 0x0010 to 0x0011 first unit of the first measurement value Char 2 Register 9 0x0012 to 0x0013 second unit of the first measurement value Char 2 Register 10 0x0014 to 0x0015 first unit of the second measurement value Char 2 Register 11 0x0016 to 0x0017 second unit of the second measurement value Char 2 Register 12 0x0018 to 0x0019 first unit of the...

Страница 45: ...ansducer is also the CAN ID1 of the transducer for a con nected BlueBox bls 5 digits Sensor ID CAN ID1 Sensor number max 17 Sensor numbers of the transducer in order max 4 connected sensors salinity as a computed value from a conductivity measurement2 2 pulse inputs 4 digital Inputs 2 current outputs 4 relay outputs Depending on the number of connected sensors the Sensor numbers of the following s...

Страница 46: ... this blinking dot Appendix C Adjustment of the touch display If the display responses not wrong or only under large pressure a display adjustment is necessary While switching on power press display until the notice touch adjustment don t touch for normal use appears Left off the display immediately Press the display immediately again for more than one second A blinking dot appears at top left Pre...

Страница 47: ...BlueSense Housing dimensions GO Systemelektronik GmbH Faluner Weg 1 24109 Kiel Germany Tel 49 431 58080 0 Fax 58080 11 Page 47 55 www go sys de info go sys de Appendix D Housing dimensions ...

Страница 48: ... bus card is detected CAN bus speed is still unknown CAN bus speed detected here 5 kbit s device is registered on the CAN bus flashing CAN bus connection is disconnected CAN bus speed detected here 50 kbit s device is registered on the CAN bus flashing CAN bus connection is disconnected RS 232 card is detected RS 485 card is detected 1 Oxygen 8 0 mg l 2 Temperature 1 18 4 C 3 Conductivity 414 µS c...

Страница 49: ...n the motherboard and the display is interrupted Entry into csv file 32768 Error during data record Please check memory card 50 SD Memory Card error during a recording Entry into csv file 16384 No memory card found 99 SD Memory Card missing critical battery voltage 11 The supply voltage has dropped below 11 5 volts If the supply voltage is below 11 V the transducer will be switched off Entry into ...

Страница 50: ...tiation motherboard Version A B The motherboard Version B is different from the motherboard Version A in that on the motherboard Version B two additional jumper slots are mounted X20 and X21 These jumper slots are located in the lower left corner of the motherboard visible after removing the front cover of the housing If these jumper slots exist it is motherboard Version B If these jumper slots do...

Страница 51: ...point calibration example turbidity 1 Request 2 Input of the measurement points Here you enter the number of measurement points Switch back to the turbidity menu without saving the input Deletes the last entered character Saves the input and switches back to the next menu Without input the value is set to 2 At some sensors there is before a menu for selecting a gain Activation of the calibration m...

Страница 52: ...ast entered character Saves the input and switches to the next menu Without a setting the value is set to 0 Not recommended Aborts the calibration and switches back to the turbidity menu Saves the in calibration and switches back to the turbidity sensor menu The calibration is saved and completed 1 6 actual number of the measurement point number of measurement points 0 0 actual measurement value a...

Страница 53: ...080 0 Fax 58080 11 Page 53 55 www go sys de info go sys de Appendix I Menu structure Main structure Setup Sensors Reset Comport Screen Memory Card Programs Info Main menu Parameter Display Language Time Date see 4 1 1 see 4 1 2 see 5 see 5 1 see 5 2 see 5 3 see 5 4 see 5 5 see 6 see 7 see 8 see 9 ...

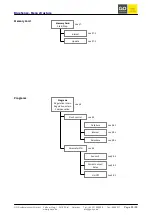
Страница 54: ...mport Modbus protocol Modbus address Comport CAN 50 kB s CAN 5 kB s see 5 3 see 5 3 1 see 5 3 2 see 5 1 see 5 1 1 see 5 1 1 1 see 5 1 1 2 see 5 1 1 3 see 5 1 1 4 see 5 1 1 5 see 5 1 1 5 1 see 5 1 1 5 1 see 5 1 1 5 2 see 5 1 1 5 2 Sensors Sensor X Calibration Relay Current Output Change Name Parameter Minimum value Maximum value Avergae Interval see 5 1 3 Digital In ...

Страница 55: ...www go sys de info go sys de Memory Card Programs Memory Card Start Stop Interval Update see 7 see 7 2 see 7 3 Programs Regulation intern Regulation extern Compensation Parameter PID Flushtime Interval Relaxtime Flushcontrol Sensor X Current output Relay On Off see 8 see 8 see 8 1 see 8 1 see 8 1 see 8 see 8 2 see 8 2 see 8 2 ...

Отзывы: