1
T
HANK
Y
OU
...
PAGE 1
I
NTRODUCTION
PAGE 1
G
ETTING TO
K
NOW
Y
OUR
C
ABLEMASTER
PAGE 2
I
NSTALLATION
O
VERVIEW
PAGE 3
Location for Power Unit & Cable
PAGE 3
Hawse Pipe & Cable Plug Exit
PAGE 3
Connection to Electrical System
PAGE 3
T
YPES OF
I
NSTALLATIONS
PAGE 4
I
NSTALLATION
I
NSTRUCTIONS
PAGE 5
W
IRING
I
NSTRUCTIONS
PAGE 6
P
OWER
C
ABLE
I
NSTALLATION
PAGE 8
C
ABLE
A
DJUSTMENT
PAGE 8
AC W
IRING
I
NSTRUCTIONS
PAGE 9
M
AINTENANCE
PAGE 9
O
PERATION OF
C
ABLEMASTER
PAGE 10
T
ROUBLESHOOTING
G
UIDE
PAGE 10
C
ABLEMASTER
D
IMENSIONS
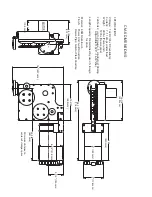
PAGE 11
C
ABLEMASTER
W
IRING
D
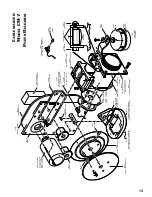
IAGRAM
PAGE 15
C
ABLEMASTER
A
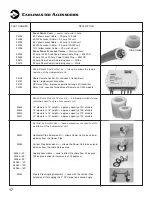
CCESSORIES
PAGE 17
for buying the Glendinning Cablemaster. At
Glendinning, we are committed to providing you, our
customer, with a product that will yield trouble-free
service. Care has been taken during each phase of the
manufacturing process to guarantee a lifetime of qual-
ity and performance—after all, our name is on it!
Paul & John Glendinning
Welcome to the Glendinning family of quality marine
products. Your new
Cablemaster
carries the same assur-
ance of quality that has stood behind every product from
Glendinning Marine Products for over 30 years—we’re
proud of our reputation for quality products and service.
While installation on most boats is straight forward
and easy, for those perplexing situations, nothing beats a
qualified marine electrician. Using common sense about
safety and a sound mechanical approach during the
installation, the
Cablemaster
will provide many hours of
trouble-free service.
All
Cablemasters
have been designed to pay out and
retract shore power cables without overloading the motor
within the system’s power unit. Properly adjusted, a
Cablemaster
will drag 75 feet (maximum) of shore power
cable without slippage.
The
Cablemaster
consists of two major components;
the
hawse pipe
and
power unit
. The chromed hawse
pipe is designed to accommodate varying sizes of shore
power cables with the attached 30 or 50amp shore
power plug cover. Within the hawse pipe, a neoprene
gasket/wiper prevents the entrance of water and helps
clean the cable as it is retracted into the boat. When the
cable is retracted completely, the plug cover actuates the
in-limit switch which is mounted on the face of the gasket
plate inside the hawse pipe.
The drive motor, reduction gearing, guide roller
assembly and the relay assembly comprise the power
unit. The power unit is connected to the hawse pipe with
a hawse pipe clamp and a length of extruded aluminum
angle. The hawse pipe clamp allows the power unit to be
angled to either side of vertical directing the shore power
cable toward the storage compartment. The main pulley
of the
Cablemaster
is also freewheeling which allows the
cable to be manually payed in or out.
The out-limit switch is located in the guide roller
assembly. The nylon safety collar, which is installed
around the shore power cable, activates the out-limit
switch. This collar also serves as a mechanical stopping
device should the limit switch fail or should the shore
power cable be forcibly pulled outward.
T
ABLE OF
C
ONTENTS
T
HANK
Y
OU
...
I
NTRODUCTION
In preparing this manual, Glendinning Marine Products, Inc. has relied
upon the standards established by the National Electric Code and the
recommended practices and standards for AC electrical systems for
vessels prepared by the American Boat and Yacht Council, Inc. This
manual reflects practices and standards in effect at the time of publica-
tion and is intended only as a guide to understand the Cablemaster.
Glendinning Marine Products, Inc. will not be liable for any loss, dam-
age, incidental or consequential damages of any kind, arising in con-
nection with the use or reliance upon this manual.
ATTENTION
:
18
Please take a moment to validate your product warranty by mailing in this card with the proper information.
F
OLLOW THESE SIMPLE STEPS
:
STEP 1: Fill in the registration card.
STEP 2: Cut along dotted line.
STEP 3: Affix correct postage.
STEP 4: Drop in mailbox.
_______________________________________________________________________
N
AME
_______________________________________________________________________
A
DDRESS
_______________________________________________________________________
C
ITY
S
TATE
Z
IP
_______________________________________________________________________
C
OUNTRY
P
HONE
E
_________________________________________
B
OAT
M
ODEL
& Y
EAR OF
M
ANUFACTURE
_________________________________________
C
ABLEMASTER
S
ERIAL
N
UMER
_______________________________________________________
W
HAT WOULD YOU LIKE TO SEE IMPROVED
/
CHANGED
?
THANK YOU!
CABLEMASTER W
ARRANTY
R
EGISTRATION
WOULD YOU LIKE TO RECEIVE INFO ON
NEW PRODUCTS FROM GLENDINNING
?
YES
NO
C
ABLEMASTER
P
RODUCT
R
EGISTRATION
O
DANGER: ELECTRICAL CORD REELS CAN BE HAZARDOUS. MISUSE CAN RESULT IN FIRE OR DEATH BY ELEC-
TRICAL SHOCK. PLEASE READ CAREFULLY AND FOLLOW INSTRUCTIONS:
H
AZARDS
S
TATEMENT
N
O
R
S
END VIA
F
AX TO
:
(843) 399-5005
"
!
A cord reel marked for indoor use is to be used indoors only.
!
Inspect thoroughly before each use. DO NOT USE if damaged.
!
Look for the number of watts or amperes on appliances to be
plugged into cord reel.
!
See label on cord reel for specific watts or amperes.
!
DO NOT plug more than the specified number of watts or
amperes into this cord reel.
!
DO NOT run through doorways, holes in ceilings, walls or floors.
!
Make sure appliance is OFF before connecting cord reel to outlet.
!
FULLY INSERT plug into outlet.
!
DO NOT remove, bend or modify any metal prongs or pins of cord
reel.
!
DO NOT use excessive force to make connections.
!
DO NOT connect a three-prong plug to a two-prong cord reel.
!
Keep away from water.
!
DO NOT USE WHEN WET.
!
Keep children and pets away from cord reel.
!
DO NOT plug one cord reel into another.
!
AVOID OVERHEATING.
!
DO NOT cover with any materials.
!
DO NOT drive, drag, or place objects over cord.
!
DO NOT walk on cord.
!
GRASP PLUG to remove from outlet.
!
Always store cord reels INDOORS.
!
Always unplug when not in use.
!
DO NOT unplug by pulling on cord.
THIS IS A POLARIZED CORD REEL

