26
INSTALLATION INSTRUCTIONS
Step 3: Connect to the gas supply
1. The inlet to the appliance is pipe
thread ISO RP
1
⁄
2
” internal situated
at the rear top right corner.
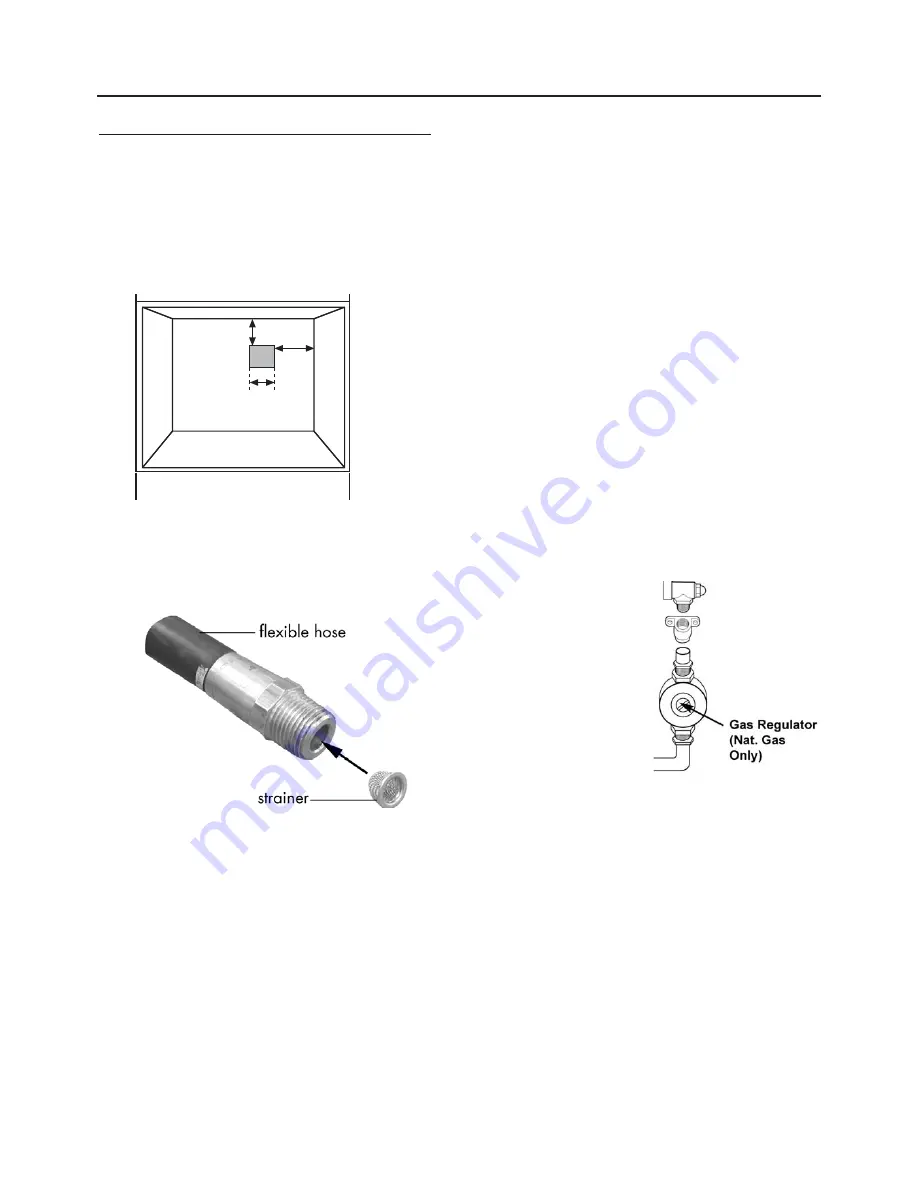
2. Fit the bayonet connection to the
wall in the shaded area as shown.
3. Fit the strainer (supplied with the
appliance) to the flexible hose inlet
as shown, making sure that it is
pushed fully into place.
4. Use a 900mm - 1125mm length of
flexible connector and make sure it
does not block the fan inlet and
cannot come into contact with
moving parts of the cabinetry - eg;
drawers and doors.
5. Flexible connections should be
A.S. 1869, to at least class B.
Parts of the appliance likely to
come into contact with a flexible
connector have a temperature rise
less than 70˙C.
6. Make sure all connections are gas
sound.
Important:
- ensure that you route all
mains and electrical cables and
flexible tubing well clear of any
adjacent heat source, such as an oven
grill or hob.
Ensure that all pipe work is of the
correct rating for both size and
temperature.
Means of isolation shall be provided
at the shut off point by either an
approved quick connect device or a
Type 1 manual shut off valve. The
outlet of the quick connect device
shall be at, or below, the horizontal
position.
Connection to the gas supply should
be made using the Aquaknect
AS/NZS 1869 class B hose assem-
bly with an internal diameter of not
less than 10mm and regulator (regu-
lator for use with natural gas)
NOTE: Maximum length of hose
900mm. The temperature rise of the
areas at the rear of the cooker that
are likely to come into contact with
the flexible hose do not exceed
70˙C.
Rear
Wall
60 mm
100
mm
150 mm
square
Содержание 900gr
Страница 1: ......


