MDE-5491A
8
SECTION 3 - REMOVING COMPONENTS
3
4
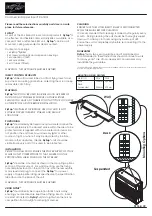
Loosen and remove the five Phillips-head screws in the top row on the front of the unit (see
Note: Retain the screws for reinstallation.
Figure 2: Loosening and Removing E-CIM Mounting Screws
E-CIM Mounting
Screws (5X)
5
Remove the door node to access the two top-center, E-CIM mounting screws.
Note: If you are working on both doors, ensure that you do not swap the door nodes in further steps.
6
Remove all 1/4-inch thread forming screws connecting the E-CIM to the door, including the 1/4-inch
thread forming screws that are also connected to the PPU bracket at the bottom of the E-CIM.
Note: Ensure that you remove the five screws beneath the PPU graphic first. You need not remove the
PPU assembly, just the screws that attach it to the E-CIM. For more information, refer
.
Содержание FlexPay IV
Страница 1: ...MDE 5491A February 2020 FlexPay IV Numeric Keypad to Alphanumeric Keypad Upgrade Instructions ...
Страница 2: ...This page is intentionally left blank ...
Страница 4: ...ii MDE 5491A This page is intentionally left blank ...
Страница 6: ...MDE 5491A 2 SECTION 1 INTRODUCTION 1 This page is intentionally left blank ...
Страница 20: ...MDE 5491A 16 SECTION 3 REMOVING COMPONENTS 3 This page is intentionally left blank ...


