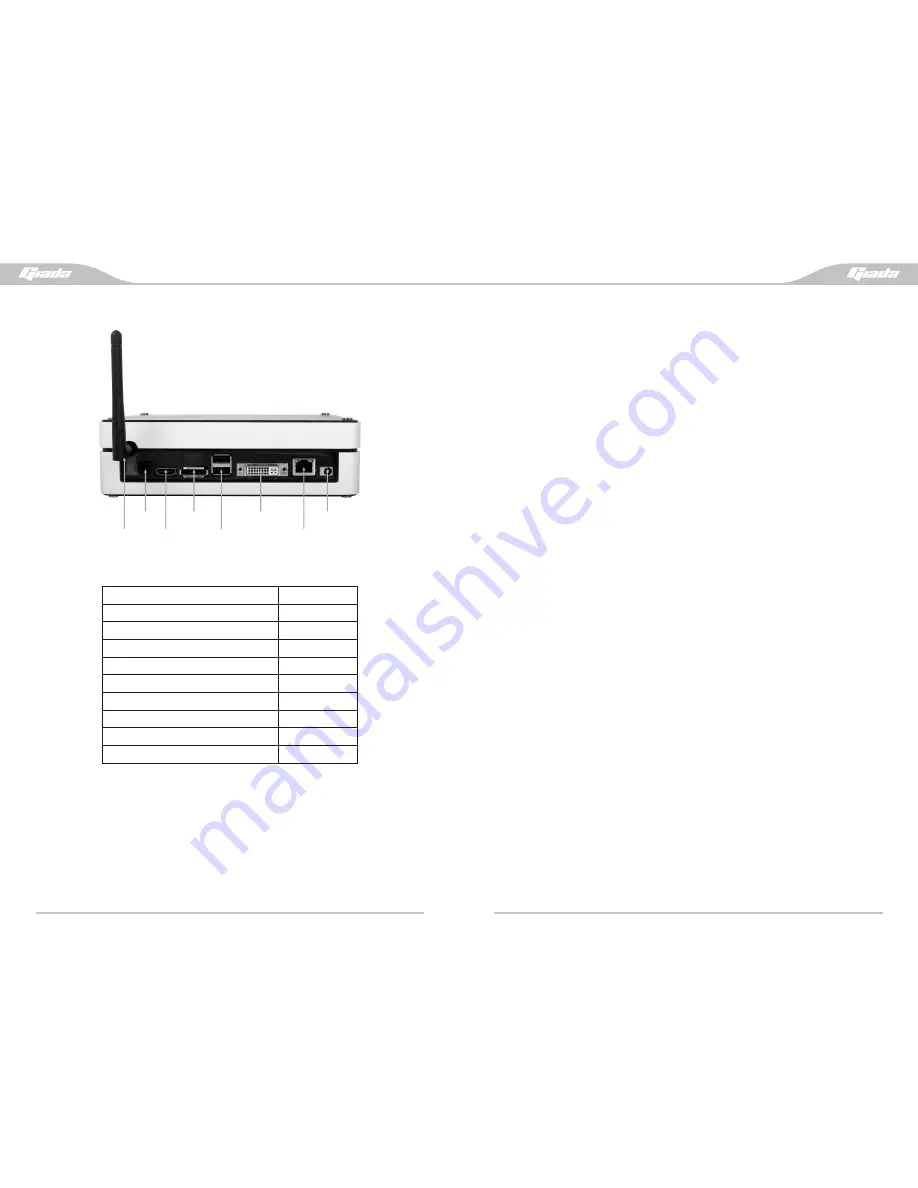
S/PDIF
HDMI
E-SATA
USB
DVI
1000M LAN
DC-IN
WiFi
13
12
3.6 Rear interface ports
Interface name
Qty.
USB
5
HDMI
1
E-SATA
1
DVI-I
1
S/PDIF
1
1000M LAN
1
WiFi
1 (optional)
Audio
2
Card Reader
1
4. Installing WiFi wireless LAN devices (optional)
Please refer to the Quick Installation Guide for detailed information.
Note: The real interfaces ports are listed in the following table:
【
Caution
】
The descriptions relating to BIOS in this Manual can only be used for
reference as the BIOS version of the system is upgraded continuously.
Giada provides no guarantee that the contents in this manual is consistent
with the information you acquire.
The BIOS represents the basic I/O control program saved in the flash memory. Bridging
the motherboard and the operating system, BIOS is used for managing the setup of the
related parameters between them. When the computer is powered on, the system is
controlled by the BIOS program. First, a self-test called POST is performed to check all
hard devices and confirm the parameters of the synchronous hardware. Once all
detections are completed, the BIOS will hand over the control to the operating system
(OS). As the BIOS serves as the channel that connects the hardware and software,
whether your computer can run stably and work in optimized state will hinge on how to
properly set the parameters in the BIOS. Therefore, the correct setup of BIOS plays a
key role in stably running the system and optimizing its performance.
The CMOS Setup will save the set parameters in the built-in CMOS SRAM on the
motherboard. When the power is turned off, the lithium battery on the motherboard will
still power the CMOS SRAM continuously. The BIOS setup program will allow you to
configure the following items:
(1). HD drive and peripheral devices
(2). Video display type and display options
(3). Password protection
(4). Power management settings
A. State of BIOS Setup
When the computer is powered on, BIOS will run the self-test (POST) program. This
program includes series of diagnosis fixed in the BIOS. When this program is executed,
the following information will appear if any error is found:
Press F1 to Run Setup
Press F 2 to Load default values and continue
To enter BIOS, please press F1; to load the default values and enter the system, please
press F2. After the self-detection process is completed, you can press DEL to enter the
BIOS interface if no error is found. If the indicative information disappears before you can
act, you can shut off the computer and turn on it again. To restart your computer, you can
also simultaneously press <Ctrl>+<Alt>+<Delete> keys.
Chapter IV BIOS Setup
Содержание cube N3
Страница 1: ......


