background image


Administrator Mode


31

4

These options you can also find on this Center V2 setting page: 

„


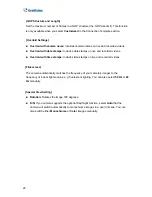
Cease motion detection messages from: 

When this option is enabled, the camera 

will not notify Center V2 of motion-triggered events. 

„


Cease input trigger messages from: 

When this option is enabled, the camera will 

not notify Center V2 of input-triggered events. 

„


Enable schedule mode: 

Starts the Center V2 monitoring based on the schedule you 

set in the 

Select Schedule Time

 section. Refer to

 4.5 Schedule

 for the same settings. 

„


Stream Type:

 Sets the stream type to JPEG or MEPG4. 


For the related settings to activate Center V2 monitoring, see 

4.1.2 Motion Detection, 4.2.1 

Input Setting

, and 

7.1 Center V2

.


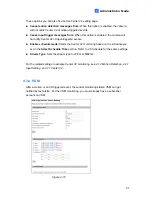
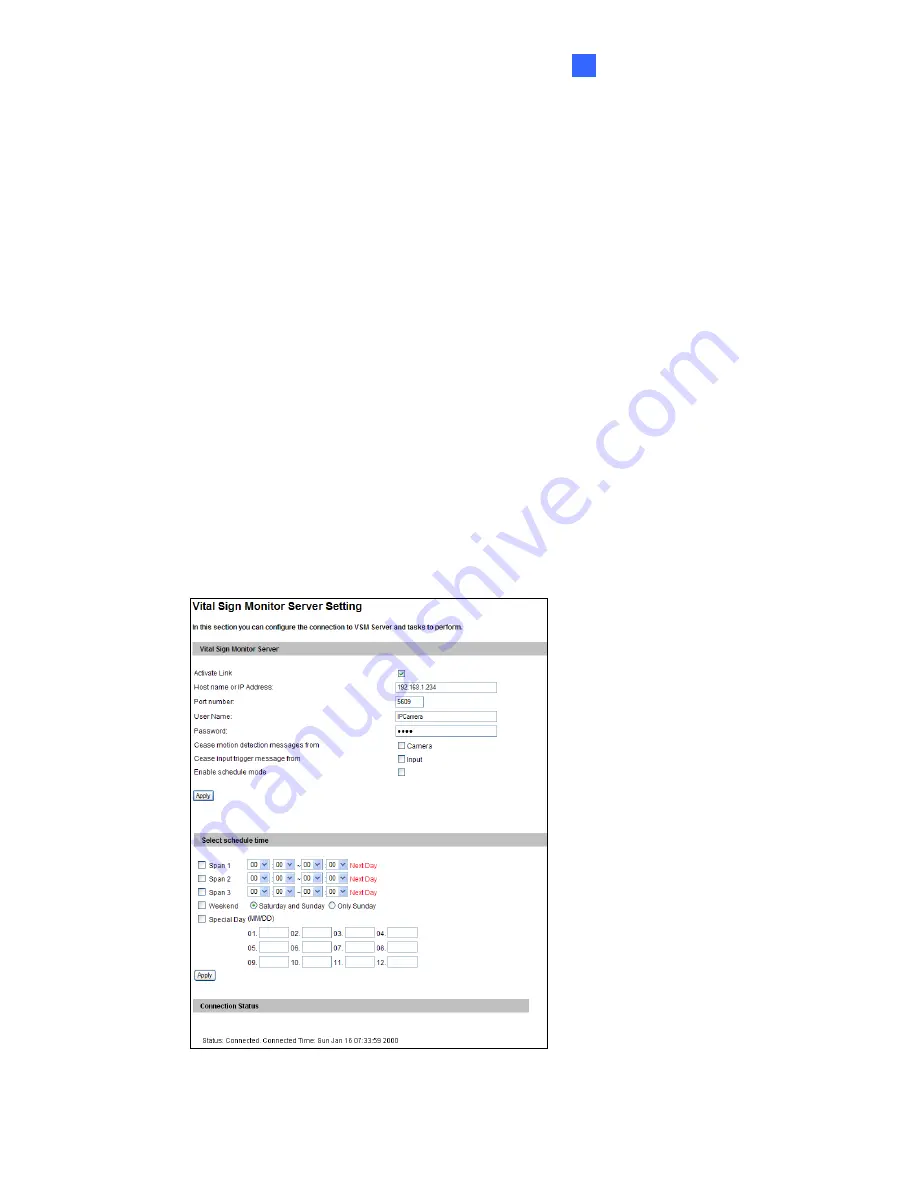
4.3.4  VSM 

After a motion or an I/O triggered event, the central monitoring station VSM can get 
notified by text alerts.  For the VSM monitoring, you must already have a subscriber 
account on VSM. 


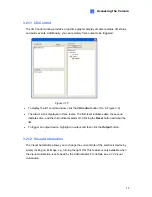
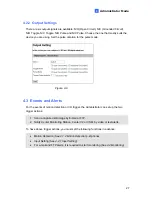
Figure 4-12 


Содержание GV-IP Camera 1.3M

Страница 1: ...Before attempting to connect or operate this product please read these instructions carefully and save this manual for future use User s Manual GV IP Camera 1 3M ...

Страница 2: ...ow 9 3 2 3 Snapshot of Live Video 11 3 2 4 Video Recording 11 3 2 5 Picture in Picture and Picture and Picture View 12 3 2 6 Alarm Notification 14 3 2 7 Video and Audio Configuration 15 3 2 8 Remote Configuration 15 3 2 9 Camera Name Display 16 3 2 10 Image Enhancement 16 3 2 11 I O Control 17 3 2 12 Visual Automation 17 3 2 13 Network Status 18 Chapter 4 Administrator Mode 19 4 1 Video and Motion...

Страница 3: ...ccount 46 4 7 4 Log Information 46 4 7 5 Tools 47 Chapter 5 Advanced Applications 48 5 1 Upgrading System Firmware 48 5 2 Backing Up and Restoring Settings 51 Chapter 6 DVR Configurations 53 6 1 Setting up an IP Camera 54 6 2 Remote Monitoring with Multi View 57 6 3 Remote Monitoring with E Map 58 6 4 Remote Monitoring with Mobile Phones 60 Chapter 7 CMS Configurations 62 7 1 Center V2 62 7 2 VSM ...

Страница 4: ...tection triggering actions e g image upload and output trigger Privacy mask allowing the concealment of parts of the image that should not be viewable IP address filtering 3GPP ISMA supported Central monitoring station CMS supported PoE Power over Ethernet supported Optional Day Night function supported Optional 1 2 Packing List Power Adaptor x 1 GV IP Camera User s Manual x 1 GV IP Camera Softwar...

Страница 5: ...vides one digital input and one relay output For details see Chapter 8 The I O Terminal Block 4 Line In Microphone In Connector Connects a monaural microphone for audio input 5 Auto Iris Connector If the auto iris lens is in use insert the auto iris plug into the connector 6 Line Out Connector Connects a speaker for audio output 7 Network Connector Connects to a 10 100 Ethernet network 8 Reset But...

Страница 6: ...ication 3 Connect to power using one of the methods Using the supplied power adaptor connect to power Power over Ethernet PoE If the feature is available the power will be provided over the network cable 4 Check if the system status LED is on and then you can set the IP address for the unit 2 2 Assigning an IP Address Designed for use on an Ethernet network the GV IP Camera must be assigned an IP ...

Страница 7: ... entering the assigned IP address on the web browser Important Dynamic IP Address and PPPoE should only be enabled if you know which IP address the GV IP Camera will get from the DHCP server or ISP Otherwise you must use the Dynamic DNS service to obtain a domain name linked to the GV IP Camera s changing IP address first For details on Dynamic IP Address and PPPoE see 4 6 2 Advanced TCP IP If Dyn...

Страница 8: ...d configuration page and are discussed in the following sections in this manual Date and time adjustment see 4 7 1 Date Time Setting Login and privileged passwords see 4 7 3 User Account Network gateway see 4 6 Network Camera image adjustment see 3 2 2 The Control Panel of the Live View Window Video format resolution and frame rate see 4 1 1 Video Settings ...

Страница 9: ... Start the Internet Explorer browser 2 Enter the IP address or the domain name of the GV IP Camera in the Location Address field of your browser Figure 3 1 3 Enter the login name and password The default login name and password for Administrator are admin The default login name and password for Guest are guest 4 Click Apply A video image similar to the example on Figure 3 2 is now displayed in you...

Страница 10: ...ain Page This section introduces the features of the Live View window and Network Status on the main page The two features are accessible by both Administrator and Guest Main Page of Guest Mode Video and Motion Live View MJEPG MPEG4 Network Status Figure 3 2 ...

Страница 11: ...ection 3 2 3 6 File Save Records live video to the local computer See section 3 2 4 7 Full Screen Switches to full screen view Right click the image to have these options Snapshot PIP PAP Zoom In and Zoom Out See section 3 2 5 for PIP and PAP views 8 I O Control Starts the I O Control Panel See section 3 2 11 9 Show System Menu Brings up these functions Alarm Notify Video and Audio Configuration R...

Страница 12: ...time graphic display of the input and output status You can force the output to be triggered by double clicking its icon Alarm Notify Displays the captured images by sensor triggers and or motion detection For this function to work you have to configure the Alarm Notify settings first See 3 2 6 Alarm Notification GPS For details 4 7 2 GPS Map Settings Download Allows you to download the updated pr...

Страница 13: ...d Outdoor or choose Manual to adjust the white balance manually Sharpness Adjusts the sharpness of the image Gamma Adjusts the relative proportions of bright and dark areas Monochrome When this option is enabled the camera will discard all color information and create grayscale images In a poor lit scene there is often little or no useful color information so image quality will improve with monoch...

Страница 14: ...ollow these steps 1 Click the Snapshot button No 5 Figure 3 3 The Save As dialog box appears 2 Specify Save in type the File name and select JPEG or BMP as Save as Type You may also choose whether to display the name and date stamps on the image 3 Click the Save button to save the image in the local computer 3 2 4 Video Recording You can record live video for a certain period of time to your local...

Страница 15: ...ht click the live view to have the options of PIP and PAP Picture in Picture View With the Picture in Picture PIP view you can crop the video to get a close up view or zoom in on the video Inset window Navigation box Figure 3 9 1 Select PIP An inset window appears 2 Click the insert window A navigation box appears 3 Move the navigation box around in the inset window to have a close up view of the ...

Страница 16: ...ge 3 To adjust a navigation box size move the cursor to any of the box corners and enlarge or diminish the box 4 To move a navigation box to another area on the image drag it to that area 5 To change the frame color of the navigation box or hide the box right click the image select Mega Pixel Setting and click one of these options Display Focus Area of PAP Mode Displays or hides the navigation box...

Страница 17: ...d the captured images are displayed on the control panel of the Live View window I O Alarm Notify Once the input device is triggered the captured images are displayed on the control panel of the Live View window For this function to work the Administrator needs to install the input device properly See 4 2 1 Input Setting Alert Sound Activates the computer alarm on motion and input triggered detect...

Страница 18: ...he Show System Menu button No 9 Figure 3 3 and select Video and Audio Configuration Figure 3 13 3 2 8 Remote Configuration You can view the connection status of the central monitoring stations and upgrade firmware over the Internet Click the Show System Menu button No 9 Figure 3 3 and select Remote Config The Remote Config dialog box will appear Status In this tab you can see the current status of...

Страница 19: ...cement To enhance the image quality of live video click the Show System Menu button No 9 Figure 3 3 and select Image Enhance This dialog box appears Figure 3 14 De Interlace Coverts the interlaced video into non interlaced video De Block Removes the block like artifacts from low quality and highly compressed video Enable DirectDraw Activates the DirectDraw function ...

Страница 20: ...n three levels The first level indicates date the second indicates time and the third indicates alarm ID Clicking the Reset button will clear the list To trigger an output device highlight an output and then click the Output button 3 2 12 Visual Automation The Visual Automation allows you to change the current state of the electronic device by simply clicking on its image e g turning the light ON ...

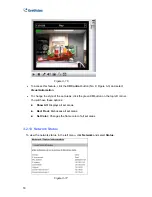
Страница 21: ...style of the set areas click the green I O button on the top left corner You will have these options Show All Displays all set areas Rect Float Embosses all set areas Set Color Changes the frame color of all set areas 3 2 13 Network Status To view the network status in the left menu click Network and select Status Figure 3 17 ...

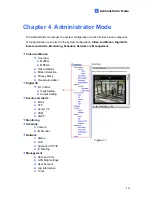
Страница 22: ...d Alerts Monitoring Schedule Network and Management Video and Motion Live View MJEPG MPEG4 Video Settings Motion Detection Privacy Mask Visual Automation Digital I O I O Control Input Setting Output Setting Events and Alerts Email FTP Center V2 VSM 3GPP Monitoring Schedule Camera I O Monitor Network Status LAN Figure 4 1 Advanced TCP IP IP Filtering Management Date and Time GPS Map Settings User A...

Страница 23: ...nd how the images can be managed by using Motion Detection Privacy Mask and Visual Automation 4 1 1 Video Settings Figure 4 2 Name Rename the camera The camera name will appear on the Live View To display the camera name on the Live View window see 3 2 9 Camera Name Display ...

Страница 24: ... no motion detected only 1frame will be transmitted Noise detection to reduce frame rates This option will reduce automatically frame rates on video noise conditions caused by weather or light changes and restore normal frame rates when the disturbing conditions are over JEPG Resolution MEPG 4 Resolution 1280 x 960 640 x 480 640 x 480 352 x 288 352 x 288 360 x 240 360 x 288 176 x 144 176 x 144 3GP...

Страница 25: ...d videos Overlaid with time stamps Includes time stamps on live and recorded videos Flicker less The camera automatically matches the frequency of your camera s imager to the frequency of indoor light sources e g fluorescent lighting You can also select 50 Hz or 60 Hz manually Special View Setting Rotation Rotates the image 180 degrees D N If you camera supports the optional Day Night function sel...

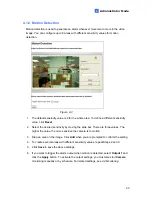
Страница 26: ...nsitivity by moving the slide bar There are three values The higher the value the more sensitive the camera is to motion 3 Drag an area on the image Click Add when you are prompted to confirm the setting 4 To create several areas with different sensitivity values repeat Steps 2 and 3 5 Click Save to save the above settings 6 If you want to trigger the alarm output when motion is detected select Ou...

Страница 27: ...s This feature is ideal for locations with displays keyboard sequences e g passwords and for anywhere else you don t want sensitive information visible Figure 4 4 1 Check the Enable option 2 Drag the area s where you want to block out on the image Click Add when you are prompted to confirm the setting 3 Click the Save button to save all the settings ...

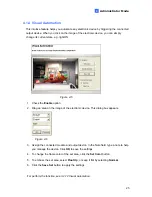
Страница 28: ...ble option 2 Drag an area on the image of the electronic device This dialog box appears Figure 4 6 3 Assign the connected module and output device In the Note field type a note to help you manage the device Click OK to save the settings 4 To change the frame color of the set area click the Set Color button 5 To emboss the set area select Float Up or keep it flat by selecting Normal 6 Click the Sav...

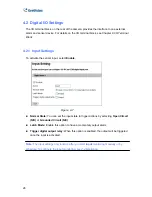
Страница 29: ...select Enable Figure 4 7 Normal State You can set the input state to trigger actions by selecting Open Circuit N O or Grounded Circuit N C Latch Mode Enable this option to have a momentary output alarm Trigger digital output relay When this option is enabled the output will be triggered once the input is activated Note The input settings only function after you start Input monitoring manually or b...

Страница 30: ...vents and Alerts For the events of motion detection or I O trigger the Administrator can set up the two trigger actions 1 Send a captured still image by E mail or FTP 2 Notify Center Monitoring Station Center V2 or VSM by video or text alerts To have above trigger actions you must set the following functions in advance Motion Detection See 4 1 2 Motion Detection Optional Input Setting See 4 2 1 In...

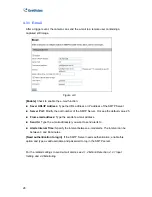
Страница 31: ...p the default value 25 From email address Type the sender s e mail address Send to Type the e mail address s you want to send alerts to Alerts Interval Time Specify the interval between e mail alerts The interval can be between 0 and 60 minutes Need authentication to login If the SMTP Server needs authentication enable this option and type a valid username and password to log in the SMTP server Fo...

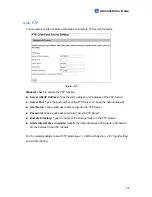
Страница 32: ...umber of the FTP Server Or keep the default value 21 User Name Type a valid user name to log into the FTP Server Password Type a valid password to log into the FTP Server Remote Directory Type the name of the storage folder on the FTP Server Alerts Interval time in minute Specify the interval between FTP alerts The interval can be between 0 and 60 minutes For the related settings to send FTP alert...

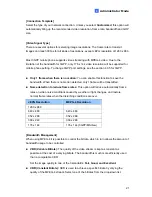
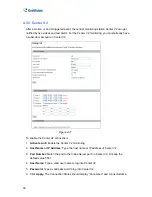
Страница 33: ...1 To enable the Center V2 connection 1 Activate Link Enable the Center V2 monitoring 2 Host Name or IP Address Type the host name or IP address of Center V2 3 Port Number Match the port to the Video Server port on Center V2 Or keep the default value 5551 4 User Name Type a valid user name to log into Center V2 5 Password Type a valid password to log into Center V2 6 Click Apply The Connection Stat...

Страница 34: ...s Enable schedule mode Starts the Center V2 monitoring based on the schedule you set in the Select Schedule Time section Refer to 4 5 Schedule for the same settings Stream Type Sets the stream type to JPEG or MEPG4 For the related settings to activate Center V2 monitoring see 4 1 2 Motion Detection 4 2 1 Input Setting and 7 1 Center V2 4 3 4 VSM After a motion or an I O triggered event the central...

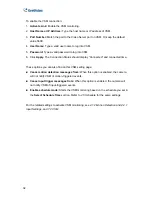
Страница 35: ...d and connected time These options you can also find on this VSM setting page Cease motion detection messages from When this option is enabled the camera will not notify VSM of motion triggered events Cease input trigger messages from When this option is enabled the camera will not notify VSM of input triggered events Enable schedule mode Starts the VSM monitoring based on the schedule you set in ...

Страница 36: ...ort Keep the default value 8554 or modify it if necessary RTP UDP Port Keep the default range from 17300 to 17319 or modify it if necessary The number of ports for use is limited to 20 Max Connection Set the maximum number of connections to the GV IP Camera The maximum value is 20 For details on remote monitoring with mobile phones see 6 4 Remote Monitoring with Mobile Phones ...

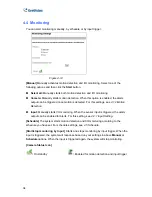
Страница 37: ... 2 Motion Detection Input Manually starts I O monitoring When the sensor input is triggered the alarm output can be enabled for alerts For this setting see 4 2 1 Input Setting Schedule The system starts motion detection and I O monitoring according to the schedule you have set For schedule settings see 4 5 Schedule Start stop monitoring by Input Starts and stops monitoring by input trigger When th...

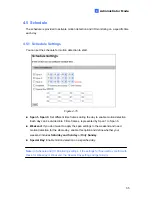
Страница 38: ...ection Each day can be divided into 3 time frames represented by Span 1 to Span 3 Weekend If you don t want to apply the span settings to the weekend and need motion detection for the whole day enable this option and define whether your weekend includes Saturday and Sunday or Only Sunday Special Day Enable motion detection on a specified day Note In Schedule and I O Monitoring settings if the sett...

Страница 39: ...le I O monitoring Each day can be divided into 3 time frames represented by Span 1 to Span 3 Weekend If you don t want to apply the span settings to the weekend and need I O monitoring for the whole day enable this option and define whether your weekend includes Saturday and Sunday or Only Sunday Special Day Enable I O monitoring on a specified day ...

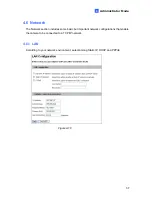
Страница 40: ...k The Network section includes some basic but important network configurations that enable the camera to be connected to a TCP IP network 4 6 1 LAN According to your network environment select among Static IP DHCP and PPPoE Figure 4 16 ...

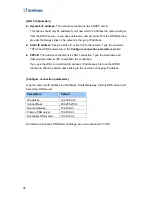
Страница 41: ...ters section PPPoE The network environment is xDSL connection Type the Username and Password provided by ISP to establish the connection If you use the xDSL connection with dynamic IP addresses first use the DDNS function to obtain a domain name linking to the camera s changing IP address Configure connection parameters Type the camera s IP address Subnet Mask Router Gateway Primary DNS server and...

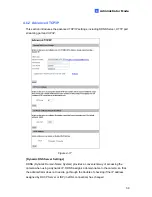
Страница 42: ... UPnP Figure 4 17 Dynamic DNS Server Settings DDNS Dynamic Domain Name System provides a convenient way of accessing the camera when using a dynamic IP DDNS assigns a domain name to the camera so that the administrator does not need to go through the trouble of checking if the IP address assigned by DHCP Server or ISP in xDSL connection has changed ...

Страница 43: ...DNS 6 Click Apply HTTP Port Settings The HTTP port enables connecting the camera to the web For security integration the Administrator can hide the server from the general HTTP port by changing the default HTTP port of 80 to a different port number within the range of 1024 through 65535 GV IPCam1 3M Streaming Port Settings The VSS port enables connecting the camera to the GV System The default set...

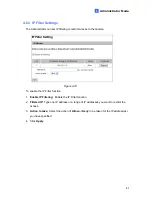
Страница 44: ...camera Figure 4 18 To enable the IP Filter function 1 Enable IP Filtering Enable the IP Filter function 2 Filtered IP Type one IP address or a range of IP addresses you want to restrict the access 3 Action to take Select the action of Allow or Deny to be taken for the IP address es you have specified 4 Click Apply ...

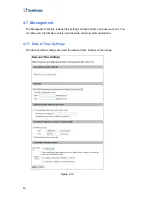
Страница 45: ...includes the settings of data and time and user account You can also view the firmware version and execute certain system operations 4 7 1 Date Time Settings The date and time settings are used for date and time stamps on the image Figure 4 19 ...

Страница 46: ...ime Server Uses the NTP server to automatically update the camera s date and time every 24 hours Type the host name or the IP address of the NTP server Synchronized with your computer or modify manually Manually changes the camera s date and time Or synchronize the camera s date and time with those of the local computer Overlaid Date and Time Settings Select the display format of date and time sta...

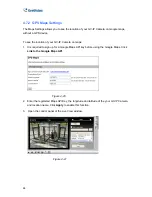
Страница 47: ...your GV IP Camera on maps 1 It is required to sign up for a Google Maps API key before using the Google Maps Click Link to the Google Maps API Figure 4 20 2 Enter the registered Maps API Key the longitude and latitude of the your GV IP Camera and location name Click Apply to enable this function 3 Open the control panel of the Live View window Figure 4 21 ...

Страница 48: ... 4 22 5 Right click the warning message and select Allow Blocked Content The map will be displayed The icon indicates the location of your GV Video Server You may change different map formats such as Satellite and Hybrid at the upper right corner for viewing Figure 4 23 ...

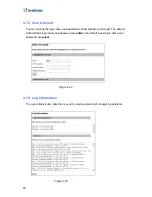
Страница 49: ...f Administrator and Guest The default Administrator login name and password are admin the default Guest login name and password are guest Figure 4 24 4 7 4 Log Information The log contains dump data that is used by service personnel for analyzing problems Figure 4 25 ...

Страница 50: ...the camera Firmware Update This field displays the firmware version of the camera System Settings Clicking the Load Default button will make the camera restore factory default settings Note After applying the default function you will need to configure the camera s network setting again Reboot Clicking the Reboot button will make the camera perform software reset ...

Страница 51: ...mera over the Internet or by using the Video Server Utility included in the Software CD 5 1 1 Upgrading Firmware over Internet 1 In the Live View window click the Show System Menu button No 9 Figure 3 3 select Remote Config and then click the Firmware Upgrade tab This dialog box appears Figure 5 1 2 Click the Browser button to locate the firmware file img saved at your local computer 3 Click the F...

Страница 52: ... to install the program 2 Double click the Video Server Utility icon created on your desktop This dialog box appears Figure 5 2 3 Click the Search button to locate available GV IP Cameras on the same LAN Or click the New button and assign the IP address to locate the GV IP Camera over the Internet Or highlight one GV IP Camera in the list and click the Delete button to remove it 4 Double click one...

Страница 53: ...appears Figure 5 4 6 Click the Browse button to locate the firmware file img saved at your local computer 7 If you like to upgrade all the GV IP Cameras in the list check Upgrade all video servers 8 Type Password and click Upgrade to process the upgrade ...

Страница 54: ...ort it to another camera To back up the settings 1 Run Video Server Utility and locate the desired GV IP Camera See Steps 1 3 in 5 1 2 Upgrading Firmware by Using the VS_Utility 2 Double click the GV IP Camera in the list Figure 5 3 appears 3 Click the Export Settings button This dialog box appears Figure 5 5 4 Click the Browse button to assign a file path 5 Type Password and click the Export Sett...

Страница 55: ...store the settings 1 In Figure 5 3 click the Import Settings tab This dialog box appears Figure 5 6 2 Click the Browse button to locate the backup file dat 3 Click the Update Settings button to start restoring ...

Страница 56: ...og cameras 8 IP cameras 16 channels The maximum number of connections to the GV IP Camera is 20 When one GV System connects to one GV IP Camera it takes up to 4 connections When the user connects to one GV IP Camera via browser it takes up to 2 connections When the user operates the Camera Audio Control on Center V2 it takes 1 connection The codec and resolution of digital videos are set up on the...

Страница 57: ...all This dialog box appears Figure 6 1 2 Check Install IP Camera select the number of GV IP Cameras you want to link to and click Configure This dialog box appears Figure 6 2 To automatically set up the camera click Scan Camera to detect any GV IP devices on the LAN To manually set up the camera click Add Camera The following steps are the example of manual setup 3 Click Add Camera This dialog box...

Страница 58: ... port number Stream number You have the option of single or dual streaming Codec Type You have the codec option of MPEG4 or JPEG If you select Dual Stream the preview codec and recording codec will be set differently 5 Click Apply The IP camera is added to the list 6 Click the listed camera and select Display position to map the IP camera to a channel on the GV System Figure 6 5 7 The Status colum...

Страница 59: ...ystem is to the surrounding sound Gain Control Increase or decrease the gain of the microphone Wave Out Enable this option to listen to live audio from the camera Rec Audio Enable this option to activate the audio recording Hardware compressed data control Hardware compressed data from the video IP device such as IP Camera Video Server and Compact DVR can be transmitted directly to remote servers ...

Страница 60: ...To create a host click the New button You need to create a group before creating a host 3 Select GV IP Camera from the Device drop down list Type the host name IP address user name and password of the camera Modify the default VSS port 10000 if necessary Figure 6 7 4 Click Save to establish connection For details on the Multi View functions see Multi View MPEG 4 Encoder Viewer Chapter 6 User s Man...

Страница 61: ... the New Map file and click the Load Map button on the toolbar to import a graphic file 4 To create a host click the Add Host button on the toolbar and select Add IPCam 5 Right click the created New Host in the Host View and select Host Settings This dialog box appears Figure 6 8 6 Give the GV IP Camera a location name and type its IP address or domain name Modify the default VSS port 10000 if nec...

Страница 62: ...start the WebCam server 2 At the local computer open the web browser and type the address of the DVR The Single View page appears 3 Select Emap A valid user name and password are required for login For the first time user you will be directed to the Download page Install the E Map program before you can run it 4 On the Remote E Map window click the Login button and select the GV IP Camera host to ...

Страница 63: ...CP IP Port 10000 Video Settings 3GPP MSViewV2 SSViewV3 Supported SSView V3 Nokia S60 2nd and 3rd for Smartphone TCP IP Port 10000 Video Settings 3GPP MSViewV2 SSViewV3 Supported 3GPP Mobile phones with players supporting RTSP TCP IP Port 8554 UDP Port 17300 17319 Video Settings 3GPP MSViewV2 SSViewV3 Supported Note For the 3G enabled mobile phone you can receive live video from the camera without ...

Страница 64: ...allow the remote access first On the main page select Video and Motion and click Video Settings The Video Settings page appears 2 In the Connection Template field select 3GPP MSViewV2 SSViewV3 Supported Click Apply to enable the remote viewing function 3 In the mobile phone enter the address port number user name and password of GV IP Camera to enable the connection Figure 6 9 ...

Страница 65: ... and manage the camera and I O devices connected to the GV IP Camera GV IP Camera GV IP Camera TCP IP Center V2 Video Data Text Data Figure 7 1 To set the appropriate port connecting to the GV IP Camera click the Preference Settings button point to System Configure click the Network tab and check Accept connection from video server Keep default port 5551 or modify it to match the Center V2 port on...

Страница 66: ... the monitoring window after motion stops Camera send by I O trigger will monitor Specify the duration of the camera view remaining on the monitoring window when an I O device is triggered To keep the camera view remaining on the monitoring window even after the alarm is finished click the right arrow button and uncheck Latch Trigger Then the camera view will keep remaining on the monitoring windo...

Страница 67: ...port connecting to the GV IP Camera click Configure on the window menu and select System Configure to display this dialog box Under the Connective Port for Video Server item keep the default port 5609 or modify it to match the VSM port on the GV Video Server Figure 7 4 For further information on how to mange the received video from the GV IP Camera see GV CMS Series User s manual ...

Страница 68: ...ter V2 Dispatch Server Text Data Figure 7 5 To set the appropriate port connecting to the GV IP Camera click the Server Setting button on the toolbar and enable Allow Video Server Login as Subscriber from Port Keep the default port as 5551 or modify it to match the Center V2 port on the GV IP Camera Figure 7 6 For further information on how to mange the received video from the GV IP Camera see GV ...

Страница 69: ... digital input and one relay output The I O terminal block can be used to develop applications for motion detection event alerts via E Mail and FTP and center monitoring by Center V2 and VSM 8 1 Pin Assignment The pin assignment for the terminal block 1 2 3 4 Pin Function 1 Output 2 Output 3 Input 4 Input Figure 8 1 ...

Страница 70: ...orking in conjunction with the GV Relay V2 module it can drive heavier loads Refer to the figure and table below to connect the GV Relay V2 module to the GV IP Camera Output Devices 1 4 Connect to Power 1 2 3 4 Figure 8 2 GV Relay V2 I O Terminal Block DO 1 Pin 1 COM Pin 2 Note The GV Relay V2 module is an optional product ...

Страница 71: ...EG Video Streaming Simultaneous MPEG4 and JPEG video stream dual stream Selectable single stream MPEG4 or JPEG Resolution MPEG4 VGA QVGA CIF QCIF JPEG 4 VGA 1280 x 960 VGA QVGA CIF QCIF Frame Rate MPEG4 30 fps VGA JPEG 15 fps 1280 x 960 Image Setting Auto Exposure Auto White Balance Brightness Contrast Sharpness Gamma Monochrome Negative 180 degree Rotate Flicker less 50 60 Hz Audio Codec G 726 Ne...

Страница 72: ...0 degree C Humidity 10 90 no condensation Power Source DC 12 V Dimensions 125 x 70 x 50 mm L x W x H w o lens Web Interface Installation Management Web based configuration Maintenance Firmware upgrade through Web browser Applications Network Storage GV NVR GV System GV Storage System available soon 3G Mobile Phone 3GPP ISMA Live Viewing Multi View E Map CMS Center V2 VSM Control Center Product spe...

Отзывы: