


Target Fixed IP Dome
183
16
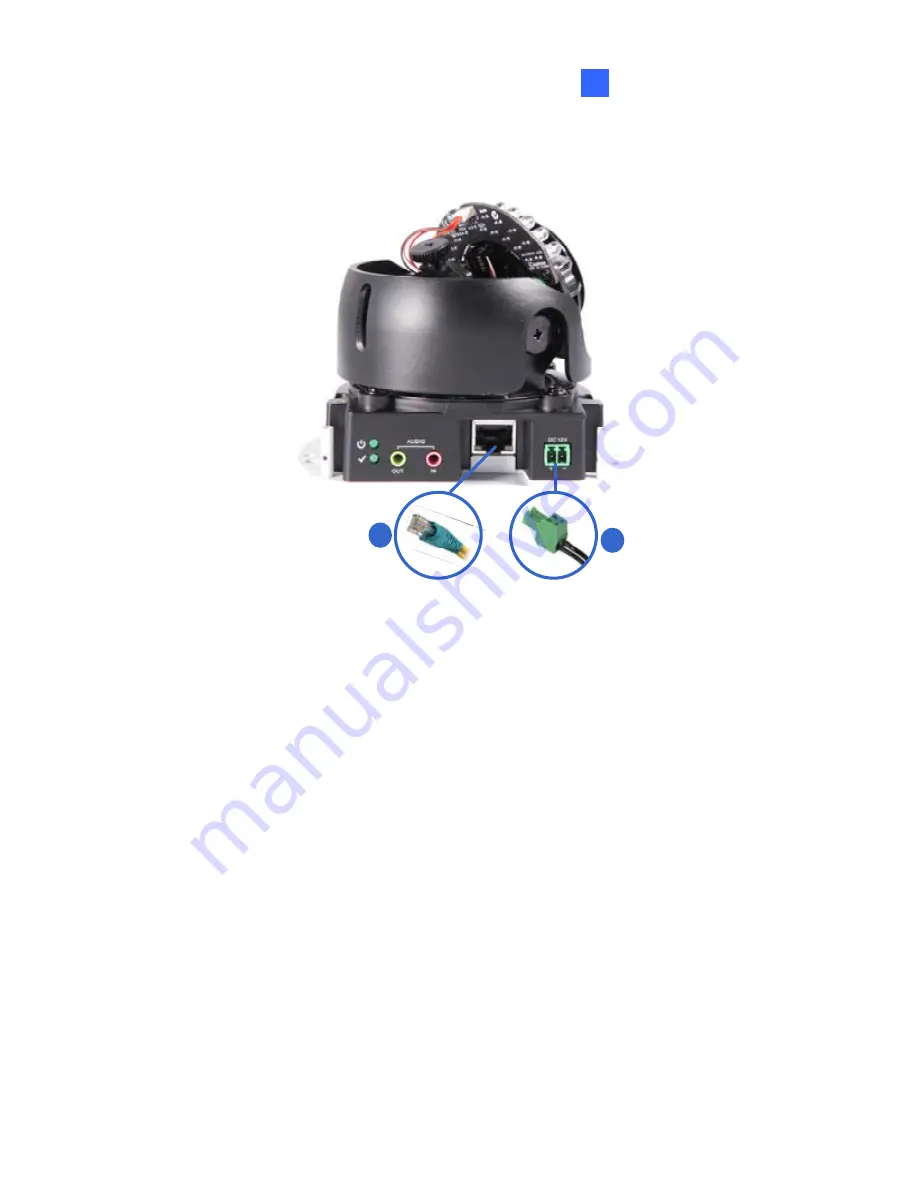
16.4 Connecting the Camera
1
2
1. Connect power using one of the following methods:
Plug the power adapter to the 12V terminal block. The power
adapter is an optional device. For detail, see
Options
in the
manual.
Use the Power over Ethernet (PoE) function and the power will be
provided over the network cable.
The power and status LEDs shall turn on (green).
2. Use a standard network cable to connect the camera to your network.
3. You are ready to access the live view, adjust the image clarity and
configure the basics. See
Getting Started, Chapter 2, GV-IPCam
H.264 Firmware Manual
.
Содержание GV-BX1200 Series
Страница 10: ...Pinhole Camera 247 viii...
Страница 157: ...Pan Adjustment Tilt Adjustment Rotational Adjustment 122...
Страница 168: ...Vandal Proof IP Dome Part II 13 13 2 Overview 1 2 3 4 5 6 8 7 9 10 12 11 13 14 133...
Страница 179: ...Tilt Adjustment Rotational Adjustment 144...
Страница 186: ...Target Vandal Proof IP Dome 14 14 2 Overview 1 2 3 4 5 6 13 12 10 7 8 9 14 11 151...
Страница 204: ...Fixed IP Dome 15 Pan Adjustment Tilt Adjustment Rotational Adjustment 169...
Страница 209: ...15 Place the housing cover on the camera body with the GeoVision logo pointing toward the front of the camera 174...
Страница 222: ...Cube Camera 17 7 Adjust the angles of the camera based on live view and fasten the indicated screw 187...
Страница 232: ...PT Camera 19 19 2 Overview 1 2 3 4 5 6 7 8 9 10 11 12 197...
Страница 241: ...M3 Screw x 2 M2 Screw GV IPCAM H 264 Software DVD GV NVR Software DVD Warranty Card 206...
Страница 242: ...Pinhole Camera 20 20 2 Overview Camera Lens 1 2 3 4 Main Body 6 7 8 9 4 5 207...
Страница 258: ...Accessing the Camera 21 6 Unplug the Ethernet cable 223...
Страница 263: ...22 The Web Interface 1 2 3 4 5 6 7 8 9 10 11 12 13 228...


