AKULA 9000B USER MANUAL
/ SECTION 3
REV:EN05130513-03
Copyright 2006-2015 © Geoscanners AB
14
3.1
Main Window and Control
The control unit receives all the necessary information about the working parameters via the communications
cable, this can be USB or Ethernet. Upon power up the power LED in your control unit will flash continuously
indicating that it hasn’t been able to establish a communication link with the control software GAS™ . As soon as
the control software is launched in your PC it will start to communicate with any hardware unit attached to any
of the available ports. When this process is complete the main window appears and data start to stream into the
b-scan area of the application. The power LED in your control unit should now be lit all the time.
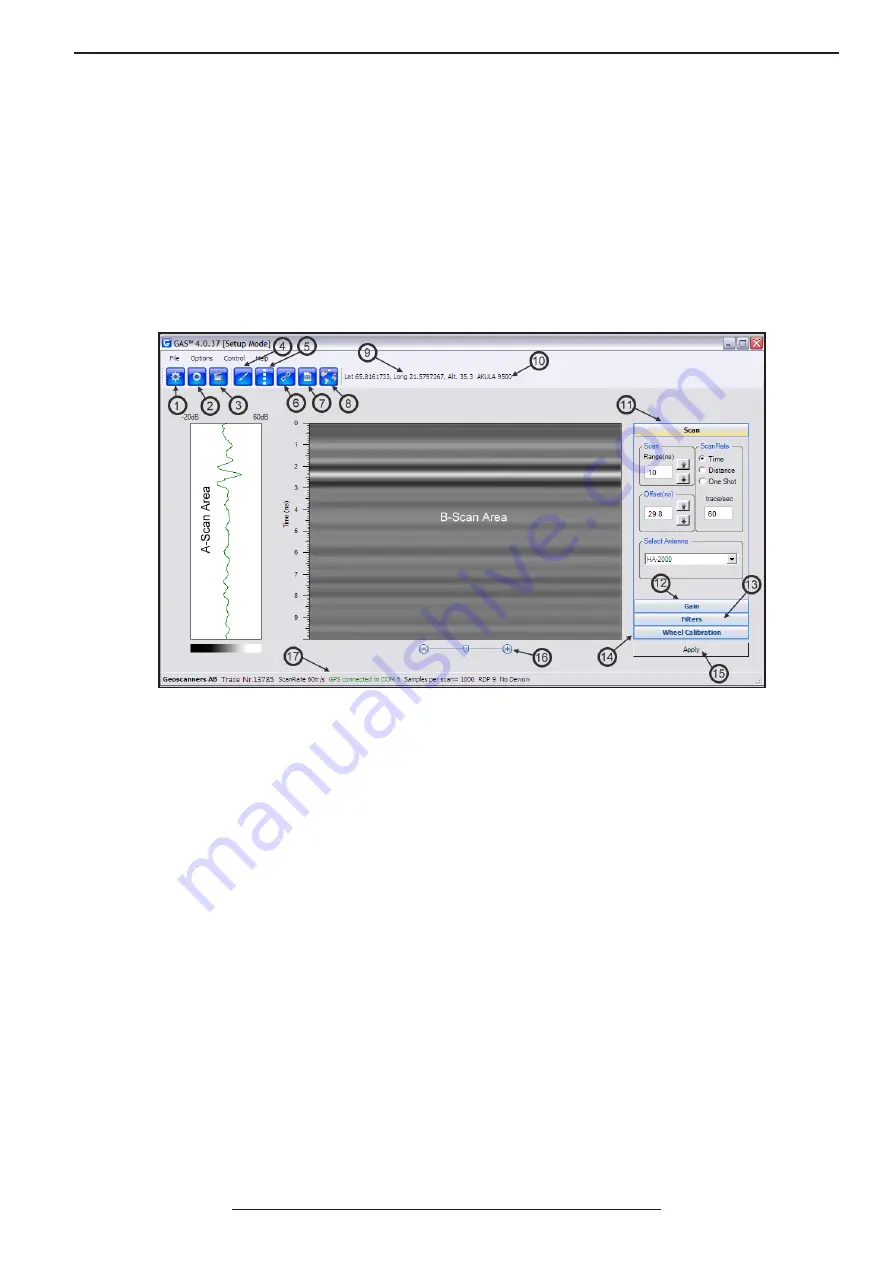
The main window in GAS™ is where we have all the buttons that give access to all different functions that control
your ground penetrating radar unit.
1. Setup Mode Icon : this button is available in all modes, click on it whenever you need to return to the setup
mode operation of the unit. The same can be done by pressing Ctrl+E on your keyboard.
2. Record Mode Icon: this button is available in all modes as well, click on it when the setup of the unit has been
completed and you need to start collecting data. You can also activate the record mode by pressing Ctrl+D on
your keyboard.
3. Play back Mode Icon: this button is also available in all modes, click on it to review previously collected files
that are stored in your PC. You can invoke this mode of operation by pressing Ctrl+V on your keyboard.
Please note that all units are sold with a copy of GPRSoft™ standard which has much more powerful viewing
properties.
4. Palettes Icon: this button invokes the palettes dialogue box.
5. Marker Icon: this button places markers in your data files.
6. GPS Activate Icon: press this button to activate the link of your control unit with a GPS receiver.
7. Macro Icon: this button invokes the macro functions dialogue box.
8. General Settings Icon: press this button to gain access to the global settings dialogue box.
9. GPS Active String: this string appears when the unit is connected to a GPS receiver and the NMEA strings are
coming properly formatted.


