


GE
Direction 5370626-100, Revision 18 LOGIQ e/LOGIQ e Vet/LOGIQ i/Vivid e Basic Service Manual
7-4
Section 7-3 - USB Quick Save
Section 7-3
USB Quick Save
7-3-1
Overview
There may be times when the customer or field engineer will want to directly save images into USB
memory. This is accomplished by saving individual Cine clips (moving images- avi format) or still images
(jpg format) directly to a USB memory disk by pressing a Print Key.
For LOGIQ e, LOGIQ e Vet and LOGIQ i, the P3 key is the factory default print key to accomplish the
USB Quick Save; for Vivid e, the P2 key is the factory default print key to accomplish the USB Quick
Save. However, the default is for the Image Area only or the customer may have customized the default
Key function.
Here, take LOGIQ e for example and the P3 key is the factory default print key to accomplish the USB
Quick Save.
7-3-2
Check and Record the P3 Key Function
Check the function of the default Key in the event that the customer may have made some customized
settings.
1.) Click
Utility/Config
on the keyboard.
2.) Select
Connectivity
from the Utilities Menu.
3.) Select the
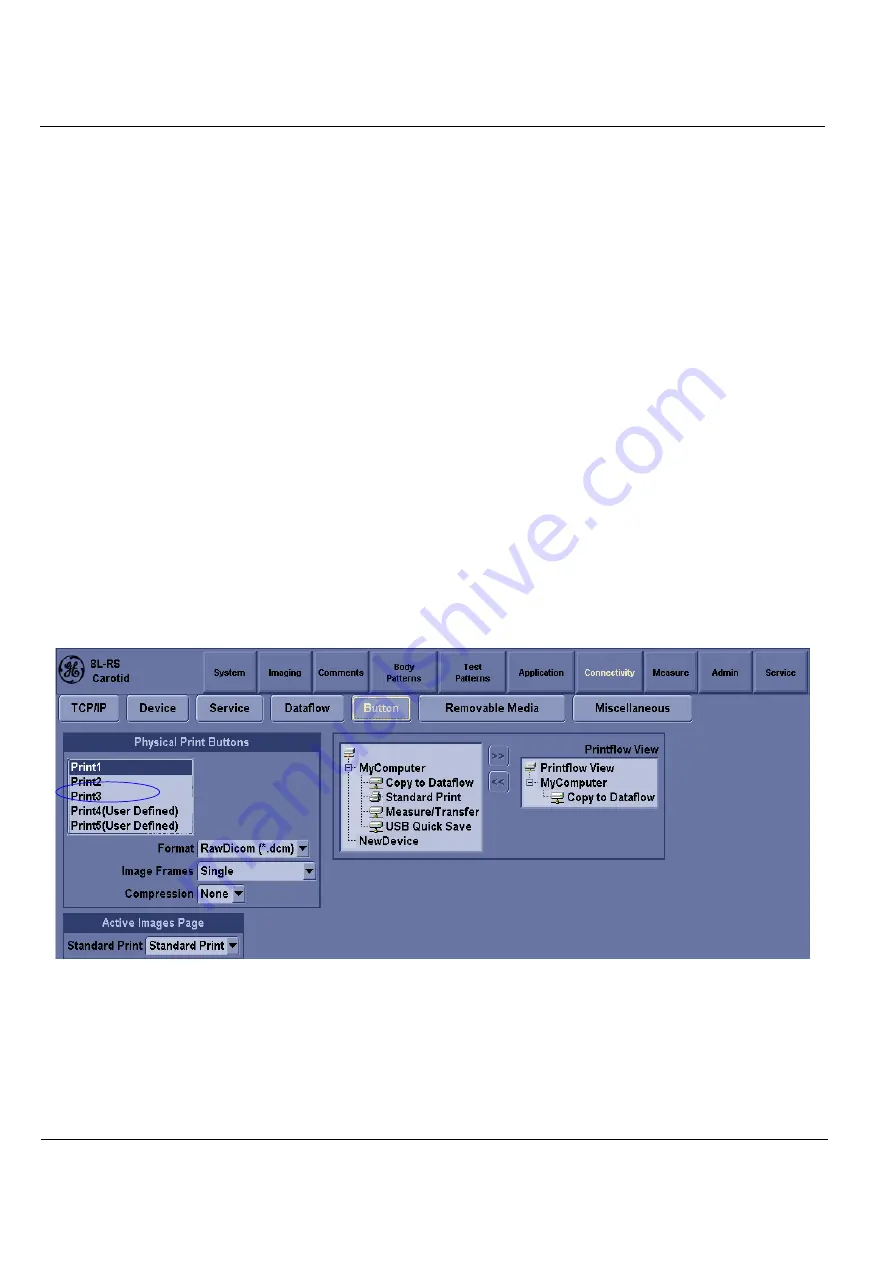
Buttons
tab on the Connectivity screen.
4.) In the
Physical Print Buttons
field, select Print3 key.
The Connectivity/Buttons Screen will be displayed like the one shown in
.
P3 is the factory default USB Quick Save key. If it is not set to Image Area, proceed to step 5 to record
the customer’s customized settings.
Figure 7-2 Buttons Set Up Screen


