– 19 –
Ram Assembly
Note:
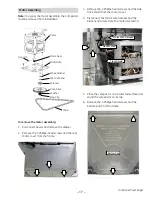
To access the ram assembly, the compactor
must be removed from installation.
To remove the ram assembly:
Remove the top cover. (See
Top Cover
.)
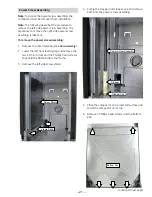
Plug in compactor, turn ON-OFF switch to the
ON position, and close the drawer.
Note:
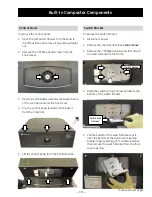
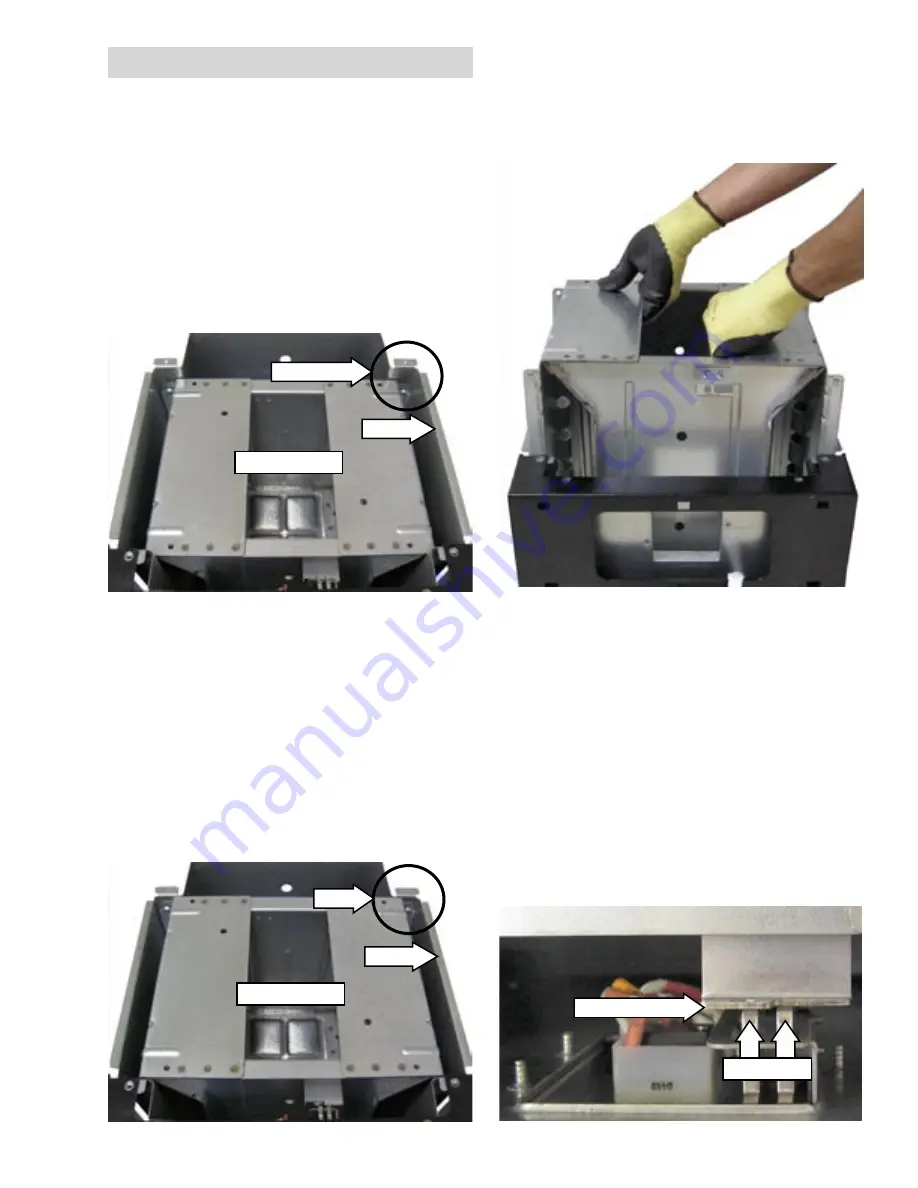
The ram is in the normal stop position,
approximately ¾ inch recessed from top of frame.
1.
2.
Lift the foot kick, then release to start down
travel of the ram.
After the ram reverses and begins up travel, lift
and maintain the foot kick in the lifted position
until the ram runs off the top of the power screw
assemblies.
Note:
The ram is now in an over stop position,
approximately flush with top of frame. A repetitive
thumping sound will be heard.
3.
4.
¾-in. Recess
Flush
Ram Assembly
Frame
Frame
Ram Assembly
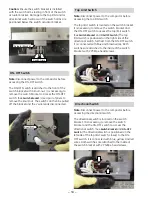
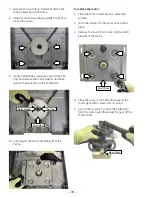
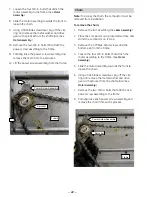
Disconnect power.
Remove the switch bracket. (See
Switch Bracket
.)
Lift and remove the ram assembly from the top
of the power screws.
5.
6.
7.
Actuator Bracket
Switch Arms
(
Continued next page
)
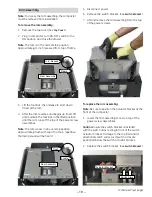
To replace the ram assembly:
Note:
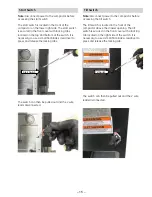
Be sure to position the actuator bracket at the
front of the compactor.
1. Lower the ram assembly to rest on top of the
power screw assemblies.
Caution:
Insure the switch bracket is installed
with the switch arms resting in front of the switch
actuator bracket. Damage to the top limit and/or
directional switch will occur if switch arms are
positioned below the switch actuator bracket.
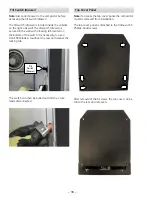
2. Replace the switch bracket. (See
Switch Bracket
.)
Содержание GCG1500 WW
Страница 11: ... 11 15 in Built In Compactor Component Locator Views Continued next page ...
Страница 26: ... 26 Warranty ...

