Puma III User Manual
Automatic-Aligning System
5-6
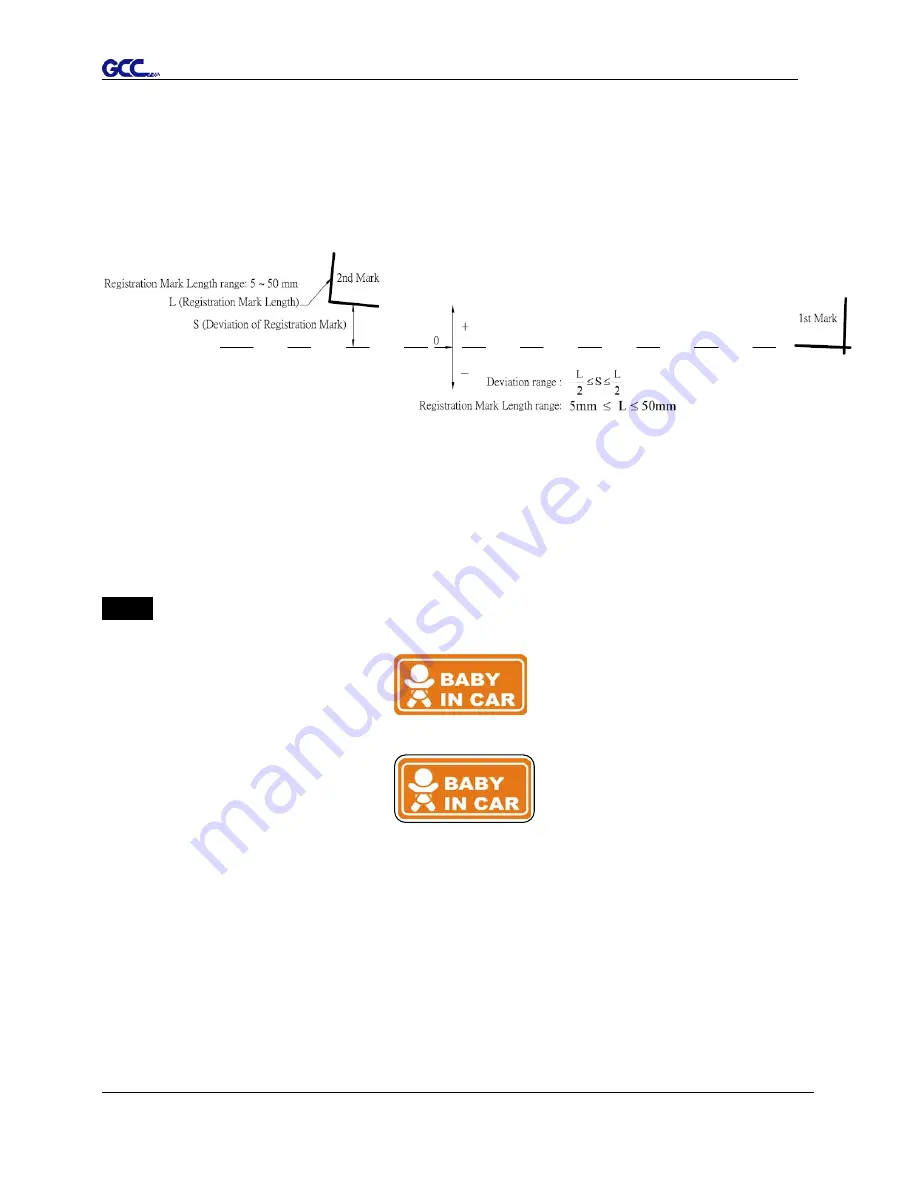
5.4 Registration Mark Offset Range
Please correctly load your media (refer to the alignment ruler on the platen) to make sure the
registration marks are successfully detected. Deviation exceeds the range below will lead to
detection failure.
5.5
Contour Cutting
For accurate contour cutting with AAS function, please proceed the following steps:
Step 1
Creating Graphics
■ Create the graphic that you want to print and cut in your software.
■ Create a contour for cutting around the graphic.
TIPS1: Leave some space between the graphic and contour line.
TIPS2: Create the contour in a separate layer and assign a different color for it.
■ Add registration marks around the graphic.
Note:
The Multiple Copies function is also available. It automatically copy the graphic and
registration marks.
Содержание P3-132S
Страница 1: ...V 22 2016 Dec Puma III Series User Manual http www GCCworld com...
Страница 30: ...Puma III User Manual Installation 2 19 Step 3 Select Driver page Step 4 Select the model and click on Remove...
Страница 48: ...Puma III User Manual Installation 2 37...
Страница 123: ...Puma III User Manual GreatCut Plug In A 5 Step 5 Click output and the object will be sent to GCC Cutting Plotter...
Страница 138: ...Puma III User Manual GreatCut Plug In A 5 Step 5 Click output and the object will be sent to GCC Cutting Plotter...
Страница 143: ...Puma III User Manual GreatCut Plug In A 5 Step 4 Click Multi Copy on GreatCut under File...
Страница 158: ...Puma III User Manual SignPal 12 Instruction A 6...
Страница 159: ...Puma III User Manual SignPal 12 Instruction A 6 3 Select File Print Setup in SignPal Software and select the printer...
Страница 160: ...Puma III User Manual SignPal 12 Instruction A 6 4 Select File Document Setup in SignPal and select paper size...
Страница 165: ...Puma III User Manual SignPal 12 Instruction A 6...


