Puma III User Manual
Automatic-Aligning System
5-5
the cutting plotter)
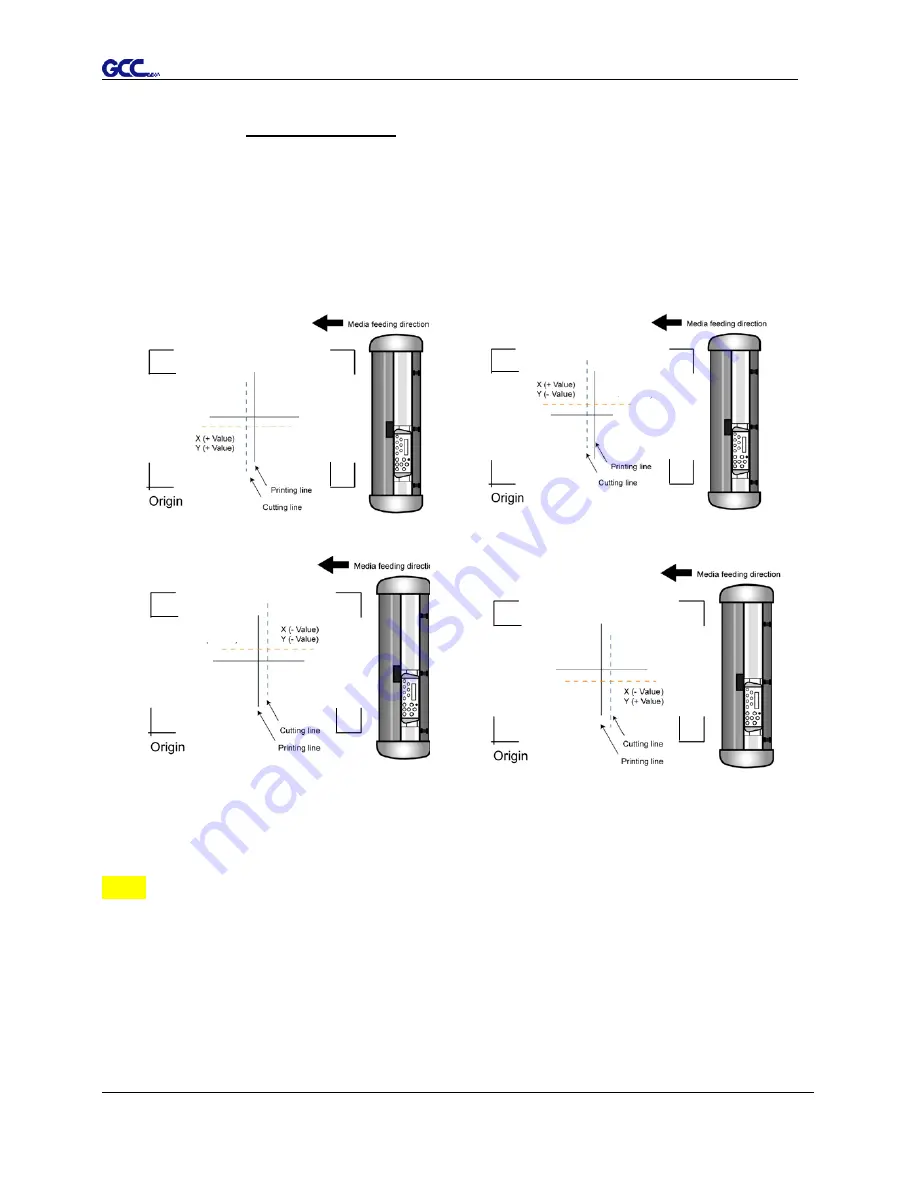
■ When the actual cutting line and the printed line need to be changed towards
the direction of origin mark, then simply add the negative value of the offset.
If the direction is from the opposite of the origin mark, then enter positive
values for the offset (see the following figures). This method applies to both
X and Y axes.
Note:
Before adjusting the AAS II settings, please proceed scaling for width and length.
The blade offset value isn’t set for this test graphic, please set it according to the
blade you use.
If you have any question, please contact us or your local distributor for assistance.
Содержание P3-132S
Страница 1: ...V 22 2016 Dec Puma III Series User Manual http www GCCworld com...
Страница 30: ...Puma III User Manual Installation 2 19 Step 3 Select Driver page Step 4 Select the model and click on Remove...
Страница 48: ...Puma III User Manual Installation 2 37...
Страница 123: ...Puma III User Manual GreatCut Plug In A 5 Step 5 Click output and the object will be sent to GCC Cutting Plotter...
Страница 138: ...Puma III User Manual GreatCut Plug In A 5 Step 5 Click output and the object will be sent to GCC Cutting Plotter...
Страница 143: ...Puma III User Manual GreatCut Plug In A 5 Step 4 Click Multi Copy on GreatCut under File...
Страница 158: ...Puma III User Manual SignPal 12 Instruction A 6...
Страница 159: ...Puma III User Manual SignPal 12 Instruction A 6 3 Select File Print Setup in SignPal Software and select the printer...
Страница 160: ...Puma III User Manual SignPal 12 Instruction A 6 4 Select File Document Setup in SignPal and select paper size...
Страница 165: ...Puma III User Manual SignPal 12 Instruction A 6...


