


Quick Reference Guide
QRG-S1080-1000
Revision B
August 22, 2013
Company Proprietary
Page 5 of 22
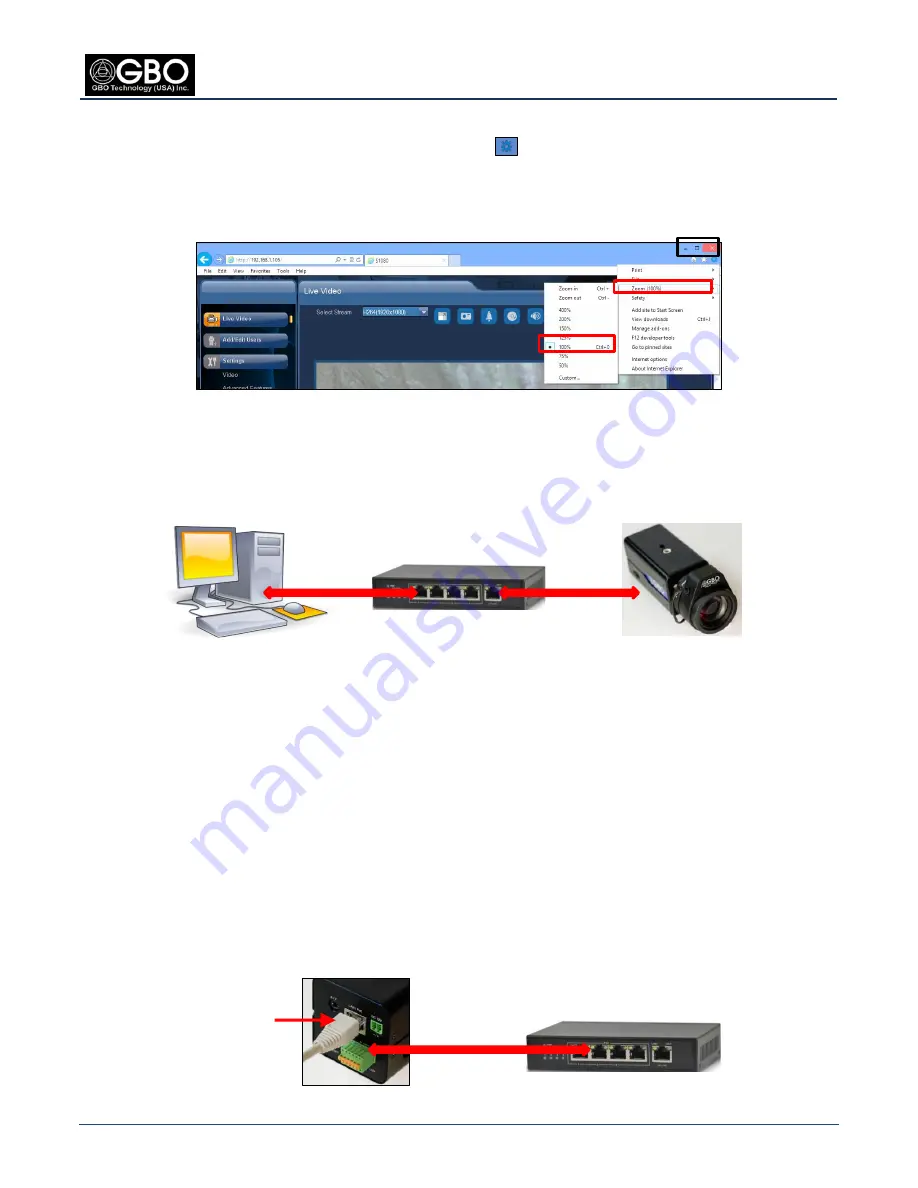
Step 11.
Set Browser Size
At the Internet Explorer screen, click on the
Settings
icon
located in the upper right-hand corner of the
1.
screen.
Select
Zoom (100%)
from the drop-down menu, and then select
100%
from the second drop-down menu
2.
(see Figure 9). Your Browser window will now be the correct size.
Figure 9
Set Browser Window Size
2.2
Standalone POE Switch Installation
This installation requires the camera and your PC to be connected to a standalone POE switch via two Ethernet cables.
It uses the
OnVIF Device Manager
application to interface with the camera’s software.
Figure 10
PC to Standalone POE Switch to Camera
Step 1.
Connect PC to POE Switch
Using an Ethernet cable, connect one end to the POE switch and the other to your PC (see Figure 10).
Step 2.
Power-On PC
First, power-on the PC to ensure that the PC’s Ethernet interface is configured to use DHCP to automatically obtain an
IP address. In this case, because there is no DHCP server running on the network, the PC will obtain an Auto-IP address
in the 169.254.0.0 class B subnet. See
Section 2.4, Use DCHP to Obtain an IP Address Automatically,
for detailed
information on required PC settings.
Step 3.
Connect Camera to Standalone POE Switch
Using an Ethernet cable, connect one end of the cable to the LAN/POE slot in the back of the camera and the
1.
other end to the POE switch (see Figure 11). The POE switch provides DC power to the camera so that the
camera’s DC power cable is not needed.
Figure 11
Back of Camera and POE Switch
Ethernet Cable
Ethernet Cable
Standalone POE Switch
LAN/POE/slot
Ethernet
Cable
POE Switch
Standalone PC
Camera


