


QRG-S1080-1000
Revision B
Quick Reference Guide
Page 2 of 22
Company Proprietary Information
August 22, 2013
Step 3.
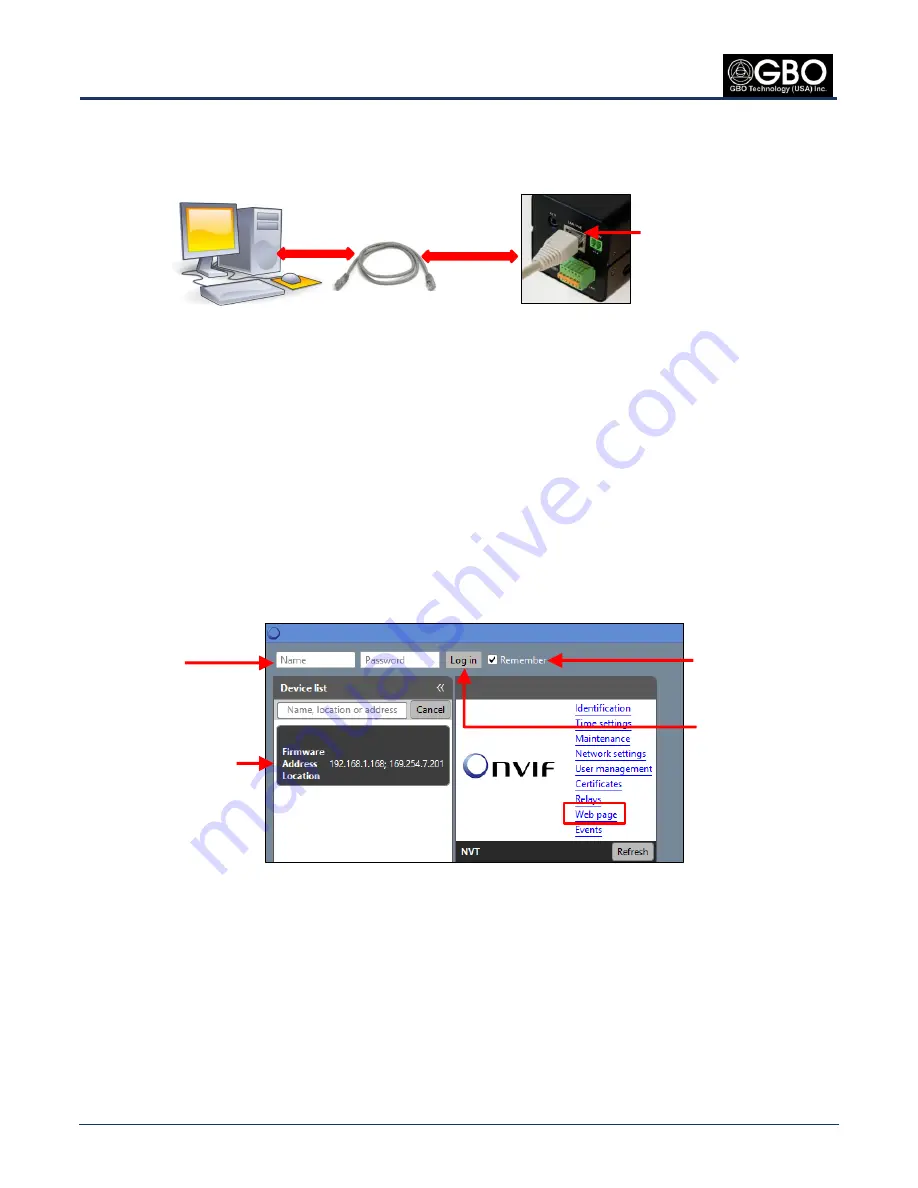
Connect Camera to Your Computer
Using an Ethernet cable, connect one end of the cable to the LAN/POE slot in the back of the camera and the other end
to your computer (see Figure 2).
Figure 2
Camera Connected Directly to PC
Step 4.
Power On Camera with DC Power Supply
Insert the connector end of the camera’s power supply cable into the DC 12V receptacle located on the back
1.
of the camera. Plug the electrical end of the power supply cable into a power outlet.
Wait until the two camera LEDs light up. Initially they are red/orange in color; when they both turn green,
2.
the camera is “on” and working correctly (see Figure 1)
Step 5.
Open “OnVIF Device Manager”
Open the OnVIF application by double-clicking on its icon on your desktop and its
Main Screen
opens.
1.
At the
OnVIF Main Screen
, check the
Remember
checkbox (see Figure 3).
2.
Enter your
Name
(
admin
) and
Password
(
9999
).
3.
Figure 3
OnVIF Main Screen and Log In
Click on the
Log in
button.
4.
Your camera’s IP address is shown in the gray box as
Address
.
5.
Step 6.
Change Settings
Click on the
wrench
icon located at the top right side of the
OnVIF Main Screen
(see Figure 4). The
1.
Application settings
dialog box opens.
Name
Password
Log in
button
Your camera’s
IP Address
Ethernet Cable
LAN/POE/slot
Remember
checkbox
Standalone PC
Camera


