background image

Multiboot Options Add-in     115

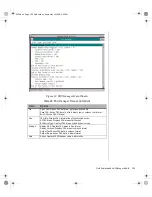
1.

Highlight the function in the Configuration window.

2.

Press the spacebar or 

E

NTER

, or double-click on the entry (this updates 

the choice and resource lists).

3.

Press the tab key to get to the choice list, and press 

E

NTER

.

4.

Use the arrow keys to select a proper choice, and press 

E

NTER

 again.

5.

If the choice allows multiple possible values for a particular resource, 
use the hot key to select a resource and press the spacebar or double-
click on the resource.

6.

Select the desired resource, and click 

OK

.

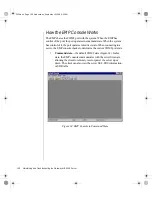
System Resource Usage

Click 

Resource Use

 in the Configuration window to display the System 

Resource Usage window, which shows the resources each device 
consumes. This information is useful if a conflict occurs. Devices can be 
organized according to the resources you want to examine using the options 
in the Resource section of the screen. The resource information can also be 
written to a plain text file through this window.

Multiboot Options Add-in

In this window, you can change the boot priority of a device.

1.

Select a device.

2.

Press 

+

 to move the device up in the list (higher priority). Press 

-

 to 

move it down.

To Edit Resources

To Change the Boot Priority of a Device

3424.boo  Page 115  Wednesday, September 2, 1998  9:23 AM

Содержание ALR 9200

Страница 1: ...9200 TECH REF R0 8 98 In our effort to use nature s resources efficiently and wisely we print all manuals on recycled papers that meet the minimum requirements established by the Federal EPA in its guidelines for recycled paper products 3424 boo Page i Wednesday September 2 1998 9 23 AM ...

Страница 2: ...ed trademarks and MMX is a trademark of Intel Corporation Microsoft MS MS DOS and Windows are trademarks or registered trademarks of Microsoft Corporation All other product names mentioned herein are used for identification purposes only and may be the trademarks or registered trademarks of their respective companies Copyright 1998 Advanced Logic Research Inc ALR All Rights Reserved 9401 Jeronimo ...

Страница 3: ...alling the Front Door 8 Chapter 2 Components 9 System Board Features 10 System Board Connectors 10 Drive Controllers and Connectors 12 System Jumpers B 13 Miscellaneous Connectors 14 Expansion Slot Connectors 15 Memory Module Connector I 16 System Management Connectors 16 Back Panel I O Connectors 18 Processors and Related Connectors 20 Power Connectors 21 Memory 23 DIMM Installation Sequence 24 S...

Страница 4: ...and Drivers 71 Setting the Jumpers 72 Changing a Jumper Setting 73 CMOS Clear Jumper 74 Password Clear Jumper 75 Recovery Boot Jumper 75 Installing Software and Drivers 77 Installing Video Drivers 77 Chapter 5 BIOS Setup 79 Introduction 80 Using BIOS Setup 81 Record Your Setup Settings 81 If You Cannot Access Setup 82 Starting Setup 82 Setup Menus 83 Setup Key Commands 84 Special Display Items 84 ...

Страница 5: ... a Task 111 Resource Configuration Add in Window 112 Using the RCA Window 112 Defining an ISA Board 113 Adding and Removing ISA Boards 114 Modifying Resources 114 System Resource Usage 115 Multiboot Options Add in 115 Security Add in 116 Security Options 117 System Event Log Viewer Add in 118 Sensor Data Record Manager Add In 120 Field Replaceable Unit Manager Add In 122 Exiting the SSU 124 Chapte...

Страница 6: ...he SCSI Utility 152 Chapter 8 Troubleshooting 153 Introduction 154 Computer Virus Notice 155 Viruses 155 Types of Viruses 155 Virus Contamination 155 Protecting Your System 156 Virus Prevention 156 Troubleshooting Checklist 158 Verifying the Configuration 158 Troubleshooting Guidelines 158 Solving Problems 159 Resetting the System 159 Initial System Startup 159 Running New Application Software 160...

Страница 7: ...nterrupts 182 Video Modes 183 DMA Usage 187 Appendix B Regulatory Compliance Statements 189 Electromagnetic Compatibility 190 FCC Notice 191 Industry Canada Notice 192 CE Notice 192 VCCI Notice 193 Australia New Zealand Notice 193 Declaration of the Manufacturer or Importer 194 Safety Compliance 194 Index 195 3424 boo Page v Wednesday September 2 1998 9 23 AM ...

Страница 8: ...vi Maintaining and Troubleshooting the Gateway ALR 9200 Server 3424 boo Page vi Wednesday September 2 1998 9 23 AM ...

Страница 9: ...Preface Contents About This Guide viii Conventions Used in This Guide ix Important Safety Instructions x 3424 boo Page vii Wednesday September 2 1998 9 23 AM ...

Страница 10: ...talling Components describes the procedures for installing or replacing the hardware components Chapter 4 Jumpers and Drivers describes setting the jumpers and provides basic information about operating systems and software Chapter 5 BIOS Setup briefly explains the system basic input output system BIOS and provides instructions on how to update the BIOS Chapter 6 The Server Setup Utility describes...

Страница 11: ...L A plus sign indicates that the keys must be pressed simultaneously Setup Commands to be entered options to select and messages that appear on your monitor are printed in bold User s Guide Names of publications and files are printed in italic Sidebars Sidebars give critical information such as warnings and important notes Note This is an example of an important note that may appear in the manual ...

Страница 12: ... on the power cord or allow anything to rest on it If you use an extension cord with this system make sure the total ampere ratings on the products plugged into the extension cord do not exceed the extension cord ampere rating Also the total ampere requirements for all products plugged into the wall outlet must not exceed 15 amperes Never insert objects of any kind into the system ventilation slot...

Страница 13: ...ystem 3 Removing the Access Cover 3 Opening the Front Door 4 Opening the Subchassis and Electronics Bay 5 Closing the System 7 Closing the Subchassis and Electronics Bay 7 Installing the Access Cover 8 Installing the Front Door 8 3424 boo Page 1 Wednesday September 2 1998 9 23 AM ...

Страница 14: ...e the system case cover Static Electricity Precautions Avoid static causing surfaces such as plastic and styrofoam in your work area Remove the parts from their antistatic bags only when you are ready to use them Do not lay parts on the outside of antistatic bags since only the inside provides antistatic protection Always hold cards by their edges and their metal mounting bracket Avoid touching co...

Страница 15: ...t of the system the access cover is on the right side of the server 1 Observe the ESD precautions in Static Electricity Precautions on page 2 2 Turn off all peripheral devices connected to the system 3 Turn off the system by using the power on off switch on the front panel and unplugging all AC power cords 4 Label and disconnect all peripheral cables attached to the input output I O panel on the b...

Страница 16: ...er handle 7 Using an even pull slide the cover backward about an inch until it stops 8 Pull the entire cover outward straight away from the chassis to disengage the rows of tabs from the notches in the top and bottom edges of the chassis Set the cover aside Opening the Front Door The front door is secured to the bezel by a key lock This lock has three positions fully locked front door unlocked and...

Страница 17: ...on page 2 2 Turn off all peripheral devices connected to the system 3 Turn off the system power by using the power on off switch on the front panel and unplugging all AC power cords 4 Label and disconnect all peripheral cables attached to the I O panel on the back of the system 5 Remove and save the three screws from the back of the access cover you will need them later to reattach the cover 6 Rem...

Страница 18: ...al edge of the electronics bay as a handle rotate the bay right away from the main chassis until it stops C in Figure 2 12 If necessary completely remove the subchassis and electronics bay rotate the bays outward until the two pins that function as hinges for the bays slide out of their slots Set the bays aside Caution You must disconnect all cabling to the electronics bay before rotating removing...

Страница 19: ...and secured 2 Press down on the tab on the top of the electronics bay to release it and swing it closed 3 Attach any cables to the electronics bay components 4 Press down on the tab at the top of the subchassis to free it and swing it closed 5 Secure the subchassis with the two screws you removed earlier 6 If necessary reinstall the foam bracketing for the fans in the subchassis and reinstall the ...

Страница 20: ... firmly engage in the chassis 4 Attach the cover to the chassis with the three screws you removed earlier and tighten them firmly 5 Connect all external cables and the power cords to the system Installing the Front Door To replace the front door insert the hinges into the slots on the front of the chassis and close the door Secure it by turning the bezel keylock to the second locked position The f...

Страница 21: ...s 15 Memory Module Connector I 16 System Management Connectors 16 Back Panel I O Connectors 18 Processors and Related Connectors 20 Power Connectors 21 Memory 23 DIMM Installation Sequence 24 System Memory Addressing 24 Memory Configuration 25 System Security 26 Mechanical Locks and Monitoring 26 Software Locks via the SSU or BIOS Setup 26 3424 boo Page 9 Wednesday September 2 1998 9 23 AM ...

Страница 22: ...O dynamic random access memory DRAM Installed 256 MB 4 GB of EDO error correcting code ECC random access memory RAM Video memory Installed 2 MB of video memory PCI bus es PCI A Three expansion connectors PCI B Four expansion connectors one shared with the ISA slot ISA bus One expansion slot for expansion boards shared with a PCI B slot Server management Thermal voltage monitoring and error handlin...

Страница 23: ...ule connector J3G1 BB Processor 4 Slot 2 connector J9E1 J ICMB connector J1E1 CC IDE connector J9E2 K PCI slot A1 J2D1 DD Diskette drive connector J9E3 L Video and parallel port connectors J1C1 EE Auxiliary power connector J9E4 M Serial port connectors J1B2 FF USB internal header JC9F14 N Keyboard and mouse connectors J1B1 GG SMBus connector J9F2 O USB external connector J1A1 HH F16 expansion conn...

Страница 24: ...ing on chip buffers No logic termination or resistor loads are required to connect devices to the SCSI controller other than termination in the device at the end of the cable The SCSI bus is terminated on the system board with active terminators that can be disabled Wide SCSI A LL and Wide SCSI B Connectors A Internally each wide channel is identical capable of operations using either 8 or 16 bit ...

Страница 25: ...racteristics of the system Some jumpers are reserved and are not described in this section Do not change any jumper unless it is necessary to configure the system In some cases changing the settings of reserved jumpers can cause damage to the system board Clear CMOS Jumper This jumper allows you to clear the complimentary metal oxide semiconductor CMOS memory You should only do this if you cannot ...

Страница 26: ...f the BIOS as it boots up This jumper occupies pins 9 11 of the connector See Setting the Jumpers on page 72 for more information on setting the recovery boot jumper Miscellaneous Connectors Hard Drive Input LED Connector C This connector allows you to connect a cable from an add in hard disk controller to the system board to allow the add in controller to activate the hard drive activity LED on t...

Страница 27: ...ctors ISA Slot G The system board has one industry standard architecture ISA slot that is full length if you do not use the wide SCSI B connector and half length if you use the wide SCSI B connector the ISA slot supports slave only boards and is shared with PCI B slot 4 The ISA bus also supports three embedded devices the Super I O chip system board management controller BMC and flash memory for t...

Страница 28: ...The memory module is a proprietary card that supports all of the main memory for the system The memory module is described in Memory on page 23 System Management Connectors Server Management features are implemented using one microcontroller the system board management controller BMC The BMC and associated circuitry are powered from the 5 V standby line which remains active when the system power i...

Страница 29: ...ine connection During monitoring the BMC performs the following functions System board temperature and voltage monitoring Processor presence monitoring and fault resilient boot FRB control System board fan failure detection and indicator control SEL interface management SDRR interface management SDR SEL timestamp clock System board field replaceable unit FRU information interface System management...

Страница 30: ...es between the memory and I O controller MIOC and the PCI expansion bridge PXB External IPMB connector JJ This connector allows you to connect an external device to the IPMB to help determine the cause of a system failure from a remote terminal SMM connector KK The SMM connector allows you to connect a system management module to the system board to monitor the system and perform other system mana...

Страница 31: ...nable the parallel port and set the port address and interrupt When disabled the interrupt is available to expansion cards Serial Port Connectors M Both serial ports are relocatable By default port 1 is the left connector port 2 on the right Each serial port can be set to one of four different COMx ports and each can be enabled separately The system BIOS provides fields in the setup utility to eas...

Страница 32: ...ors and Related Connectors VRM Connectors P Q R S T U In this system each processor must have one VRM to adjust the voltage supplied to the processor core and one to adjust the voltage supplied to the second level cache in the SEC cartridge The first VRM is dedicated to a single processor and provides the correct power to the processor core The second VRM provides power to the integrated second le...

Страница 33: ... in MP and uniprocessor UP environments The system SMP design supports up to four processors and is Intel MP Specification v1 1 and 1 4 compliant The second level cache is located inside the SEC cartridge The cache includes burst pipelined synchronous static RAM BSRAM and is offered in 512 KB 1 MB and 2 MB configurations with ECC that operates at the full core clock rate Each processor cartridge r...

Страница 34: ...nnectors provide the majority of the power to the system board These connectors are designed to accommodate the power supply installed in the system Auxiliary Power Connector EE The auxiliary power connector provides for the connection of an additional power source 3424 boo Page 22 Wednesday September 2 1998 9 23 AM ...

Страница 35: ...ed connector Memory amounts from 128 MB to 4 GB of RAM are supported with a 64 72 bit four way interleaved pathway to main memory The 16 slots are divided into four banks of four slots each labeled A through D These banks support 4 1 interleaving The memory controller supports EDO DRAMs The ECC used for the memory module is capable of correcting single bit errors SBEs and detecting 100 percent of ...

Страница 36: ...iguous in the ranges defined as memory holes using configuration registers The system supports both base conventional and extended memory Base memory is located at addresses 00000h to 9FFFFh the first 1 MB Extended memory begins at address 0100000h 1 MB and extends to FFFFFFFFh 4 GB which is the limit of supported addressable memory The top of physical memory is a maximum of 4 GB to FFFFFFFFh Memo...

Страница 37: ...omponent Combinations Bank A slots J1 4 Bank B slots J5 8 Bank C slots J9 12 Bank D slots J13 16 Total Memory 4x64 256 MB 4x64 4x32 384 MB 4x64 4x32 4x32 512 MB 4x64 4x64 512 MB 4x64 4x64 4x32 4x32 768 MB 4x64 4x64 4x64 4x64 1024 MB 4x128 4x64 4x32 4x32 1024 MB 4x128 4x128 4x64 4x64 1536 MB 4x128 4x128 4x128 4x128 2048 MB 4x256 4x128 4x64 4x64 2048 MB 4x256 4x256 4x128 4x128 3072 MB 4x256 4x256 4x...

Страница 38: ...for example the system may power down or lock the keyboard Software Locks via the SSU or BIOS Setup The system setup utility SSU provides a number of security features to prevent unauthorized or accidental access to the system Once the security measures are enabled access to the system is allowed only after you enter the correct password s For example the SSU allows you to Enable the keyboard lock...

Страница 39: ...fect you Can boot the system and run the OS but you must enter the user password to use the keyboard or mouse Cannot turn off system power or reset the system from the front panel switches Secure mode has no effect on functions enabled via the Server Manager Module or power control via the real time clock RTC Taking the system out of secure mode does not change the state of system power That is if...

Страница 40: ... bootup To leave secure mode Enter the correct password s Disable writing to diskette In secure mode the system will not boot from or write to a diskette unless a password is entered To set these features see Security Menu on page 92 and Security Options on page 117 Disable the power and reset buttons If you enable this protection feature in the SSU the system disables the power and reset buttons ...

Страница 41: ...y detects and tests the keyboard if present and displays a message No entry exists in the SSU for enabling or disabling a keyboard Do not plug in a keyboard while power is applied to the system Specify the boot sequence The sequence you specify in the BIOS see Boot Device Priority Submenu on page 96 or the SSU see Multiboot Options Add in on page 115 determines the boot order If secure mode is ena...

Страница 42: ...30 Maintaining and Troubleshooting the Gateway ALR 9200 Server 3424 boo Page 30 Wednesday September 2 1998 9 23 AM ...

Страница 43: ... Replacing the Processor 32 Installing Another Processor 36 Installing Hardware 40 Memory 40 Drives 45 Installing Fans for High Power Drives 57 Expansion Cards 62 Power Supplies 65 Replacing the Battery 68 3424 boo Page 31 Wednesday September 2 1998 9 23 AM ...

Страница 44: ...I Xeon processor overheats and fails if it is not cooled sufficiently The heat sink provided with the processor in the system provides all necessary cooling for the processor For the latest details on the availability of the upgrade kits contact one of the sources listed in the Assistance Resources document 1 Turn off the system and disconnect all the power cords 2 Open the case observing the stat...

Страница 45: ...lightly pull the tab outward and to the left You should not try to pull the entire bracket rather the back of the tab has a latch C in Figure 5 that releases when the tab is pulled slightly 6 When you have released the right edge of the bracket rotate it 90 to the left until it is perpendicular to the front of the retention module The left edge of the bracket has an open hinge that can release fro...

Страница 46: ...of the retention module Put it on a piece of conductive foam and store it in an antistatic package 10 Remove the replacement processor cartridge from its protective wrapping 11 Orient the SEC cartridge so that the heat sink faces away from the center of the system board If you are installing a termination card assembly orient it so that the side with the label faces toward the center of the system...

Страница 47: ...erpendicular to the front of the retention module slide the open hinge at the left of the bracket into its receptacle at the left of the retention module b Rotate the bracket to the right until it reaches the retention module With your right thumb on the face of the bracket and your right index finger around the tab at the right of the bracket slightly pull the tab outward and to the left to open ...

Страница 48: ...1 Turn off the system and disconnect the power cord 2 Open the case observing the static electricity precautions in Static Electricity Precautions on page 2 and remove the foam cover on the electronics bay 3 Wear an anti static wristband grounded to the system chassis and place processors on a grounded static free surface or conductive foam pad 4 Remove the termination card in the lowest numbered ...

Страница 49: ...pull the entire bracket rather the back of the tab has a latch that releases when the tab is pulled slightly 6 When you have released the right edge of the bracket rotate it 90 to the left until it is perpendicular to the front of the retention module The left edge of the bracket has an open hinge that can release from the module when you rotate the bracket to the left 7 Disengage the open hinge b...

Страница 50: ... antistatic package 10 Remove the processor cartridge from its protective wrapping 11 Orient the S E C cartridge so that the heat sink faces away from the center of the system board 12 With the tabs at the top of the S E C cartridge completely open pulled outward away from the center of the cartridge Figure 10 slide the cartridge into the guide rails of the retention module Figure 10 When done pro...

Страница 51: ...right of the bracket slightly pull the tab outward and to the left to open the latch at the back of the tab c As you open the latch on the back of the tab slide the right edge of the bracket onto the retention module and release the tab If done correctly the bracket will latch securely 15 Reinstall the foam cover 16 Close the case as described in Closing the System on page 7 17 Reconnect the power...

Страница 52: ...M are supported with a 64 72 bit four way interleaved pathway to main memory The 16 slots are divided into four banks of four slots each labeled A through D These banks support 4 1 interleaving The memory controller supports EDO DIMMs only The ECC used for the memory module is capable of correcting single bit errors SBEs and detecting 100 percent of double bit errors over one code word Nibble erro...

Страница 53: ...y Module 5 Place the module component side up on a nonconductive static free surface Removing DIMMs When adding and removing DIMMs remember that DIMMs must be installed or removed by banks Each bank consists of four DIMM sockets All DIMMs in the bank must be installed and all must be of the same size and speed See Figure 4 on page 23 for the location of the DIMM sockets in each bank 3424 boo Page ...

Страница 54: ...ou are replacing DIMMs proceed to Installing DIMMs on page 43 If you are removing DIMMs continue this procedure 6 Reinstall the memory module see Installing the Memory Module on page 44 7 Reinstall the foam cover 8 Reinstall the access cover using the original screws 9 Connect all external cables and power cords to the system 10 Turn on the monitor and then the system 11 Run the SSU BIOS Setup see...

Страница 55: ...he two notches in the bottom edge of the DIMM align with the keyed socket on the memory module 3 Insert the bottom edge of the DIMM into the socket then press down firmly on the DIMM until it seats correctly see Figure 12 Figure 12 Installing a DIMM To Install DIMMs Caution Use extreme care when installing a DIMM Applying too much pressure can damage the socket DIMMs are keyed and can be inserted ...

Страница 56: ...ry module 1 Observe the safety and ESD precautions in Static Electricity Precautions on page 2 2 Holding the memory module by its edges align the module so its edge engages in the guide rail at the back of the electronics bay 3 Push the memory module toward the system board until it fully engages its connector 4 Install the foam pad in the electronics bay 5 Replace the system access cover and scre...

Страница 57: ...n If you need to replace the diskette drive follow the instructions below Removing the Diskette Drive You should only replace the diskette drive if the originally installed drive fails 1 Observe the safety and ESD precautions in Static Electricity Precautions on page 2 2 Remove the access cover see Opening the System on page 3 3 Remove the foam and fans from the subchassis Be sure to label the fan...

Страница 58: ...the diskette drive carrier to the side of the 5 25 inch drive bay 6 Slide the carrier toward the back of the chassis to disengage the tabs from the slots in the side of the 5 25 inch drive bay 7 Remove the carrier drive from the chassis and place it component side up on an antistatic surface 3424 boo Page 46 Wednesday September 2 1998 9 23 AM ...

Страница 59: ... page 62 and the access cover using the original screws Installing the Diskette Drive You should only replace the diskette drive if the originally installed drive fails 1 Remove the new 3 5 inch diskette drive from its protective wrapper and place it component side up on an antistatic surface 2 Set any jumpers or switches according to the drive manufacturer s instructions 3 Place the drive carrier...

Страница 60: ...tripe on the signal cable must face toward the center of the drive 9 Reinstall the foam pads fans see Installing an Individual System Fan on page 62 and the access cover using the original screws 10 Run the SSU or BIOS Setup to specify that the diskette drive is installed in the system Modifying Resources on page 114 or Main Menu on page 85 Drive Cabling Considerations Excluding the diskette drive...

Страница 61: ...nstall legacy devices in the 5 25 inch drive bay and connect them to the narrow SCSI cable Ultra and Ultra 2 devices are normally hard drives connect them to the SCSI backplane at the rear of the SCSI drive bay The wide SCSI connectors support either single ended SE or low voltage differential LVD drives Installing a 5 25 inch Peripheral in the Front Bay Three 5 25 inch half height bays provide sp...

Страница 62: ...rations on page 48 2 Open the front door by rotating its right side out and to the left 3 Remove the access cover see Opening the System on page 3 4 Push the tab A in Figure 16 on the left side of the EMI metal shield to the right to disengage it from the chassis Removeand save the shield Figure 16 Removing the EMI Shield To Install a 5 25 inch Device Note System EMI integrity and cooling are both...

Страница 63: ...8 Using two screws of the appropriate size and length not supplied attach each plastic slide rail see Figure 17 with its metal grounding plate to the drive Figure 17 Attaching the Slide Rails 9 Position the drive so the plastic slide rails engage in the bay guide rails Push the drive into the bay until the slide rails lock in place 10 Connect a power cable to the drive The connectors are keyed and...

Страница 64: ...emove a device from the 5 25 inch drive bay and do not replace it with another 5 25 inch device of the same height replace the EMI shield s in the drive bay to maintain the EMI and airflow characteristics of the chassis 1 Observe the safety and ESD precautions in Static Electricity Precautions on page 2 2 Open the front door by rotating its right side out and to the left 3 Remove the access panel ...

Страница 65: ...elds to maintain the EMI and airflow characteristics of the chassis If the device is a SCSI device and it was installed at the end of the SCSI signal cable modify the cable and termination arrangement so that a proper termination exists at the end of the cable it can be a termination device only not necessarily a SCSI peripheral 9 Close the subchassis and make sure the foam cover is properly insta...

Страница 66: ...9 so that the three screw holes in the heatsink align with the corresponding holes in the hard drive The holes are placed so that you can position the heatsink in only one way with the fins extending along the side and the top of the hard drive Figure 19 Installing Heatsinks on a Hard Drive To Install Heatsinks on Hard Drives Caution Electrostatic discharge ESD can damage disk drives and other com...

Страница 67: ...er 1 Remove the 3 5 inch hard drive from its wrapper and place it on an antistatic surface 2 Orient the drive so the connector is near the top surface of the drive then place the carrier on top of the drive 3 Using four screws of the correct size and length not supplied attach the carrier to the drive see Figure 20 Figure 20 Hard Disk Drive and Carrier To Mount a SCSI Drive on a Carrier Note Faste...

Страница 68: ...wap a drive 1 Open the front system door by rotating its right side out and to the left 2 If you installed a padlock on the metal door to the SCSI drive bay unlock the padlock and remove it 3 Press the plastic latch securing the metal door to the SCSI drive cage and open the door 4 Check the bank of yellow LEDs on the front panel to determine which drive is bad 5 Press the rounded tab on the right...

Страница 69: ...ngage push the handle straight up to lock the notches onto the pegs and press the rounded tab on the right of the carrier to the left until it clears the edge of the bay and snaps into place Figure 22 Installing a New Drive 10 Close the metal door and secure it to the chassis with the plastic latch 11 For security and to prevent unauthorized access to the bays insert a padlock through the metal lo...

Страница 70: ...wo power supply modules 1 Remove four screws the grill plate and fan from your kit 2 Remove the plate Figure 23 that covers the power supply bay closest to the PCI slots It is the uppermost bay when the server is standing upright in pedestal mode Figure 23 Installing a Fan in the Power Supply Bay To Install a Fan In the Power Supply Bay Fan Plate covering power supply bay Cable Grill plate 3424 bo...

Страница 71: ...ing an Individual System Fan The subchassis houses up to eight system fans Not all of these fans are required in standard configurations If a fan fails follow this procedure to remove the failed fan 1 Observe the safety and ESD precautions in Static Electricity Precautions on page 2 2 Remove the access cover see Removing the Access Cover on page 3 To Remove an Individual System Fan Note Correct ai...

Страница 72: ...aight out see Figure 24 Be careful not to break the foam Figure 24 Removing the System Fan Assembly 4 For better access to the individual fan cables on the front panel board carefully rotate the right edge of the foam fan assembly outward into the opening where the foam cover was 3424 boo Page 60 Wednesday September 2 1998 9 23 AM ...

Страница 73: ...t differently in the assembly but in general each fan can slide in and out of the foam in only one way 1 3 5 7 2 4 6 8 1 1 7 5 3 2 4 6 8 Note The two installed fans nearest the 5 25 inch drive bays fans 6 and 7 in Figure 25 are separated by a square piece of foam the piece with a crescent shaped hole that extends perpendicularly from the front of the fans in Figure 25 it is the rectangle between t...

Страница 74: ...is prior to removal so that it rests firmly against the diskette drive at the top and the 5 25 inch bays at the middle and bottom 8 Reinstall the foam cover It is molded to match the position of the fans and fits in only one way 9 Reinstall the access cover using the original screws Expansion Cards The system board has seven slots for the installation of expansion cards There are six PCI slots and...

Страница 75: ... expansion card from its protective wrapper Be careful not to touch the components or the gold edge connectors 3 Set any jumpers or switches according to the manufacturer s instructions 4 Remove the rear foam pad from the electronics bay 5 Remove and save the expansion slot cover Figure 26 Figure 26 Installing an Expansion Card To Install an Expansion Card Caution Do not overload the system board ...

Страница 76: ...or ISA board Removing an Expansion Card Remember that removing an ISA expansion card may require you to use the SSU to remove it from the system configuration 1 Observe the safety and ESD precautions in Static Electricity Precautions on page 2 2 Remove the access cover Opening the System on page 3 and the rear foam pad 3 Disconnect any cables attached to the board you are removing 4 Remove and sav...

Страница 77: ...lied by two supply modules to various system components Table 5 shows the power distribution using the power share board Configurations using three power supply modules use the same power share board as those using two supply modules The third module acts as a hot spare and allows hot swapping of failed power supply modules Table 5 Power Sharing Power Supply Output B System board 5V A System board...

Страница 78: ...ention clip to the side as you remove the power cord see Figure 27 on page 66 2 Remove the four screws Figure 27 holding the power supply module to the back of the chassis 3 Using the flared vertical edges as handles and using both hands slide the power supply module straight back from its bay Figure 27 Figure 27 Removing a Power Supply Module Removing a Power Supply Module Caution You might feel ...

Страница 79: ...u are installing an additional power supply module remove the access cover If you are replacing a failed module install the new module in the same bay from which you removed the failed module 4 Slide the power supply into its bay 5 With even force on the flared vertical edges push toward the front of the system until the edges rest against the rear of the chassis and the power supply module engage...

Страница 80: ...pen the case observing the static electricity precautions in Static Electricity Precautions on page 2 5 Locate the battery on the system board see Figure 3 on page 11 The battery is circular and has the positive pole mark on the top 6 Gently pull the battery from its socket You may need to use a screwdriver with an insulated handle or other implement to remove the battery see Figure 28 Figure 28 R...

Страница 81: ...ached to the correct connectors and secured Check to be sure that all power switches are on If the system is plugged into a power strip or surge protector be sure it is turned on also Enter the BIOS Setup program and compare the settings on the screen with your notes or the system hardware manuals Correct any discrepancies Turn off the system remove the cover and verify that all cables inside the ...

Страница 82: ...70 Maintaining and Troubleshooting the Gateway ALR 9200 Server 3424 boo Page 70 Wednesday September 2 1998 9 23 AM ...

Страница 83: ...s Setting the Jumpers 72 Changing a Jumper Setting 73 CMOS Clear Jumper 74 Password Clear Jumper 75 Recovery Boot Jumper 75 Installing Software and Drivers 77 Installing Video Drivers 77 3424 boo Page 71 Wednesday September 2 1998 9 23 AM ...

Страница 84: ... following functions Clear CMOS memory Clear the passwords from CMOS memory Recover from a failed BIOS update One 11 pin connector provides three 3 pin jumper blocks that control the functions identified above Figure 29 shows the location and orientation of the jumpers Items in bold in Table 6 on page 73 show the default placement for each configurable option Figure 29 System Board Jumpers J6J1 1 ...

Страница 85: ...rn on the system for the change to take effect 8 You may need to repeat these steps to move the jumper back to its original setting depending on the jumper function Table 6 System Board Jumper Summary Function Pins What it Does at System Reset CMOS clear 1 2 Normal Preserves the contents of the NVRAM 2 3 Forced erase Replaces the contents of the NVRAM with the manufacturing default settings Passwo...

Страница 86: ...omatically reprograms CMOS to its default settings except for the password 5 Enter Setup and make any changes necessary for example changing the boot device 6 Press F10 to save the new Setup configuration and exit Setup 7 Turn off the system and disconnect all AC power cords from the system 8 Again remove the access cover 9 Move the jumper from pins 2 and 3 back to pins 1 and 2 the Protect CMOS me...

Страница 87: ...ins 6 and 7 back to pins 5 and 6 8 Reinstall the access cover using the original screws and connect the power cords to the system 9 Run the SSU to specify a new password See Security Add in on page 116 for instructions on setting a password in the SSU Recovery Boot Jumper The jumper at pins 9 10 and 11 controls whether the system attempts to boot using the BIOS programmed in flash memory or if it ...

Страница 88: ...tem off disconnect all AC power cords from the system and remove the access cover 6 Move the jumper from pins 10 and 11 back to pins 9 and 10 to enable the normal boot mode 7 Replace the foam pad and the access cover remove the diskette from drive A and connect the power cords to the system 8 After running the special recovery mode run the BIOS Setup or the SSU to specify a new password See Securi...

Страница 89: ...nstalling Video Drivers After configuring the system you need to install video drivers to take full advantage of the features of the onboard CL GD5480 super VGA video controller The software shipped with the server includes video drivers for use with WindowsNT For other operating systems see the operating system instructions for installing device drivers Note If you install a PCI VGA video card yo...

Страница 90: ...78 Maintaining and Troubleshooting the Gateway ALR 9200 Server 3424 boo Page 78 Wednesday September 2 1998 9 23 AM ...

Страница 91: ...etup 82 Setup Menus 83 Setup Key Commands 84 Special Display Items 84 Main Menu 85 Advanced Menu 87 Security Menu 92 Server Menu 93 Boot Menu 95 Exit Menu 97 Upgrading the BIOS 98 Preparing for the Upgrade 98 Upgrading the BIOS 100 Recovering the BIOS 101 Changing the BIOS Language 101 3424 boo Page 79 Wednesday September 2 1998 9 23 AM ...

Страница 92: ...er 7 Other Utilities on page 125 Use the EMP to access and monitor the server remotely FRUSDR Load Utility described in Chapter 7 Other Utilities on page 125 Use to update the Field Replacement Unit FRU Sensor Data Record SDR and Desktop Management Interface DMI flash components BIOS Update Utility described in Chapter 7 Other Utilities on page 125 Use to update the BIOS or recover from a corrupte...

Страница 93: ...feature such as Select the diskette drive Select the parallel port Select a serial port Set the time or date to be stored in the real time clock RTC Configure an IDE hard drive Specify the boot device sequence Enable the SCSI BIOS Run SSU not Setup you must run the SSU instead of Setup to do the following Enter or change information about an expansion card Alter system resources e g interrupts mem...

Страница 94: ... system after POST completes the memory test When you reboot the system by pressing CTRL ALT DEL while at the DOS operating system prompt When you have moved the CMOS jumper on the system board to the Clear CMOS position enabled for a step by step procedure see CMOS Clear Jumper on page 74 In the three conditions listed above after rebooting the system displays this prompt Press F2 to enter SETUP ...

Страница 95: ...e b Keyboard Features 2 Advanced Menu a PCI Configuration PCI Device Embedded SCSI PCI Devices b I O Device Configuration c Advanced Chipset Control 3 Security Menu 4 Server Menu a System Management b Console Redirection 5 Boot Menu a Boot Device Priority b Hard Drive 6 Exit Menu 3424 boo Page 83 Wednesday September 2 1998 9 23 AM ...

Страница 96: ...Function Key Command Get general help F1 or ATL H Move between menus Go to the previous item colon Go to the next Item Ø zero Change the value of an item or Select an item or display a submenu ENTER Leave a submenu or exit Setup ESC Reset to Setup defaults F9 Save and exit Setup F10 Table 9 Special Display Items When you see this It means this On screen an option is shown but you cannot select it ...

Страница 97: ... Selects the secondary diskette type Hard Disk Pre delay Disabled 3 6 9 12 15 21 or 30 seconds Adds a delay before the first BIOS access of a hard disk drive Some hard disk drives hang if accessed before they initialize themselves This delay ensures the hard disk drive has initialized after powerup and before being accessed Primary Master N A Enters submenu Primary Slave N A Enters submenu Keyboar...

Страница 98: ...is field is available only for Type User This field is strictly informational for Type Auto Maximum Capacity N A Computed size of drive from cylinders heads and sectors entered This field is available only for Type User This field is strictly informational for Type Auto Multi Sector Transfers Disabled 2 4 8 or 16 sectors Determines the number of sectors per block for multisector transfers This fie...

Страница 99: ... Keyboard auto repeat rate 30 26 7 21 8 18 5 13 3 10 6 or 2 per second Selects the key repeat rate Keyboard auto repeat delay 1 4 sec 1 2 sec 3 4 sec 1 sec Selects the delay before the keys begin to repeat Table 13 Advanced Menu Field Options Description Plug and Play OS No Yes Select Yes if you are booting a Plug and Play capable operating system Reset Configuration Data No Yes Select Yes if you ...

Страница 100: ...t method consult the operating system documentation Pause Before Boot Enabled Disabled Enables a five second pause before booting the operating system Advanced Chipset Control N A Enters submenu Table 14 PCI Device Embedded SCSI Submenu Field Options Description Option ROM Scan Enabled Disabled Enables the option ROM scan of the selected device Enable Master Disabled Enabled Enables the selected d...

Страница 101: ...lers as PCI bus masters Latency Timer Default 0020h 0040h 0060h 0080h 00A0h 00C0h 00E0h Defines the minimum guaranteed time in units of PCI bus clocks that a device can be master on a PCI bus Typically option ROM code overwrites the value set by the BIOS Table 16 I O Device Configuration Submenu Field Options Description Serial Port A Disabled Enabled Auto OS Controlled Auto forces the BIOS to con...

Страница 102: ... 378 278 Selects the base I O address for the parallel port Interrupt IRQ 5 IRQ 7 Selects the interrupt for the parallel port DMA channel DMA 1 DMA 3 Selects the DMA channel for the parallel port Floppy disk controller Disabled Enabled Enables the onboard diskette controller Base I O Address Primary Secondary Sets the base I O address for the diskette controller PS 2 Mouse Auto Disabled Enabled En...

Страница 103: ...bled Disabled When enabled the secondary cache is sized and enabled For Core Clock Frequency to System Bus ratios equal to two BIOS automatically disables the L2 cache ISA Expansion Aliasing Enabled Disabled When enabled every I O access with an address in the range x100 x3FFh x500 x7FFh x900 xBFF and xD00 xFFFh is internally aliased to the range 0100 03FFh before any other address range checking ...

Страница 104: ... string or by clearing the password jumper on the system board see Security Add in on page 116 Set User Password Press Enter When you press the ENTER key you are prompted for a password press the ESC key to cancel Once set you can disable the password by setting it to a null string or by clearing the password jumper on the system board see Security Add in on page 116 Password on Boot Disabled Enab...

Страница 105: ...d unless at least one password is enabled Video Blanking Disabled Enabled Blanks the video when secure mode is activated You must enter a password to unlock the system You cannot enable this field unless at least one password is enabled Floppy Write Protect Disabled Enabled When secure mode is activated this field write protects the diskette drive You must enter a password to reenable diskette wri...

Страница 106: ... Enabled clears the system event log Assert NMI on AERR Disabled Enabled Enabled generates a nonmaskable interrupt NMI on an address parity error AERR Assert NMI on BERR Disabled Enabled Enabled generates an NMI on a bus error BERR Assert NMI on PERR Disabled Enabled Enabled generates an NMI on a parity error PERR To activate this feature the system error SERR option must be enabled Assert NMI on ...

Страница 107: ...s software flow control CTS RTS CD is hardware plus carrier detect flow control Table 22 Boot Menu Field Options Description Floppy Check Disabled Enabled If Enabled system verifies the diskette type on boot Disabled results in a faster boot Multi boot Support Disabled Enabled This option should remain enabled unless you install more than eight hard drives in the system Boot Device Priority N A En...

Страница 108: ...espect to the boot sequence For options on this menu use the up or down arrow keys to select a device Press the or keys to move the device higher or lower in the boot priority list Table 24 shows the manner in which the drives are displayed Table 23 Boot Device Priority Submenu Priority Device Description 1 Diskette drive Attempts to boot from drive A 2 Removable devices Attempts to boot from a re...

Страница 109: ...available and their functions Table 25 Exit Menu Command Options Command Description Exit Saving Changes Exits after writing all modified Setup item values to NVRAM Exit Discarding Changes Exits leaving NVRAM unmodified and continues POST You are prompted if any of the Setup fields were modified Load Setup Defaults Loads the default values for all Setup items Load Custom Defaults Loads the setting...

Страница 110: ...ect 1 Boot the computer and press F2 when you see the message Press F2 Key if you want to run Setup 2 Write down the current settings from the BIOS Setup program Obtaining the Upgrade Utility You can upgrade to a new version of the BIOS using the new BIOS files and the BIOS upgrade utility iFLASH EXE You can obtain the BIOS upgrade file and the iFLASH EXE utility through your computer supplier or ...

Страница 111: ...ette type sys a 4 Press ENTER Creating the BIOS Upgrade Diskette The BIOS upgrade file is a compressed self extracting archive that contains the files you need to upgrade the BIOS 1 Copy the BIOS upgrade file to a temporary directory on your hard disk 2 From the C prompt change to the temporary directory 3 To extract the file type the name of the BIOS upgrade file for example 10006BI1 EXE 4 Press ...

Страница 112: ...vities ongoing at the time you begin the BIOS upgrade 1 Boot the server with the diskette in drive A The BIOS upgrade utility screen appears 2 Select Update Flash Memory From a File 3 Select Update System BIOS Press ENTER 4 Use the arrow keys to select the correct bio file Press ENTER 5 When the utility asks for confirmation that you want to flash the new BIOS into memory select Continue with Prog...

Страница 113: ...er then continue with the BIOS upgrade see Upgrading the BIOS on page 98 Changing the BIOS Language You can use the BIOS upgrade utility to change the language the BIOS displays Use a bootable diskette containing the flash utility and language files see Creating the BIOS Upgrade Diskette on page 99 1 Boot the computer with the bootable diskette in drive A The BIOS upgrade utility screen appears 2 ...

Страница 114: ...tion that you want to flash the new language into memory select Continue with Programming Press ENTER 6 When the utility displays the message upgrade is complete remove the diskette Press ENTER 7 Reboot the computer and the changes will take effect 3424 boo Page 102 Wednesday September 2 1998 9 23 AM ...

Страница 115: ...U 109 Launching a Task 111 Resource Configuration Add in Window 112 Using the RCA Window 112 Defining an ISA Board 113 Adding and Removing ISA Boards 114 Modifying Resources 114 System Resource Usage 115 Multiboot Options Add in 115 Security Add in 116 Security Options 117 System Event Log Viewer Add in 118 Sensor Data Record Manager Add In 120 Field Replaceable Unit Manager Add In 122 Exiting the...

Страница 116: ...R Load Utility described in Chapter 7 Other Utilities on page 125 Use to update the Field Replacement Unit FRU Sensor Data Record SDR and Desktop Management Interface DMI flash components BIOS Update Utility described in Chapter 7 Other Utilities on page 125 Use to update the BIOS or recover from a corrupted BIOS update Firmware Update Utility described in Chapter 7 Other Utilities on page 125 Use...

Страница 117: ...DR Allows troubleshooting of the server when the operating system is not operational Provides a system level view of the server I O devices When to Run the SSU The SSU is a DOS based utility that supports extended system configuration operations for onboard resources and expansion cards Use the SSU when you need to Add and remove boards affecting the assignment of resources ports memory IRQs DMA M...

Страница 118: ... memory The configuration values in flash memory take effect when you boot the server POST checks the values against the actual hardware configuration if the values do not agree POST generates an error message You must then run the SSU to specify the correct configuration before the server boots The SSU always includes a checksum with the configuration data so the BIOS can detect any potential dat...

Страница 119: ...r mouse The SSU provides a VGA based GUI on the primary monitor The SSU runs from writable nonwritable removable and nonremovable media If the SSU is run from nonwritable media user preference settings like screen colors cannot be saved The SSU supports the ROM DOS V6 22 operating system It can run on other ROM DOS compatible operating systems but they are not supported The SSU will not operate fr...

Страница 120: ... BIOS Setup From the boot menu select the Boot Device Priority option Select diskette drive as your primary boot device Save those settings and exit the BIOS Setup The server will boot from the diskette drive and display a menu of options Follow the instructions in the menu to start the SSU 3 When the SSU title appears on the screen press ENTER to continue 4 The mouse driver loads if it is availab...

Страница 121: ...NI file so that they take effect the next time you start the SSU Use these four user customizable settings Color lets you change the default colors associated with different items on the screen to predefined color combinations The changes are instantaneous Mode lets you set the desired expertise level Novice Intermediate Expert 3424 boo Page 109 Wednesday September 2 1998 9 23 AM ...

Страница 122: ... a new language setting to take effect you must exit the SSU and restart it Other lets you change other miscellaneous options in the SSU The changes are instantaneous Use the mouse to click on the proper button in the Preferences section of the SSU Main window OR Use the tab and arrow keys to highlight the desired button and press the spacebar or ENTER OR Access the menu bar with the mouse or hot ...

Страница 123: ...e control by commanding the center of operation until you close the task window In the SSU Main window double click on the task name under Available Tasks to display the main window for that task OR Highlight the task name and click OK OR Use the tab and arrow keys to highlight the desired button and press the spacebar or ENTER To Launch a Task 3424 boo Page 111 Wednesday September 2 1998 9 23 AM ...

Страница 124: ...To remove an ISA board highlight the board in the Devices section of the screen before clicking on the button You can add only as many ISA boards as there are ISA slots available 1 From the SSU main window launch the RCA by selecting the Resources task under the RCA heading in the task box 2 When the RCA window appears it displays messages similar to the following Baseboard System Board PCI Card B...

Страница 125: ...that specifies the resources the card requires to function properly If the CFG file is unavailable you must manually create it or define the board through the SSU Defining an ISA board consists of specifying the name of the board and the resources it consumes This allows the RCA to consider the ISA board resource requirements when the RCA tries to resolve conflicts BIOS also uses this information ...

Страница 126: ...ect a valid ISA board in the Devices section of the RCA window 2 Click Remove ISA Board Modifying Resources Modifying the resources of a device may be necessary to accommodate certain operating systems applications and drivers You may also need to modify resources to resolve a conflict 1 Highlight the device in the Devices section of the RCA window 2 Press the spacebar or ENTER or double click on ...

Страница 127: ...k OK System Resource Usage Click Resource Use in the Configuration window to display the System Resource Usage window which shows the resources each device consumes This information is useful if a conflict occurs Devices can be organized according to the resources you want to examine using the options in the Resource section of the screen The resource information can also be written to a plain tex...

Страница 128: ...he password by entering it again in the second field or leave blank to clear 1 Click Administrator Password 2 Enter the password in the first field 3 Confirm the password by entering it again in the second field 1 Click Administrator Password 2 Enter the old password in the first field 3 Enter the new password in the second field or leave blank to clear 4 Confirm the password by entering it again ...

Страница 129: ... into secure mode when no activity occurs during the interval Secure Boot Mode forces the server to boot directly into secure mode Video Blanking turns off the video when the server is in secure mode Floppy Write controls access to the diskette drive when the server is in secure mode Reset Power Switch Locking controls the power and reset buttons when the server is in secure mode 3424 boo Page 117...

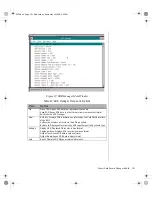
Страница 130: ...ary form Clear SEL entries from the non volatile storage area The SEL viewer main window provides access to features of the add in Each option included on the main menu supports an accelerator key Accelerator keys are indicated by an underlined letter in the text listing the option The main window includes support to display the following information for each SEL entry record identifier event type...

Страница 131: ...ay only All Events Displays the current SEL data from the BMC By Sensor Displays a pop up menu allowing you to view the data from a certain sensor type By Event Displays a pop up menu allowing you to view the data from a certain event type Settings Display Hex Verbose Toggles between Hex interpreted mode of displaying the SEL records Output Text Binary Determines whether SEL data is saved to the f...

Страница 132: ...ecords to a file in either text or binary form The SDR Manager can display SDR records in either raw form hexadecimal or in an interpreted easy to understand textual form verbose The SDR Manager s main window provides access to features of the add in through menus Each option included on the main menu supports an accelerator key Accelerator keys are indicated by an underlined letter in the text li...

Страница 133: ... SDR information as returned by the GetSDRInfo interface of the BMC All Records Displays all records in the SDR repository By Record Displays all records in the SDR repository sorted by record type Settings Display HEX Displays SDR records in Hex format Display Verbose Displays SDR records in verbose format Output Text Saves SDR data in verbose format Output Binary Saves SDR data in binary format ...

Страница 134: ...Inventory areas to a file in either text or binary form The FRU Manager can display the FRU Inventory areas in either raw form hexadecimal or in an interpreted easy to understand textual form verbose The FRU manager s main window provides access to features of the add in through menus Each option included on the main menu supports an accelerator key Accelerator keys are indicated by an underlined ...

Страница 135: ... Manager View FRU Info Displays FRU information of the selected device All FRU Areas Displays FRU areas of all devices By Device Type Displays FRU areas sorted by device type Settings Display HEX Displays FRU areas in Hex format Display Verbose Displays FRU areas in verbose format Output Text Saves FRU data in verbose format Output Binary Saves FRU data in binary format Help About Displays FRU Man...

Страница 136: ...R 9200 Server Exiting the SSU Exiting the SSU causes all windows to close 1 Exit the SSU by opening the file menu in the SSU Main window 2 Click Exit or Highlight Exit and press ENTER To Exit the SSU 3424 boo Page 124 Wednesday September 2 1998 9 23 AM ...

Страница 137: ...dow 134 Server Control Operations 136 Phonebook 140 Management Plug ins 141 FRU and SDR Load Utility 145 When to Run the FRUSDR Load Utility 145 What You Need to Do 145 How You Use the FRUSDR Load Utility 146 Cleaning Up and Exiting 150 Using the Firmware Update Utility 151 Running the Firmware Update Utility 151 Using the Symbios SCSI Utility 152 Running the SCSI Utility 152 3424 boo Page 125 Wed...

Страница 138: ... log SEL setting boot device priority or setting system security options Run the SSU from a set DOS bootable diskettes See What You Need to Do on page 106 to make a set of SSU diskettes Data entered in the SSU overrides data entered in Setup Emergency Management Port EMP Console described in Emergency Management Port Console on page 129 Use the EMP to access and monitor the server remotely FRUSDR ...

Страница 139: ...here is no device with an OS loaded the above message remains for a few seconds while the boot process continues and the system beeps once Then this message appears Operating System not found If you do not press F2 and do have a device with an OS loaded the boot process continues and this message appears Press Ctrl C to enter SCSI Utility 4 Press CTRL C if SCSI devices are installed When the utili...

Страница 140: ...a beep code indicating a critical system error that requires immediate attention If POST can display a message on the video display screen the speaker beeps twice as the message appears Note the screen display and write down the beep code you hear this information is useful for your service representative For a listing of beep codes and error messages that POST can generate see Solving Problems on...

Страница 141: ...ns are available with the console manager Connecting to remote servers Powering the server on or off Resetting the server Switching the server console between EMP active and BIOS re direct modes The console manager uses three management plug ins to monitor the server the SEL SDR and FRU viewers The console manager also has a support plug in phonebook which you can use to create and maintain a list...

Страница 142: ...es in redirect state When connecting to a server the EMP console checks to determine the current COM2 port state Command state the default COM2 state Figure 34 In this state the EMP console communicates with the server firmware allowing the client to remotely reset or power the server up or down The client can also view the server SEL FRU information or SDR table Figure 34 EMP Console in Command S...

Страница 143: ...nd run DOS text mode applications through the EMP console terminal window Figure 35 EMP Console in Redirect State Figure 35 shows the EMP console window in redirect state with the terminal window The text that appears on the server monitor is also displayed in the redirect window Availability of the various EMP console features is determined by two things the EMP access mode selected during config...

Страница 144: ...w appears but is blank Redirect window Redirect window Pre boot EMP commands available Redirect window Redirect window Always Active EMP commands available Redirect window EMP commands available You can modify the operation mode by selections in the POST reset and POST power up dialogs These are server control dialogs available with the EMP Console Table 30 EMP Console Access Modes Server not Conf...

Страница 145: ...t to it Setting Up the Server for the EMP To use the EMP you must configure the BIOS with specific settings Enter these settings in two submenus of the BIOS Server Menu the System Management Submenu System Management Submenu on page 94 and the Console Redirect Submenu Console Redirection Submenu on page 94 The sections below focus on the settings that must be configured to use the EMP System Manag...

Страница 146: ...chine If they are connected via a modem select Modem Mode Console Redirection Submenu To use the EMP you must set the following options exactly as noted COM Port Address Select 2F8 This is the COM2 port that the EMP must use The IRQ setting is automatically assigned with the correct number based on the COM port address choice Baud Rate Select 19 2k Console Type Choose PC ANSI Flow Control Choose C...

Страница 147: ...ontains the following status information Server Name The name of the connected server Line The type of line connection direct or modem Table 31 Toolbar Buttons Connects to a selected server Disconnects from the currently connected server Powers the selected server on or off Resets the selected server Opens the SEL viewer Opens the SDR viewer Opens the FRU viewer Opens the Phonebook Opens online he...

Страница 148: ...ed server Action Power On Off Powers the server on or off with POST power up options Reset Resets the server with POST reset options SEL Viewer Opens the SEL viewer SDR Viewer Opens the SDR viewer FRU Viewer Opens the FRU viewer Phonebook Opens the phonebook dialog Help Provides version information and help topics for the EMP console Server Control Operations Three server control operations are av...

Страница 149: ...able in the dialog are Line Selection Allows distinction between direct or dial up modem connection to the server Dial up Connects to a selected server with a modem Direct connect Serial Line Connects to the selected server directly using a null modem serial cable Server Displays a list of available servers in a dropdown edit list box You can select or enter a server name a server must be selected...

Страница 150: ...erver on or off with POST power up options It generates the Power on off dialog Figure 37 Figure 37 Power On Off Dialog Options available in the dialog are Power ON Powers on the server Power OFF Powers off the server This option is not allowed if the server is configured in restricted mode for EMP operations Post power up option Sets the server mode EMP active or BIOS redirection The setting is e...

Страница 151: ... System Reset Resets the server with the selected POST reset options This operation is not allowed if the server is configured in restricted mode for EMP operations Option Group Sets the POST reset option that will be effective after reset The options are EMP active or BIOS redirection The default selection is EMP active Cancel Exits the dialog with no action taken Help Displays dialog level help ...

Страница 152: ... stored in the phonebook If the New radio button is selected in the Operation area the server area is cleared Phone No Displays the number of the selected server If the New radio button is selected in the Operation area this area is cleared Operation New Makes a new entry in the phonebook Selecting this option clears the Server and Phone No fields You must click Save to add the entry to the phoneb...

Страница 153: ...Server dropdown edit box Cancel Exits the dialog with no action taken Help Displays dialog level help information Management Plug ins System Event Log Viewer The system event log SEL viewer can display records in either hexadecimal or text verbose form These options are available through the SEL viewer View the SEL from a file Save the SEL to a file View SEL summary information View all SEL entrie...

Страница 154: ...sole Connect View SEL Information Displays SEL summary information All Events Displays all events in the SEL By Sensor Type Displays all events in the SEL generated by a specific sensor type e g voltage temperature etc By Event Displays all events in the SEL of a particular type for example by memory or threshold A pop up menu lets you select the event type to display This menu displays all event ...

Страница 155: ...Exit Exits the EMP console View Display all Records Displays all records from the SDRR SDR Type Displays the records of a particular SDR type Select an SDR type from a pop up menu that displays all of the SDR types available for the hardware SDR Info Displays the SDR summary information Settings Lets you change operating parameters for the SDR viewer This menu displays the following suboption Disp...

Страница 156: ...u bar File Close Closes the FRU viewer Exit Exits the EMP console View Display all Records Displays all FRU data which consist of chassis board and product information FRU Info Displays the FRU summary information Settings Lets you change operating parameters for the FRU viewer This menu displays the following suboption Display HEX Verbose Toggles between HEX mode and interpreted mode of displayin...

Страница 157: ...ou should run the FRUSDR load utility each time you upgrade or replace the hardware in your server excluding expansion cards hard drives and RAM For example if you replace an array of fans you need to run the utility It programs the sensors that need to be monitored for server management Because the utility must be reloaded to properly initialize the sensors after programming turn the server off a...

Страница 158: ...es several keys Table 32 lists the keys and their definitions The basic command line format is frusdr h d dmi fru sdr cfg filename cfg fru filename fru Parsing the Command Line The FRUSDR load utility allows only one command line function at a time A command line function can consist of two parameters Example cfg filename cfg Invalid parameters cause an error message and exit the Table 32 Command ...

Страница 159: ...ver should be rebooted The system displays the following information if the v option is included in the command line The D FRU command may be followed with up to 16 device addresses These device addresses are used to view up to 16 different FRU areas instead of the default of displaying the BMC FRU The arguments following the d FRU are in the same order and value as the NVS_TYPE NVS_LUN DEV_BUS an...

Страница 160: ...e FRU Area The FRU area is displayed in ASCII format when the field is ASCII or as a number when the field is a number Each FRU area displayed is headed with the FRU area designated name Each field has a field name header followed by the field in ASCII or as a number The board chassis and product FRU areas end with an END OF FIELDS CODE that indicates there are no more data in the area The interna...

Страница 161: ...nto nonvolatile storage Displaying the Utility Title and Version The utility displays its title FRU SDR Load Utility Version 2 0 Revision X XX where X XX is the revision number for the utility Configuration File The configuration file is in ASCII text The utility executes commands formed by the strings present in the configuration file These commands cause the utility to run tasks needed to load t...

Страница 162: ... the FRU Nonvolatile Storage Area After the configuration is determined the utility updates the FRU nonvolatile storage area First it verifies the common header area and checksum from the specified FRU file The internal use area is read out of the specified FRU file and is programmed into the nonvolatile storage The chassis area is read out of the specified FRU file Finally it reads the product ar...

Страница 163: ...boot to it 4 At the DOS prompt run the executable file FWUPDATE EXE 5 The utility displays a menu screen Select Upload Flash 6 The utility asks for a file name Enter the name of the HEX file 7 The program loads the file and then asks if it should upload the boot block Press N to continue 8 The program next asks if it should upload the operational code Press Y to continue 9 Once the operational cod...

Страница 164: ...ility to Change default values Check and or change SCSI device settings that may conflict with those of other devices in the server Running the SCSI Utility When this message appears on the monitor Press Ctrl C to run SCSI Utility Press CTRL C to run the utility When it appears choose the host adapter that you want to configure 3424 boo Page 152 Wednesday September 2 1998 9 23 AM ...

Страница 165: ...guration 158 Troubleshooting Guidelines 158 Solving Problems 159 Resetting the System 159 Initial System Startup 159 Running New Application Software 160 The System Has Been Running Correctly 161 More Problem solving Procedures 162 Specific Problems and Corrective Actions 164 Error and Informational Messages 170 POST Codes and Countdown Codes 170 POST Error Codes and Messages 173 3424 boo Page 153...

Страница 166: ...or occurs within an application consult the documentation supplied with the software This section identifies solutions to common problems If the suggestions in this chapter do not resolve your problem try calling Technical Support Note Under no circumstances return any equipment without obtaining a Return Material Authorization RMA number 3424 boo Page 154 Wednesday September 2 1998 9 23 AM ...

Страница 167: ...files of programs such as word processing and spreadsheet programs Boot viruses attach themselves to a boot record master boot FAT or partition table Multipartite viruses are both program and boot infectors Virus Contamination There are many ways a virus can spread and infect your system However a virus is inactive until the infected program is executed or a boot record is read Thereafter the viru...

Страница 168: ...ing an anti virus program Next reboot your system as follows shut the system down then turn it off for at least 15 seconds before turning it back on This is the only way to ensure the virus does not remain in your system RAM Virus Prevention We stand by the integrity of our products Our staff takes every precaution to ensure our files are free from viruses These precautions include the following W...

Страница 169: ...fortunately today s technology makes the creation of newer viruses possible some of which can elude even the best scanners available Hence there is no absolute guarantee of virus immunity on any product If you think you have received an infected product from us please contact Technical Support Our staff will assist you in correcting the problem 3424 boo Page 157 Wednesday September 2 1998 9 23 AM ...

Страница 170: ...em keep the following guidelines in mind Never remove the system cover while the system is turned on Do not attempt to open the monitor it is extremely dangerous Even if the monitor s power is disconnected stored energy within the monitor s components can offer a painful or harmful experience If a peripheral such as the keyboard mouse drive or printer does not appear to work verify that all connec...

Страница 171: ...correct installation or configuration Hardware failure is a less frequent cause Checklist Are all cables correctly connected and secured Are all cables correctly connected and secured Are the processors fully seated in their slots on the system board Are all ISA and PCI cards fully seated in their slots on the system board Are all switch and jumper settings on the system board correct Table 33 Sys...

Страница 172: ...he system power on off switch on the front panel to turn the server on power on light should be lit Are the system power cords properly connected to the system and plugged into a NEMA 5 15R outlet for 100 120 V or a NEMA 6 15R outlet for 200 240 V Is AC power available at the wall outlet If these items are correct but the problem recurs see Solving Problems on page 159 Running New Application Soft...

Страница 173: ...oftware from a CD ROM try a different disc to see if the problem occurs on all disks If you run the software from a hard drive run it from a diskette If the software runs correctly there is a problem with the copy on the hard drive Reinstall the software on the hard drive and run it again Make sure all necessary files are installed If the problems are intermittent there may be a loose cable dirt i...

Страница 174: ...ded AC outlet 3 Make sure your video display monitor and keyboard are correctly connected to the system Turn on the video monitor Set its brightness and contrast controls to at least two thirds of their maximum ranges see the documentation supplied with your video display monitor 4 If the operating system normally loads from the hard disk drive make sure there is no diskette in drive A Otherwise p...

Страница 175: ...vice is checked its activity light should turn on briefly Check for the following Does the diskette drive activity light turn on briefly If not see Diskette Drive Activity Light Does Not Light on page 167 If a second diskette drive is installed does its activity light turn on briefly If not see Diskette Drive Activity Light Does Not Light on page 167 If there is a hard disk drive or SCSI devices i...

Страница 176: ...s not light Hard disk drive activity light does not light CD ROM drive activity light does not light Problems with application software The startup prompt Press F2 key if you want to run Setup does not appear on the screen The bootable CD ROM is not detected Try the solutions in the order given If you cannot correct the problem contact Technical Support for assistance Power Light Does Not Light Ch...

Страница 177: ...onitors shut down when inactive and may require a moment to warm up when activated Are the brightness and contrast controls on the video monitor properly adjusted Are the video monitor switch settings correct Is the video monitor signal cable properly installed Is the onboard video controller enabled If you are using an add in video controller board you may need to perform some additional checks 1...

Страница 178: ...ncorrect Check the following Are the brightness and contrast controls properly adjusted on the video monitor See the manufacturer s documentation Are the video monitor signal and power cables properly installed Is the correct monitor video board installed for your operating system If the problem persists the video monitor may be faulty or it may be the incorrect type Contact Technical Support for ...

Страница 179: ...s Not Light Check the following Are the diskette drive power and signal cables properly installed Are all relevant switches and jumpers on the diskette drive set correctly Is the diskette drive properly configured Is the diskette drive activity light always on If so the signal cable may be plugged in incorrectly If you are using the onboard diskette controller use the SSU to make sure that Onboard...

Страница 180: ...levant switches and jumpers on the drive set correctly Is the drive properly configured Is the onboard IDE controller enabled Network Problems If you have network problems consult the documentation that came with the network board installed in the server PCI Installation Tips Some common PCI tips are listed here Reserve interrupts IRQs and or memory addresses specifically for ISA adapters This pre...

Страница 181: ...the software installation and operation documentation for instructions on setting up and using the software Try a different copy of the software to see if the problem is with the copy you are using Make sure all cables are installed correctly Verify that the system board jumpers are set correctly See Setting the Jumpers on page 72 If other software runs correctly on the system contact your vendor ...

Страница 182: ...ngs are listed in Table 34 Table 34 Port 80h Codes and Beep Codes Port 80 Codes Beep Codes Error Descriptions 02 Verify Real Mode 04 Get processor type 06 Initialize system hardware 08 Initialize chipset registers with initial POST values 09 Set in POST flag 0A Initialize processor registers 0B Enable processor cache 0C Initialize caches to initial POST values 0E Initialize I O 0F Initialize the l...

Страница 183: ...Initialize manager for PCI Option ROMs 48 Check video configuration against CMOS 49 Initialize PCI bus and devices 4A Initialize all video adapters in system 4B Display QuietBoot screen 4C Shadow video BIOS ROM 4E Display copyright notice 50 Display processor type and speed 51 Initialize EISA board 52 Test keyboard 54 Set key click if enabled 56 Enable keyboard 58 2 2 3 1 Test for unexpected inter...

Страница 184: ...o UserPatch2 93 Build MPTABLE for multi processor boards 94 Disable A20 address line 95 Install CD ROM for boot 96 Clear huge ES segment register 98 1 2 Search for option ROMs One long two short beeps on checksum failure 9A Shadow option ROMs 9C Set up Power Management 9E Enable hardware interrupts A0 Set time of day A2 Check key lock A4 Initialize typematic rate A8 Erase F2 prompt AA Scan for F2 ...

Страница 185: ...rocessor 1 0165 BIOS does not support current stepping for processor 2 0200 Failure Fixed Disk 0210 Stuck Key 0211 Keyboard error 0212 Keyboard Controller Failed 0213 Keyboard locked Unlock key switch 0220 Monitor type does not match CMOS Run SETUP 0230 System RAM Failed at offset 0231 Shadow RAM Failed at offset 0232 Extended RAM Failed at offset 0250 System battery is dead Replace and run SETUP ...

Страница 186: ...ilure 8105 Processor 1 Internal Error IERR failure 8106 Processor 0 Thermal Trip failure 8107 Processor 1 Thermal Trip failure 8108 Watchdog Timer failed on last boot BSP switched 810A Processor 1 failed initialization on last boot 810B Processor 0 failed initialization on last boot 810C Processor 0 disabled system in uniprocessor mode 810D Processor 1 disabled system in uniprocessor mode 810E Pro...

Страница 187: ...Appendix A Reference Data Contents Specifications 176 System I O Addresses 178 Memory Map 181 Interrupts 182 Video Modes 183 DMA Usage 187 3424 boo Page 175 Wednesday September 2 1998 9 23 AM ...

Страница 188: ...nboard narrow and onboard wide SCSI controller and a full complement of I O ports Dimensions 19 0 H x 12 25 W x 25 0 D 85 100 lbs Processor Intel Pentium II Xeon processor Processor speed 400 or 450 MHz Processor upgrade Slot 2 Cache subsystem 512 KB 1 MB or 2 MB level 2 ECC cache RAM 256 MB standard 4 GB maximum BIOS Intel IDE interfaces One supporting two IDE devices Diskette drive 1 44 MB 3 5 i...

Страница 189: ...titude 10 000 ft max Humidity Nonoperating 95 relative noncondensing 30 C 86 F Operating wet bulb Not to exceed 33 C 91 4 F with diskette drive or hard disk drive Shock Operating 2 0 g 11 msec 1 2 sine Packaged Operational after 30 inch free fall cosmetic damage might occur Acoustic noise 50 dBA w two power supplies at 28 C 2 C 55 dBA w three power supplies at 28 C 2 C Electrostatic discharge ESD ...

Страница 190: ... 0021h 002Eh 002Fh Super I O Index and Data Ports 0030h 0031h Interrupt Controller 1 PIIX4E Aliased from 0020h 0021h 0032h 0033h 0034h 0035h Interrupt Controller 1 PIIX4E Aliased from 0020h 0021h 0036h 0037h 0038h 0039h Interrupt Controller 1 PIIX4E Aliased from 0020h 0021h 003Ah 003Bh 003Ch 003Dh Interrupt Controller 1 PIIX4E Aliased from 0020h 0021h 003Eh 003Fh 0040h 0043h Programmable Timers PI...

Страница 191: ...Interrupt Controller 2 PIIX4E 00A4h 00A15 Interrupt Controller 2 PIIX4E Aliased 00A8h 00A19 Interrupt Controller 2 PIIX4E Aliased 00Ach 00Adh Interrupt Controller 2 PIIX4E Aliased 00B0h 00B1h Interrupt Controller 2 PIIX4E Aliased 00B2h Advanced Power Management Control PIIX4E 00B3h Advanced Power Management Status PIIX4E 00B4h 00B5h Interrupt Controller 2 PIIX4E Aliased 00B8h 00B9h Interrupt Contr...

Страница 192: ... Controller 03E8h 03EFh Serial Port A 03F0h 03F5h Diskette Controller 03F6h 03F7h Primary IDE Sec Diskette 03F8h 03FFh Serial Port A Primary 0400h 043Fh DMA Controller 1 Extended Mode Registers PIIX4E 04D0h 04D1h Interrupt Controllers 1 and 2 Control Register 0678h 067Ah Parallel Port ECP 0778h 077Ah Parallel Port ECP 07BCh 07BEh Parallel Port ECP 0CA0 CA3h BMC Registers 0CF8h PCI CONFIG_ADDRESS R...

Страница 193: ...n base system memory 0A0000h to 0BFFFFh 128 KB Video or SMM memory 0C0000h and 0DFFFFh 128 KB Expansion card BIOS and buffer area 0E0000h to 0FFFFFh 128 KB System BIOS 0E0000h to 0EFFFFh 2 MB Extended system BIOS FC000000h to FFFFFFFFh 64 MB PCI memory space 3424 boo Page 181 Wednesday September 2 1998 9 23 AM ...

Страница 194: ... 8259 in PIIX4E IRQ3 INT3 Serial port A or B interrupt from SIO device you can configure either IRQ4 INT4 Serial port A or B interrupt from SIO device you can configure either IRQ5 INT5 Parallel port II IRQ6 INT6 Diskette port IRQ7 INT7 Parallel port IRQ8_L INT8 RTC interrupt IRQ9 INT9 Signal control interrupt SCI used by ACPI compliant operating system IRQ10 INT10 IRQ11 INT11 IRQ12 INT12 Mouse in...

Страница 195: ...0 25 31 5 70 7 4 Mono 720 X 400 28 31 5 70 D 4 16 256K 320 X 200 12 5 31 5 70 E 4 16 256K 640 X 200 25 31 5 70 F 4 Mono 640 X 350 25 31 5 70 10 4 16 256K 640 X 350 25 31 5 70 11 4 2 256K 640 X 480 25 31 5 60 12 4 16 256K 640 X 480 25 31 5 60 12 4 16 256K 640 X 480 31 5 37 5 75 13 8 256 256K 320 X 200 12 5 31 5 70 Table 41 Extended VGA Modes Mode in Hex Bits Pixel Colors Palette Size Resolution Pix...

Страница 196: ...4 X 768 113 3 81 4 100 1MB 64 16 64K 640 X 480 25 31 5 60 1MB 64 16 64K 640 X 480 31 5 37 9 72 1MB 64 16 64K 640 X 480 31 5 37 5 75 1MB 64 16 64K 640 X 480 36 43 3 85 1MB 64 16 64K 640 X 480 43 2 50 9 100 1MB 65 16 64K 800 X 600 36 35 2 56 1MB 65 16 64K 800 X 600 40 37 8 60 1MB 65 16 64K 800 X 600 50 48 1 72 1MB 65 16 64K 800 X 600 49 5 46 9 75 1MB 65 16 64K 800 X 600 56 25 53 7 85 1MB 65 16 64K 8...

Страница 197: ... 5 100 2MB 71 24 16M 640 X 480 25 31 5 60 1MB 71 24 16M 640 X 480 31 5 37 9 72 1MB 71 24 16M 640 X 480 31 5 37 5 75 1MB 71 24 16M 640 X 480 36 43 3 85 1MB 71 24 16M 640 X 480 43 2 50 9 100 1MB 74 16 64K interlaced 1024 X 768 44 9 35 5 43 2MB 74 16 64K 1024 X 768 65 48 3 60 2MB 74 16 64K 1024 X 768 75 56 70 2MB 74 16 64K 1024 X 768 78 7 60 75 2MB 74 16 64K 1024 X 768 94 5 68 3 85 2MB 74 16 64K 1024...

Страница 198: ...4 121 5 76 7 85 1MB 7C 8 256 256K 1152 X 864 143 5 91 5 100 1MB 7D 16 64K 1152 X 864 94 5 63 9 70 2MB 7D 16 64K 1152 X 864 108 67 5 75 2MB 7D 16 64K 1152 X 864 121 5 76 7 85 2MB 7D 16 64K 1152 X 864 143 5 91 5 100 2MB Table 41 Extended VGA Modes Continued Mode in Hex Bits Pixel Colors Palette Size Resolution Pixel Freq MHz Horiz Freq kHz Vert Freq Hz Memory 3424 boo Page 186 Wednesday September 2 ...

Страница 199: ...nels that the system typically uses and which ones are available for use by add in devices Table 42 DMA Usage DMA Resource 0 Cascade 1 Available 2 Floppy Controller 3 Available 4 Redirect Cascade 5 Available 6 Available 7 Available 3424 boo Page 187 Wednesday September 2 1998 9 23 AM ...

Страница 200: ...188 Maintaining and Troubleshooting the Gateway ALR 9200 Server 3424 boo Page 188 Wednesday September 2 1998 9 23 AM ...

Страница 201: ...ctromagnetic Compatibility 190 FCC Notice 191 Industry Canada Notice 192 CE Notice 192 VCCI Notice 193 Australia New Zealand Notice 193 Declaration of the Manufacturer or Importer 194 Safety Compliance 194 3424 boo Page 189 Wednesday September 2 1998 9 23 AM ...

Страница 202: ...eral nations and regions Table 43 EMC Standards Nation or Region Standards USA FCC CFR 47 Part 15 Class A Canada IC ICES 003 Class A Europe EN55022 Class A EN50082 1 IEC 801 2 ESD Susceptibility IEC 801 3 Radiated Immunity IEC 801 4 Electrical Fast Transient EN61000 3 2 Limit for Harmonic Current Emissions International CISPR 22 Class A Japan VCCI Class A CISPR 22 A limit 3424 boo Page 190 Wednesd...

Страница 203: ...ence to radio and television reception which can be determined by turning the equipment off and on the user is encouraged to try to correct the interference by one or more of the following measures Reorient or relocate the receiving antenna Increase the separation between the equipment and receiver Connect the equipment into an outlet on a circuit different from that to which the receiver is conne...

Страница 204: ...que édicté par Industrie Canada Attention Couper le courant avant l entretien CE Notice This Information Technology Equipment has been tested and found to comply with the following European directives i EMC Directive 89 336 EEC amending Directives 92 31 EEC 93 68 EEC as per EN 50081 1 1992 according to EN 55022 1995 Class A EN 61000 3 2 1995 or EN 60555 2 1986 EN 61000 3 3 1995 EN50082 1 1992 acco...

Страница 205: ...o disturbance may arise When such trouble occurs the user may be required to take corrective action Australia New Zealand Notice This device has been tested and found to comply with the limits for a Class A digital device pursuant to the Australian New Zealand standard AS NZS 3548 set out by the Spectrum Management Agency Japanese Users Australian and New Zealand Users 3424 boo Page 193 Wednesday ...

Страница 206: ...s and regions Caution This system may include more than one power supply You must disconnect all power supplies before servicing Table 44 Safety Compliance Standards Nation or Region Standards USA UL 1950 CSA 950 95 3rd Edition Canada UL certified to CSA 950 95 for Canada product bears the single UL mark for U S and Canada Europe German GS Mark ERG to EN60950 2nd Edition with amendments Internatio...

Страница 207: ...enu Setup menu 87 Assert NMI on AERR Setup field 94 Assert NMI on BERR Setup field 94 Assert NMI on PERR Setup field 94 Assert NMI on SERR Setup field 94 B Base I O Address Setup field diskette controller 90 floppy disk controller 90 parallel port 90 serial port A 89 serial port B 90 base memory 24 Base RAM Step Setup field 91 basic input output system see BIOS battery replacing 68 system 15 troub...

Страница 208: ... Fixed Disk Boot Sector field 92 Floppy Check field 95 Floppy disk controller field 90 floppy disk drive A 85 floppy disk drive B 85 Floppy Write Protect field 93 Flow Control field 95 Hard Disk Pre delay field 85 Hard Drive field 95 hard drive menu 96 Heads field 86 I O Device Configuration field 87 I O device configuration menu 89 Interrupt field parallel port 90 Interrupt field serial port A 89...

Страница 209: ...tion Data field 87 Restreaming Buffer field 91 Sectors field 86 Secure Mode Boot field 93 Secure Mode Hot Key Ctrl Alt field 93 Secure Mode Timer field 92 security menu 92 Serial Port A field 89 Serial Port B field 89 Server Management Mode field 94 server menu 93 Set Administrator Password field 92 Set User Password field 92 special display items 84 starting Setup 82 System Backup Reminder field ...

Страница 210: ...r Event Logging Setup field 94 clearing administrator password in the SSU 116 user password in the SSU 116 Client Configuration EMP Console 132 closing chassis 7 electronics bay 7 subchassis 7 system 7 CMOS memory 13 setting defaults 74 COM Port Address EMP Console 134 Setup field 94 command line format FRU and SDR load utility 146 parsing FRU and SDR load utility 146 command state EMP Console 130...

Страница 211: ...ultiprocessor capability 21 power support 20 removing 33 removing termination card 36 replacing 32 second level cache 21 see also processor slots 21 supported 10 customizing the SSU 109 Cylinders Setup field 86 D defining an ISA board in the SSU 113 diagnostic testing preparing the system 162 DIMM banks 23 installation sequence 24 installing 43 removing 41 supported 10 23 Direct Connect Configurat...

Страница 212: ...ctromagnetic compatibility see EMC electromagnetic interference see EMI electronics bay closing 7 defined 5 opening 5 EMC compatibility 190 compliance with standards 194 emergency management port see EMP EMI shield removing 50 EMP Console Baud Rate 134 Client Configuration 132 COM Port Address 134 command state 130 connect to remote server 137 console redirection menu 134 Console Type 134 Direct C...

Страница 213: ... testing a video controller 165 expansion slot connectors 15 ISA 15 PCI 16 PCI A 16 PCI B 16 shared 16 extended data output see EDO extended memory 24 Extended RAM Step Setup field 91 extended VGA modes supported 183 external IPMB connector 18 F F16 expansion connector 18 fan failure monitoring 16 installing for high power SCSI drives 57 installing system fan 62 installing high power drives 57 ins...

Страница 214: ...cs controller 10 guidelines troubleshooting 158 H Hard Disk Pre delay Setup field 85 Hard Drive input connector 14 Setup field 95 Setup menu 96 hard drive fans for high power drives 57 heatsinks on high power drives 54 Heads Setup field 86 heatsink high power drives 54 processor 32 36 high power drives fans 57 heatsinks 54 hot swapping power supply modules 65 SCSI drive 56 how the EMP Console work...

Страница 215: ...4 75 Recovery Boot 14 75 set CMOS to system defaults 74 setting 73 system board 13 K Key Click Setup field 87 key commands Setup 84 keyboard booting without one 29 port 19 Keyboard auto repeat delay Setup field 87 Keyboard auto repeat rate Setup field 87 Keyboard Features Setup field 85 Setup menu 87 L L2 Cache Setup field 91 LAN wake on LAN connector 14 Language changing in the BIOS 101 Setup fie...

Страница 216: ...nus Setup 83 Messaage Timeout Multiplier Setup field 95 Mode Setup field parallel port 90 Setup field serial port B 90 Modem configuration EMP Console 133 modifying resources in the SSU 114 modules power supply 65 monitor supported 19 monitoring chassis intrusion 18 fan speeds 18 POST 163 temperature 18 voltages 18 mouse port 19 Multiboot Options Add in SSU 115 Multi boot Support Setup field 95 Mu...

Страница 217: ...ts 16 installation tips 168 PCI A expansion slots 16 PCI B expansion slots 16 PCI Configuration Setup field 87 Setup menu 88 PCI Device Embedded SCSI Setup field 88 Setup menu 88 PCI Devices Setup field 89 Setup menu 89 peripheral component interconnect see PCI phonebook EMP Console 140 Plug and Play OS Setup field 87 port I O 10 keyboard 19 mouse 19 USB 20 video 18 Port 80h codes 170 POST codes 1...

Страница 218: ...g the system 159 Recovery Boot jumper 14 75 recovery flash BIOS 101 redirect state EMP Console 131 regulatory specifications electromagnetic compatibility 190 safety compliance 194 Removable Devices Setup field 95 removing 5 25 inch drive 52 access cover 3 adapter card 64 add in board 64 DIMMs 41 diskette drive 45 EMI shield 50 expansion card 64 fan assembly 60 foam covers 60 foam fan cover 60 ISA...

Страница 219: ...rocessor cartridge 10 second level cache 21 Sectors Setup field 86 secure boot mode summary 28 secure mode 17 Secure Mode Boot Setup field 93 SecureModeHotKey Ctrl Alt Setup field 93 Secure Mode Timer Setup field 92 secure mode setting up in the SSU 27 security Administrator Password is Setup field 92 adminstrator password 28 boot without keyboard 29 both user and administrator passwords set 27 ch...

Страница 220: ...er management module see SMM server management managing the server 10 Set Administrator Password Setup field 92 Set User Password Setup field 92 setting administrator password in the SSU 116 CMOS defaults 74 floppy drive A 85 floppy drive B 85 jumpers 73 recording BIOS settings 98 recording settings 81 server for EMP 133 user password in the SSU 116 Setup access 82 advanced chipset control menu 91...

Страница 221: ...er PCI device embedded SCSI 88 Latency Timer PCI devices 89 LBA Mode Control 86 Legacy Diskette A 85 Legacy Diskette B 85 Load Custom Defaults 97 Load Setup Defaults 97 Maximum Capacity 86 Maximum Number of I2O Drives 95 Memory Scrubbing 91 Message Timeout Multiplier 95 Mode parallel port 90 Mode serial port B 90 Multi boot Support 95 Multi Sector Transfers 86 Num Lock 87 Option ROM Scan PCI devic...

Страница 222: ...when to use 81 shared expansion slots 16 sharing power between modules 65 side panel installing 8 removing 3 replacing 8 single edge contact see SEC single ended SCSI see SE SCSI slot II connector system board 21 small computer systems interface see SCSI SMBus connector 18 SMI generating 17 SMM connector 18 software problems with applications 169 security features 28 trouble with new 160 solving p...

Страница 223: ...user password 116 starting 108 using 105 using the RCA window 112 when to use 81 105 standard VGA modes supported 183 starting Setup 82 SSU 108 static electricity precautions 2 status bar EMP Console 135 subchassis closing 7 defined 5 opening 5 super video graphics array see SVGA supported CPUs 10 DIMMs 10 extended VGA modes 183 memory 10 monitors 19 processors 10 RAM 10 standard VGA modes 183 vid...

Страница 224: ...ted 169 CD ROM drive activity light does not light 168 characters are distorted or incorrect 166 checklist 158 confirming operating system load 164 diskette drive activity light does not light 167 flash update recovery 75 flash update recovery beep codes 76 guidelines 158 hard disk drive activity light does not light 168 initial system startup 159 network problems 168 new battery 69 no beep codes ...

Страница 225: ...ng the configuration 158 VGA extended modes supported 183 standard modessupported 183 video blanking 17 connector 18 controller 10 installing drivers 77 memory installed 10 modes supported 183 supported resolutions 19 SVGA controller 10 Video Blanking Setup field 93 Virus Check Reminder Setup field 92 virus notice 155 voltage monitoring 16 18 voltage regulator module see VRM VRM connectors 20 seco...

Страница 226: ...214 Maintaining and Troubleshooting the Gateway ALR 9200 Server 3424 boo Page 214 Wednesday September 2 1998 9 23 AM ...

Отзывы: