-56-
Appendix
Setting The System ID
Setting The System ID
Setting The System ID
Setting The System ID
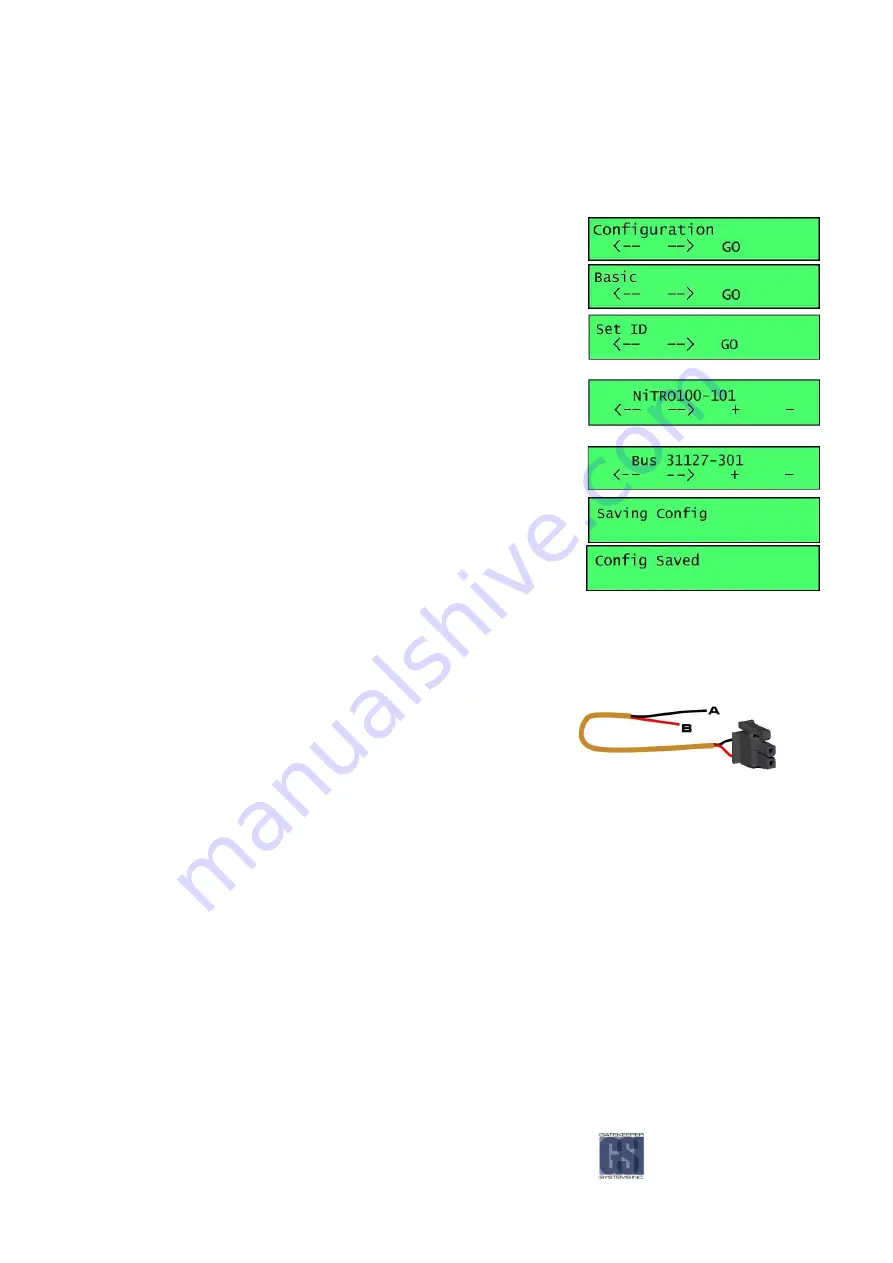
Once the system has booted and is in Record mode, press the button directly
below either the Right or Left pointing arrow until you see Configuration. Press
the GO button.
Cycle through the options until you see Basic listed, Press the GO button.
Cycle through these options until you see Set ID, Press the GO button.
Clear the long serial number from the screen by pressing the ‘-‘ button. To
change a character use the + and – buttons to cycle through until you see the
character you require. Use the Left and Right arrow button to advance or go
back. Repeat this sequence until you have the desired name. To create a space
cycle through the characters until the end of all the lower case letters.
Once the ID has been set, press the BLUE menu button to the left of the LCD.
Once the BLUE menu button has been pressed you will see the screen change to
Saving Config.
A confirmation screen will appear stating Config Saved. Continue through the
BASIC menu to change and confirm all parameters you need.
Main Power Harness.
Main Power Harness.
Main Power Harness.
Main Power Harness.
The Main Power Harness Cable contains two wires
A Negative Wire. B Positive Wire.
Please ensure Main Power Cable is hooked up before any battery cut-off or isolation circuits.
A.
A.
A.
A.
Hook the Black wire directly to the Negative Battery
Terminal.
B.
B.
B.
B.
Connect the RED wire directly to the Positive Battery
Terminal. Ensure that the 15 AMP fuse is in-line
between the Red wire and the Positive Battery
Terminal.
NOTE:
NOTE:
NOTE:
NOTE: The 15 AMP Fuse must be pulled when jump starting the bus battery, or, when doing electrical work. Failure to
comply with these instructions may result in the warranty being voided.
Содержание Digital Smart Recorder NiTRO 900
Страница 1: ...NiTRO 900 Manual Version 1 8 1 1 Safety Security Peace of Mind...
Страница 58: ...58 Notes Notes Notes Notes...
Страница 59: ...59...
Страница 60: ...60...


