


-38-
MAXVIEW™ will not automatically open in Windows Vista and restricted Windows XP setups. Please see
Manually Installing the Viewer on Page 52.
Manually Installing
Manually Installing
Manually Installing
Manually Installing MAXVIEW
MAXVIEW
MAXVIEW
MAXVIEW™
™
™
™....
MAXVIEW™ will not automatically open in Windows Vista and restricted Windows XP setups when the comrad™ is plugged
into the PC. To manually install MAXVIEW™, open Windows Explorer by right clicking with your mouse on the START menu
and selecting Explore.
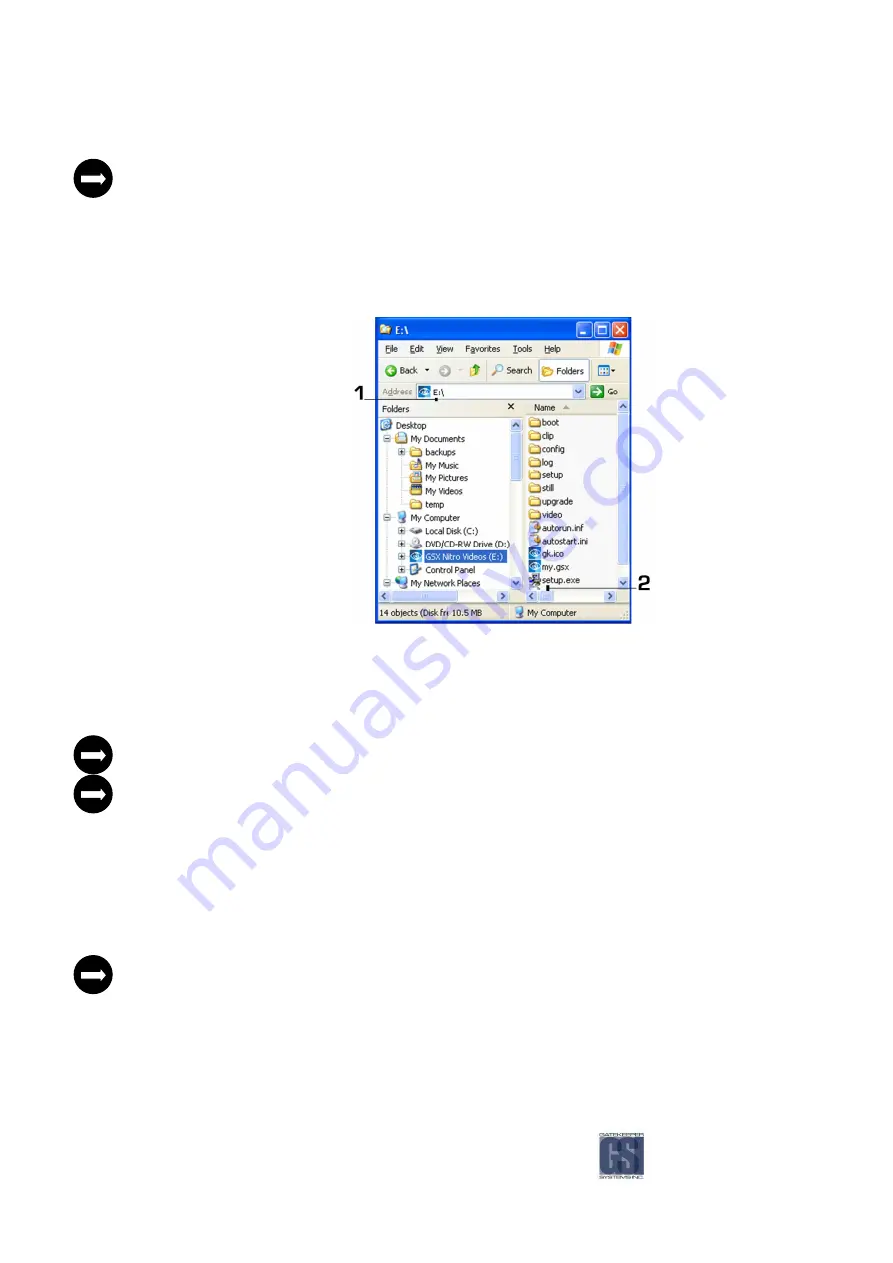
Locate the NiTRO comrad™ in Windows Explorer.
1.
1.
1.
1.
Address Bar
Address Bar
Address Bar
Address Bar
2.
2.
2.
2.
setup.exe
setup.exe
setup.exe
setup.exe
Figure
Figure
Figure
Figure 24
24
24
24:
: :
: Manually Installing
Manually Installing
Manually Installing
Manually Installing MAXVIEW
MAXVIEW
MAXVIEW
MAXVIEW™
™
™
™....
Once you have located the NiTRO™ comrad™ in Windows Explorer, double click on the NiTRO™ comrad™
Install MAXVIEW™ software by double clicking on the setup.exe file. Refer to MAXVIEW™ Installation section for details on
installing the viewer. When the installation is complete, MAXVIEW™ will automatically open with all video files
For first time connection, you will need to install MAXVIEW™ software by double clicking on the setup.exe
setup.exe
setup.exe
setup.exe file.
Refer to MAXVIEW™ Installation section for details on installing the viewer.
If MAXVIEW™ is installed you can double click my.gsx
my.gsx
my.gsx
my.gsx to launch MAXVIEW™ and load all the video files on the
comrad™
Connecting the Recorder to Computer
Connecting the Recorder to Computer
Connecting the Recorder to Computer
Connecting the Recorder to Computer with USB Ethernet Adaptor
with USB Ethernet Adaptor
with USB Ethernet Adaptor
with USB Ethernet Adaptor....
In a laptop environment, (No DHCP Lan services), the recorder will have its own IP Network Address of 192.168.1.1 and it
will provide the laptop unit with an IP address of 192.168.1.64. In Windows Explorer, use the address location:
\\192.168.1.1 to connect to the recorder. See below for detailed instructions. In a Laptop environment (no DHCP LAN
services) the recorder will have its own IP Network.
The NiTRO™ unit acts as a DHCP Server through the USB Ethernet. A DHCP Client on the Laptop/PC is
required for the Laptop/PC to obtain an IP automatically.
Power up the recorder.
Connect one end of the crossover cable to the laptop Ethernet port.
Insert the other end of the crossover cable to the USB Adaptor’s Ethernet port.
Содержание Digital Smart Recorder NiTRO 900
Страница 1: ...NiTRO 900 Manual Version 1 8 1 1 Safety Security Peace of Mind...
Страница 58: ...58 Notes Notes Notes Notes...
Страница 59: ...59...
Страница 60: ...60...


