13-18-609 Page 66
8-3
Interference-fitted Coupling Hub Installation and Removal
– In the event that a coupling hub has to
be removed, please note that these are designed to fit on compressor and motor shafts with a transitional
interference fit. Coupling hubs and their companion shafts which have bore diameters which fall in the
interference range of the design fit, must be installed or removed with the aid of a pulling tool and/or heat
dilation. The recommended steps are based on the assumption that the main motor has been pulled
away from the compressor and that the motor adaptor housing is still attached to the compressor.
Coupling Hub Installation:
·
Have coupling installation tool part number CC1026209 available
– contact Gardner Denver for
sourcing details.
·
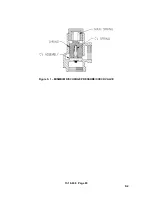
Assemble tool kit components onto coupling hub as shown on Figure 8-4.
·
Make sure that the keyway on the coupling hub and its companion shaft are properly de-burred,
cleaned and that the key fits easily into either.
·
Thoroughly cleanse the surface of the companion shaft and cover it with a film of anti-seize
lubricant part number 25BC850
– contact Gardner Denver for sourcing details.
·
Expose hub and tool assembly to the heat source until the hub reaches a temperature of 200°F.
Note that an oven is a preferred method to heat up the hardware.
·
With the help of insulating gloves, remove the hub and tool assembly from the heat source and
quickly bring it to the companion shaft. Engage the coupling hub bore onto the companion shaft
and slide it until the latter contacts the stop.
·
Once the hub has cooled down sufficiently to the grip the companion shaft, remove the installation
tool.
·
Apply a thread-locking compound to the hub setscrews (M10 size) and tighten to 12.6 lb-ft (17 N-
m) of torque. Reinstall coupling guard with provided fasteners.
Coupling Hub Removal:
·
Have removal tool part number 90500151 available
– contact GD for sourcing details.
·
Before removing an interference-fitted hub, note and record the position of the hub with respect to
the end of the companion shaft. This is particularly critical if an installation tool is not available.
·
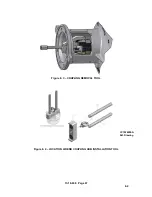
Assemble the removal tool onto the hub as shown in
Error! Reference source not found.
. Make
sure that the shaft
protector piece is captured between the puller screw and the end
of the shaft
·
Apply torque to the puller screw with a suitable torque wrench in order to pull hub away from the
shaft. If the torque applied to the puller exceeds 130ft-lb (176 N-m), it indicates that a heavy
interference fit between the hub and the shaft exists and heat dilation must be used to expand the
hub and loosen its grip on the shaft surface. Secure a suitable heating source and apply heat the
hub body while slowly rotating the shaft by means of the removal tool handle. Once the hub body
has expanded enough, the present tension of the removal tool will pull the hub away from the shaft.
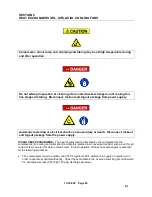
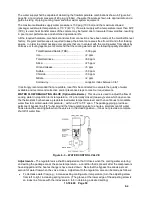
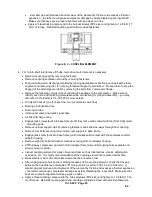
Heated surfaces of coupling hubs and installation or removal tools may cause severe
burns. Make sure to use suitable heat protective gloves and clothes.
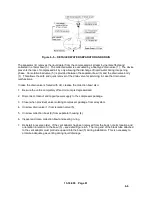
NOTICE
If heat was applied to the [compressor] coupling hub during its removal, there is the
possibility that the compressor shaft seal was damaged and it must be replaced.
Contact Gardner Denver for further instructions.
Содержание VS80A
Страница 31: ...13 18 609 Page 30 4 5 Figure 4 2 PIPING AND INSTRUMENTATION ILLUSTRATION 300CGE797 A Ref Drawing...
Страница 33: ...13 18 609 Page 32 4 7 300CGE546 04 Ref Drawing Page 2 of 4...
Страница 34: ...13 18 609 Page 33 4 8 300CGE546 04 Ref Drawing Page 3 of 4...
Страница 35: ...13 18 609 Page 34 4 9 300CGE546 04 Ref Drawing Page 4 of 4...
Страница 37: ...13 18 609 Page 36 4 11 301CGE546 B Ref Drawing Page 2 of 4...
Страница 38: ...13 18 609 Page 37 4 12 301CGE546 B Ref Drawing Page 3 of 4...
Страница 39: ...13 18 609 Page 38 4 13 301CGE546 B Ref Drawing Page 4 of 4...
Страница 41: ...13 18 609 Page 40 4 15 302CGE546 05 Ref Drawing Page 2 of 4...
Страница 42: ...13 18 609 Page 41 4 16 302CGE546 05 Ref Drawing Page 3 of 4...
Страница 43: ...13 18 609 Page 42 4 17 302CGE546 05 Ref Drawing Page 4 of 4...
Страница 45: ...13 18 609 Page 44 4 19 303CGE546 B Ref Drawing Page 2 of 4...
Страница 46: ...13 18 609 Page 45 4 20 303CGE546 B Ref Drawing Page 3 of 4...
Страница 47: ...13 18 609 Page 46 4 21 303CGE546 B Ref Drawing Page 4 of 4...
Страница 70: ...13 18 609 Page 69 9 2 Figure 9 1 MINIMUM DISCHARGE PRESSURE CHECK VALVE...
Страница 86: ...NOTES...
Страница 87: ...NOTES...


