


48
System Setting
Network Setup
You can configure the settings regarding user management and user and group permissions.
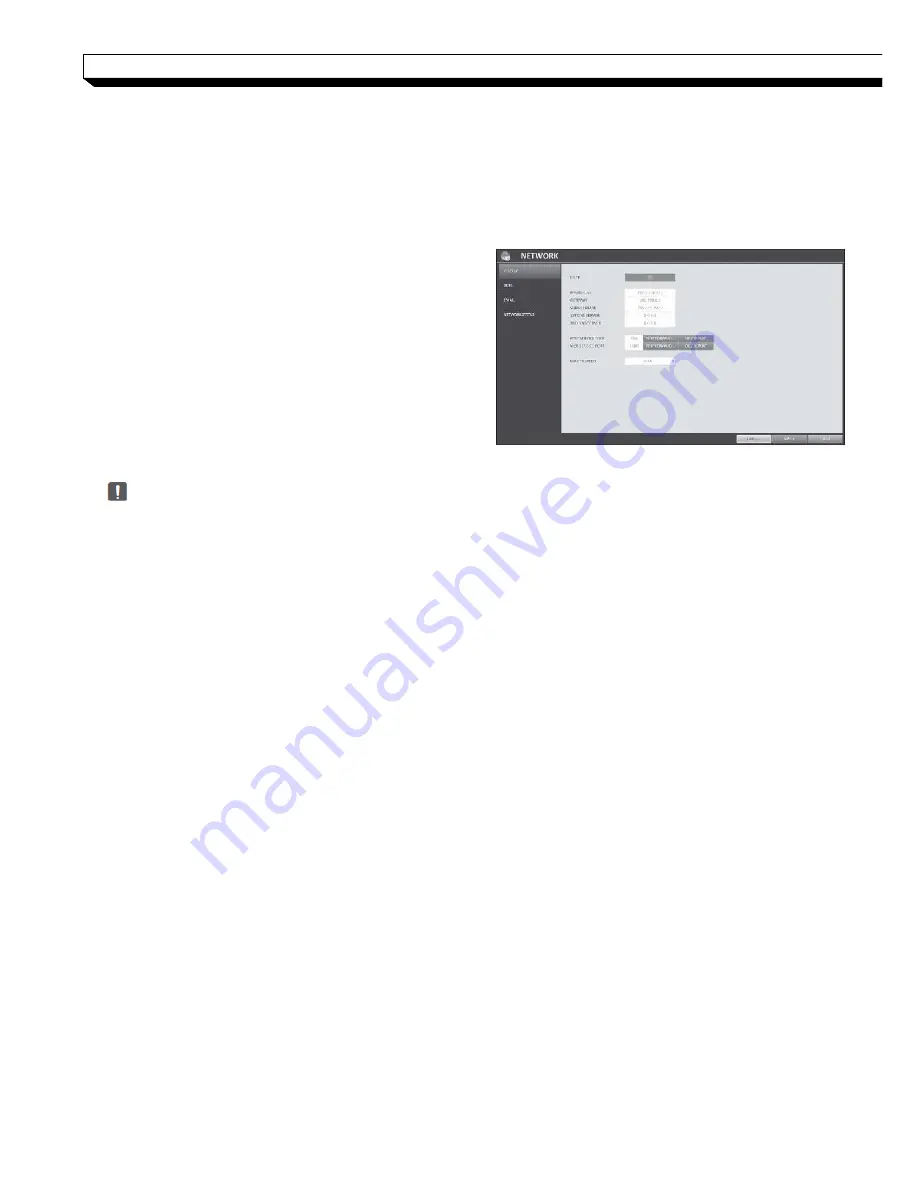
IP Setup
Specify the IP address as well as the remote service port.
1. From
<SYSTEM SETUP> - <NETWORK>
,
select
<IP SETUP>
.
2. Use the
[▲▼
◀▶
/ENTER]
buttons on the
remote control or use the mouse to specify
each item of the network settings.
>DHCP : If it is checked, set the IP address of
the NVR to Dynamic IP.
- If the
<DHCP>
item is checked, the sub
Items of IP address, gateway, subnet mask,
primary DNS server, secondary DNS server
will be filled in automatically.
If you select to obtain an IP address from the
<DHCP>
server, when the lease time of
the DHCP server expires, you will lose connection to the IP camera momentarily while
the network settings will be updated.
However, the network connection will be restored soon. It is recommended to use a fixed
IP for stable network connection.
>IP ADDRESS : Provide the IP address.
>GATEWAY : provide the gateway address.
>SUBNET MASK : provide the subnet mask address.
>1ST DNS SERVER : Enter the address of the primary DNS server.
>2ST DNS SERVER : Enter the address of the primary DNS server.
>RTSP SERVICE PORT : port number that the remote client receives the NVR video from.
>WEB SERVER PORT : port number used for connecting to the NVR with the web browser.
>PORT FORWARDING : If you are using a router, you can set the port forwarding so that
external access to the NVR is enabled.
If the router does not support the uPnP protocol, you must set the port forwarding manually.
For more information, contact your network administrator.
>DELETE PORT : release the port forwarding settings for the router.
>MAX TX SPEED : Limit the network transfer rate to access a remote client.
The video signal may be transferred at a less rate than specified, which depends on the
status of your network connection.
3. To apply the change, click
<APPLY>
in the bottom of the screen.
4. When done, press the
[EXIT]
button on the remote control or click
<CLOSE>
in the
lower screen. The confirmation message appears and you will return to the previous menu.


