


GAT ECO.Side Lock 7010 (NW) F/ISO
Installation
30
HB_GAT-ECOSide-Lock7010-FISO--EN_11
www.gantner.com
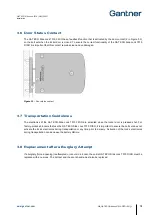
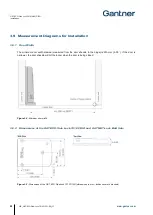
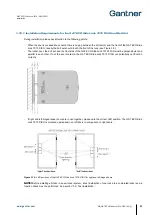
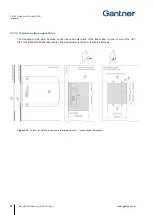
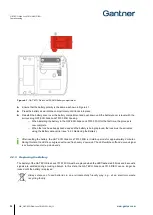
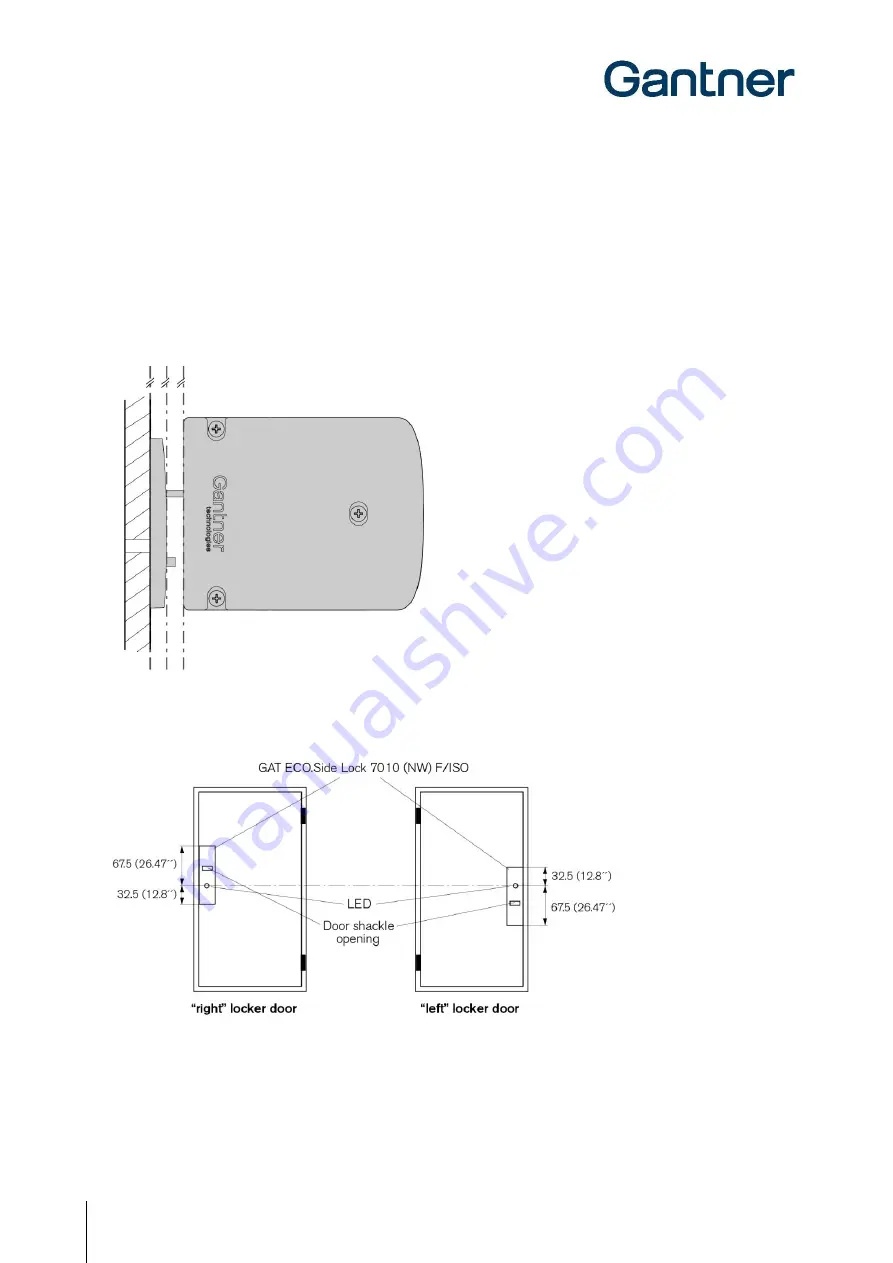
3.12.1 Installation Requirements for the GAT ECO.Side Lock 7010 F/ISO and Bolt Set
Please pay attention to the following points during installation:
-
When the door is pressed shut, ensure there is no gap between the bolt set (2) and the front of the GAT ECO.Side
Lock 7010 F/ISO. Ideally the bolt set should touch the front of the lock (see Figure 3.15).
-
The locker door, the bolt set, and the front side of the GAT ECO.Side Lock 7010 F/ISO must be perpendicular and
parallel to each other. If not, the door contact in the GAT ECO.Side Lock 7010 F/ISO can potentially not function
correctly.
-
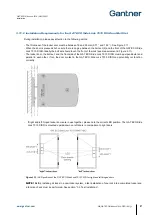
If right and left-hinged locker doors are in use together, please note the correct LED position. The GAT ECO.Side
Lock 7010 F/ISO is mounted upside-down on left doors in comparison to right doors.
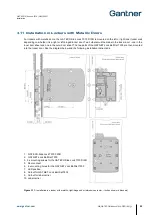
Figure 3.16 - LED positions of the GAT ECO.Side Lock 7010 F/ISO for right and left-hinged doors
NOTE!
Before installing all locks in a new locker system, a test installation of one lock into a completed locker and
a function check must be performed. See section “3.3. Test Installation”.
Содержание GAT ECO.Side Lock 7010 F/ISO
Страница 16: ...GAT ECO Side Lock 7010 NW F ISO General Information 16 HB_GAT ECOSide Lock7010 FISO EN_11 www gantner com...
Страница 32: ...GAT ECO Side Lock 7010 NW F ISO Installation 32 HB_GAT ECOSide Lock7010 FISO EN_11 www gantner com...
Страница 38: ...GAT ECO Side Lock 7010 NW F ISO Commissioning 38 HB_GAT ECOSide Lock7010 FISO EN_11 www gantner com...
Страница 63: ......


