background image

2

Introduction

2

This document will guide you 
through the process of becoming a 
Galaxy spa owner, preparing you for 
the delivery and installation of your 
spa pool and its accessories. 
Many important considerations and 
actions are required so please read 
this guide thoroughly and refer to 
the pre-delivery checklist before the 
arrival of your spa. 
You can find a wide range of support 
content and videos for spa owners on 
our website’s support page

Содержание Venus

Страница 1: ...Your Spa Pool Guide Venus Aquila II Orion Hydra...

Страница 2: ...very and installation of your spa pool and its accessories Many important considerations and actions are required so please read this guide thoroughly and refer to the pre delivery checklist before th...

Страница 3: ...Building Regulations and Consent 14 Pre Delivery Checklist 15 Installation Guide 16 First Steps 17 Hard Cover Installation 18 Cover Lifter Installation 19 Electrical Installation 25 Filling Your Spa...

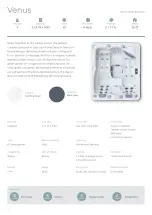
Страница 4: ...quiet circulation pump and premium insulation are just some of the features that reduce the day to day running costs of this energy efficient spa pool Seating Size m Controller Pool body 3 people 2 x...

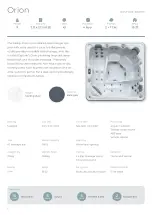
Страница 5: ...rough the ultra quiet circ pump and premium insulation keeps your water hot day to day making this an economical favourite Seating Size m Controller Pool body 5 people 2 x 2 x 0 82 Spa tech controller...

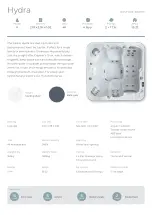
Страница 6: ...y running costs such as premium insulation and an ultra quiet circ pump For a step up in hydrotherapy explore our Transform Series Seating Size m Controller Pool body 5 people 2 12 x 2 12 x 0 92 Spa t...

Страница 7: ...t when not in use and energy efficiency is optimised through premium insulation For a step up in hydrotherapy explore our Transform Series Seating Size m Controller Pool body 6 people 2 18 x 2 18 x 0...

Страница 8: ...8 Pre Delivery Guide S E C T I O N 1 8 Everything you need to plan and consider before your Galaxy spa arrives...

Страница 9: ...ll ask you to provide specific details about your property via descriptions and images Factors such as powerlines road and driveway access and natural obstacles will be considered If needed we will ar...

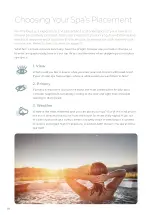
Страница 10: ...spa space 1 View What would you like to look at while you soak relax and connect with loved ones If your chosen spa has loungers where or what would you want them to face 2 Privacy If privacy is impor...

Страница 11: ...discuss any fencing requirements for your region Fencing is the homeowner s responsibility and we want you to have the safest spa environment and adhere to any local spa fencing bylaws See page 14 for...

Страница 12: ...n each side You will need to lift your empty spa slightly to install the cover lifter correctly Once filled with water it will be too heavy Spa Cover Lifter Cover Locks The spa cover requires 32 5cm o...

Страница 13: ...bable object Two tier steps dimensions Length 60cm Width 58cm Height 30cm Drainage Water splashing over the side of a spa pool is very common Children playing or having a spa pool full of people is al...

Страница 14: ...nd it there are a few considerations you will need to take into account Building consent you will need to install a fence around your spa and deck to prevent unaccompanied minors and animals from clim...

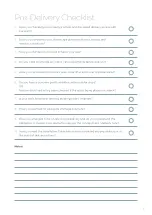
Страница 15: ...over lifter and cover clip clearances 6 Do you have a concrete pad foundation with room for steps OR Has the deck load rating been checked if the spa is being placed on a deck 7 Is your spa s fencing...

Страница 16: ...16 Installation Guide S E C T I O N 2 16 Everything you need to know once your spa pool arrives...

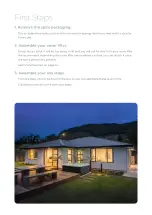
Страница 17: ...ull it will be too heavy to lift and you will not be able to fit your cover lifter We recommend assembling the cover lifter before delivery so that you can attach it once the spa is placed into positi...

Страница 18: ...he cabinet Cover Care Avoid exposing the cover to excessive chemicals Always remove the cover when adding your spa chemicals Any texture change or extreme discolouration of the base material indicates...

Страница 19: ...ver lifter All left to right instructions are from standing in front of the spa Ensure your spa is placed onto a level surface such as a concrete pad or load checked decking Ensure you have the necess...

Страница 20: ...r install the cover lifter on the shortest side the width Spa Pool Model Spa Pool Dimensions length x width x depth Total Cover Lifter Width Venus 2m x 1 74m x 0 82m 1 74cm 10cm 184cm Aquila II 2m x 2...

Страница 21: ...re it Step 5 Place the bent arm without foam through the tubular hole circular part on the bracket Important If the width is less than 2m connect the short ends to the straight coupler If the width is...

Страница 22: ...e left You can keep them lying flat on the ground for now Step 8 Slide nylon pivot straps over each of the straight coupler tubes on each side Ensure that the bracket is facing the spa on each side Yo...

Страница 23: ...the seam of the spa If the length of the face parallel to the cover is 2m or more place the long ends on the seam of the spa Step 11 Loop the cover saver strap over the top horizontal section of the s...

Страница 24: ...There are three holes on each end of the couplers Once you have aligned everything perfectly use the hole as a guide to drill a hole through to the inner tube They are smaller than the screws but a dr...

Страница 25: ...ra Your spa requires hardwiring by an electrician and it does not come with an electrical cord You will need to arrange for an electrician to visit post delivery to complete the installation Removing...

Страница 26: ...ice bags and open the cabinet panel Feed the cable up through the hole into the inside and then remove the blocks and lower gently onto the foundation Power cord Installation Guides for Your Electrici...

Страница 27: ...sket this will help to prevent air locks in the plumbing 2 Fill the spa pool to the recommended fill line indicated by the sticker on the inside of the spa Remove the hose and place the filter back in...

Страница 28: ...l on it slightly until it comes out around an inch 2 Unscrew the dial s retaining cap and attach the draining connector 3 Push in slightly to start draining 4 Pull out to stop draining mid flow 5 Atta...

Страница 29: ...wer Light Turn on off light set light mode Mode 1 Sleep economy standard mode 2 Yes no Time Time setting Up Increase time temperature select modes Down Decrease time temperature select modes Time Up R...

Страница 30: ...and the screen light will turn off if no buttons on the screen are pressed for one hour Setting the Temperature Your spa comes with a thermostatically controlled heater You can set the temperature fr...

Страница 31: ...art time for the first filter cycle Press again to set the end time Repeat this process for FILTER 2 your second filtration cycle If no activity occurs for five seconds during setting the filtration c...

Страница 32: ...know about balancing your water for the first time For ongoing maintenance and troubleshooting support please visit www galaxyspas co nz support Refer to the relevant section based on your chosen wate...

Страница 33: ...You must shock dose your spa the first time you fill it with water Shock dosing refers to adding a higher than normal dose of chlorine to the water This is extremely important for good long term water...

Страница 34: ...s cloudy water and skin eye irritation You need to lower the pH to within the normal range 7 2 7 8 by using this product Alkalinity Up if your alkalinity is not in the optimal range you will have trou...

Страница 35: ...ine shock dose as high chlorine levels can alter the test kit s accuracy Remember to ensure your chemicals are within their use by date Testing results may not be accurate otherwise Balancing Your Wat...

Страница 36: ...p 9 Tbsp 10 Tbsp 70 7 Tbsp 8 Tbsp 10 Tbsp 12 Tbsp 80 8 Tbsp 9 Tbsp 12 Tbsp 14 Tbsp 90 9 Tbsp 10 Tbsp 13 Tbsp 15 Tbsp 100 10 Tbsp 11 Tbsp 15 Tbsp 17 Tbsp Water Hardener for increasing calcium content a...

Страница 37: ...its minerals into the water removing contaminants and limiting the formation of scale and rust while inhibiting the growth of bacteria All simplesilver needs to work well is a good flow of water pass...

Страница 38: ...filter pump has been set do not use your spa pool for the next seven days Removing contamination and dispensing the correct levels of simplesilver minerals will take about a week after which you will...

Страница 39: ...w block What if I am having problems with simplesilver There can be several variables that prevent simplesilver from working effectively Whilst most can be resolved with troubleshooting and correct fi...

Страница 40: ...liance such as lights telephone radio or television within 1 5m of the spa Always check the spa s temperature before entering During pregnancy seek medical advice about using your spa before doing so...

Страница 41: ...41 Wishing you many relaxing soaks in your new spa...

Отзывы: