SMART CUT 1000
20
2.
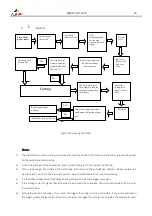
Grid Cut
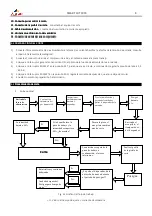
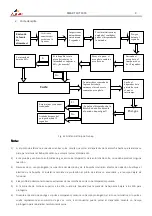
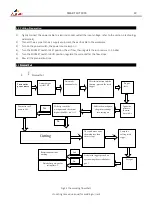
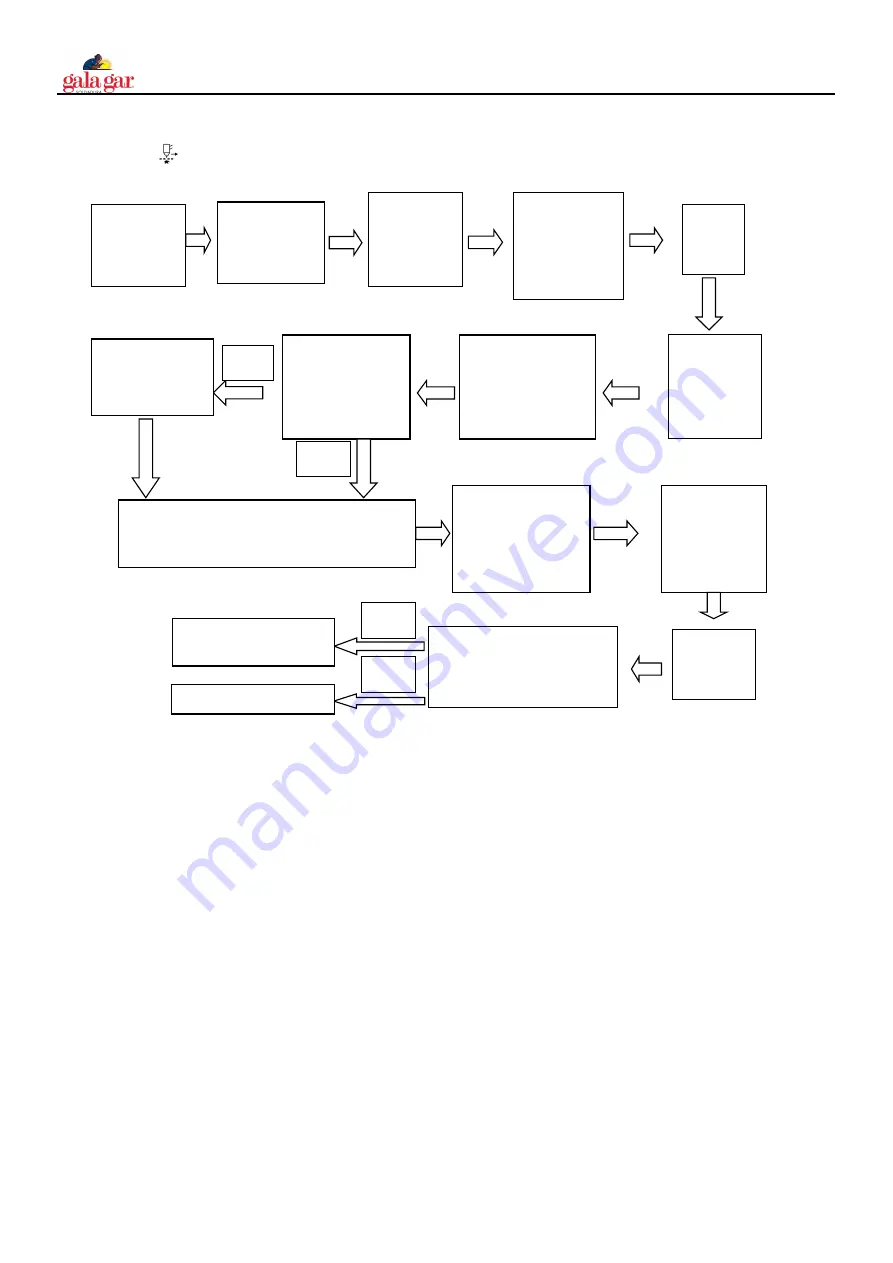
Fig 4.3 the working flow chart
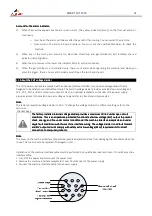
Note:
Note:
Note:
Note:
1)
The alarm lamp on when cutting, it is needed to loose the switch of the torch until the alarm release, then press
on the switch to restart working.
2)
In the automatic gas test and examine, press on the cutting torch, there will no reflection.
3)
After a long usage, the surface of the electrode and nozzle will have Oxidation reaction. Please replace the
electrode and nozzle, For The alarm lamp will on when install the shield cup, and stop working
4)
It is forbidden to take down the fittings of the cutting torch when the trigger is pressed.
5)
If the cutting current is higher than 40A, when the tip touch the workpiece, the current will down to 40A in oder
to protect the tip.
6)
Among the period of post gas, if you press the trigger for a long time, the arc restars; if you press and loosen
the trigger quickly, the gas stops, after it you can press the trigger for a long time to restart the machine as well.
Turn on the
power source
Loose the
cutting torch
trigger, the arc
stops
Pre-gas
for 1s
The torch move away
the workpiece, then the
cutting arc change into
the pilot arc
Automatic
examine for 5s
After
Initialization and
the fan stop,
press on the torch
trigger
Ignite the
pilot arc, the
max. time
is10s
Post-gas
If the tip touch the
workpiece and the
current higher than
40A, isn’t it ?
Shift to the workpiece,
the pilot arc change
into cutting arc
Yes
No
The current will
down to 40A
Cutting
Is the torch trigger pressed on
again among the period of post-
gas ?
Yes
No
Restart and continue
working
Finish after post-gas for 15s
Automatic gas
test for 10S
Содержание 223001000C
Страница 26: ......
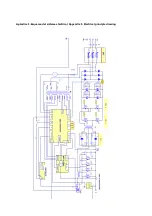
Страница 27: ...Apéndice 1 Esquema del sistema eléctrico Appendix 1 Electrical principle drawing ...
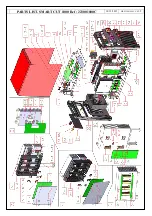
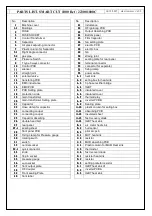
Страница 28: ...PARTS LIST SMART CUT 1000 Ref 223001000C 14 12 2015 HR 223001000C V0 1 2 ...
Страница 30: ......
Страница 31: ......

