


User Manual
17
5.2.6.2 Alarm Set
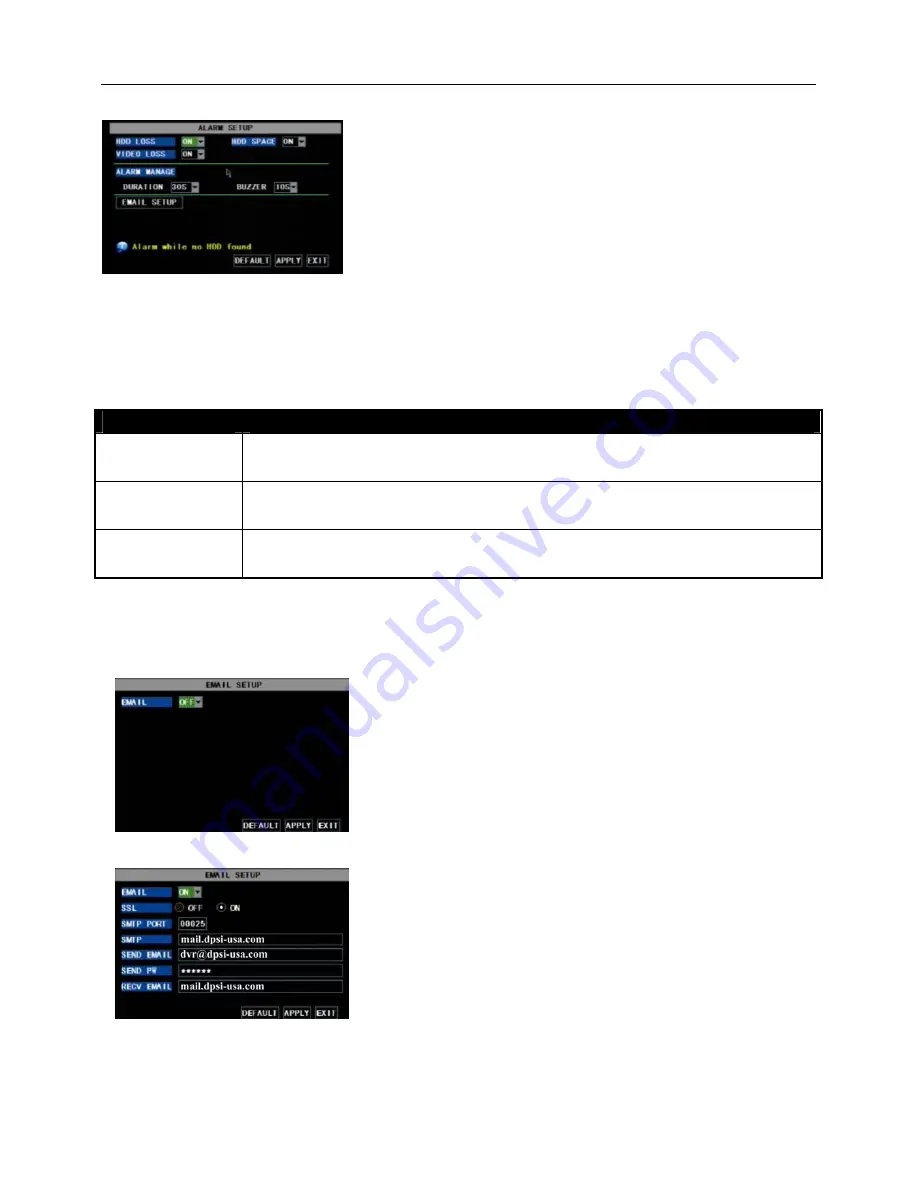
HDD SPACE:
Options are
“On” and “Off”
. When the alarm function is on, there are alarm sounds when
the HDD is running out of space; when the function is off, there are no alarm sounds.
VIDEO LOSS:
Options are
“On” and “Off”
. When the function is on, system will issue alarm sound and
display video loss on the preview interface; when the function is off, system will have no alarm sound, but the
preview interface will display video loss.
Alarm Type
Function
Video Loss
Sends alarm when DVR can’t receive video signal (such as camera damage, cable broken or damaged
or power supply malfunction).
Motion Detection
When an object moves into motion detection area, alarm will be triggered. You can adjust
sensitivity level to suit the needs of your actual application environment.
HDD loss
When Hard Drive is not detected (HDD damage, power supply malfunction), or HDD auto-overwrite
is off, and free space is not enough, an alarm will be triggered.
List 5-1
Email Alarm Notification
(to send notice to email account when motion alarm is triggered)
Please set SSL to “On” via Gmail.com server, and set to “Off” via other mail server.
Click the [Email setup] menu to enter into its sub menu
(shown as Picture 5-27).
Picture 5-27
On the [Email setup] mode, refer to its parameter setup
shown as picture 5-28 when setting email alarm to “on”.
SSL: is a security link transport protocol. You can encrypt your
communication info (including your email) using SSL to prevent hackers from
monitoring your email or communication info and even your password.
Picture 5-28
Click [Main Menu Device Alarm] to enter into [Alarm setup]
menu to setup Alarm warnings (shown as Picture 5-32).
HDD LOSS:
Options are “On” and “Off”.
If you select On there
will be a buzzer sound and “H” sign on screen when HDD is not
detected or not formatted; on the contrary, if you close the function,
there is only “H” sign to indicate HDD not found, but no alarm sound
when HDD not found or not formatted.
Picture 5-32


