SuperPro Series Installation Manual
Labeling the Wiring
Documenting the installation is critical. Particularly in a large installation, the time it takes to
document each cable run will save hours of hassle and embarrassment when trying to bring up
all the connected systems. The SuperPro provides labeling space for every port on the panel.
FutureSmart recommends the following labeling practices:
•
Label each connection on the panel documentation template (using provided labels)
•
Label each input cable
•
Label each patch cable
•
Label each cable at the receptacle
Distribution Panel Installation
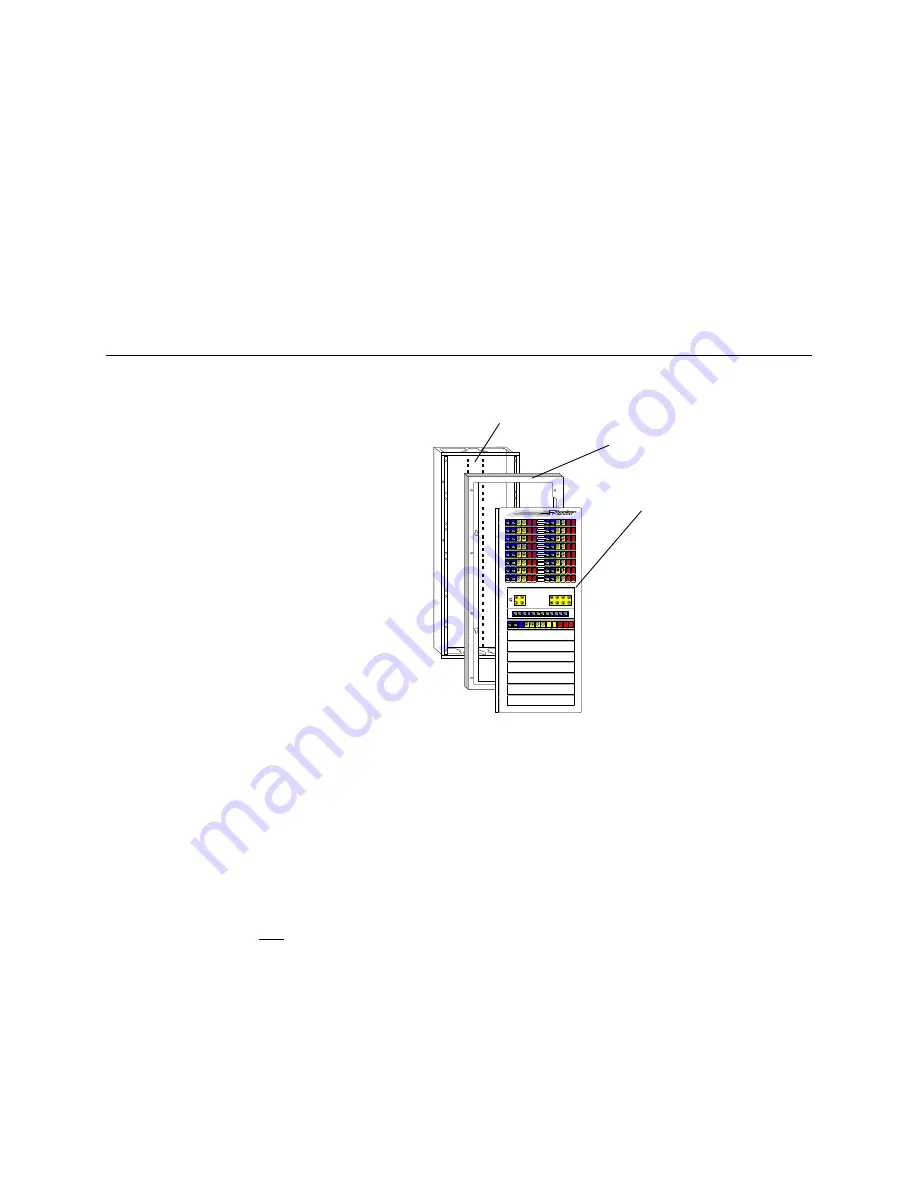
Semi-Flush Cabinet Mounting:
Rough-in can
Mounting collar
Panel
Figure 2
Step 1 – Installation of In-Wall Rough-In Can:
1. Place rough-in can between studs in the 16”-on-center stud space.
2. Be sure the lip of the can is resting against studs so that the can face protrudes ½” from the
studs. This will assure that sheetrock will sit flush with panel at finish time.
3. The top of the can should be between 5 ½’ to 6’ above the floor.
4. Using the holes on the sidewalls of the can, mount the can to wood studs using 1” to 2” long
screws. Insert shims on the sides of panel if necessary. DO NOT OVER TIGHTEN AND
DISTORT CAN!
5. Attach metal electrical box and receptacle to bottom of can.
6. Have the electrician run a 110-volt / 15 amp dedicated circuit to the receptacle in the bottom
of the can and terminate the circuit in the outlet.
7. Pull all premise cables through the top right and left holes nearest the hinge side of the panel;
use the side holes on the hinge side if you are installing a 12-zone panel or larger.
Step 2 – Installation of Collar and Panel:
1. Install two screws several threads into the two holes on the top of the rough-in can.
2. Hang collar with panel on the two screws through the keyholes provided.
3. Insert screws in the two holes in the bottom of the can and tighten.
4. Tighten the two screws on the top of the can. DO NOT OVER TIGHTEN.
Page 8
FutureSmart


