
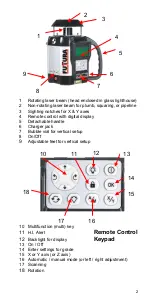

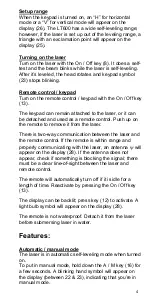


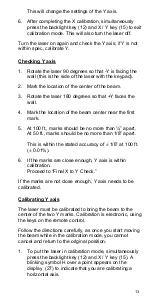


9
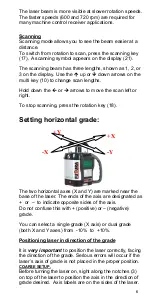
right. This is necessary to line up on a pipeline target, or
to do squaring for installing walls and partitions.
When the laser is first placed in vertical, two arrows
blink on the display (27), indicating left/right adjustment
is available.
Hold down left or right keys (10) to move plumb
beam.
If a grade has been entered, the arrows disappear.
Press
A / M key (16) to put back in left/right adjustment
mode.
It is important to check while you're using the laser
that it has not been moved and that your setting is
still accurate.
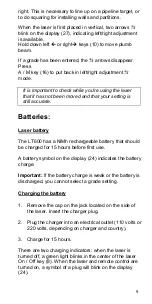
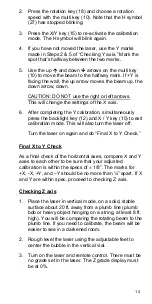
Batteries:
U
Laser battery
The LT600 has a NiMh rechargeable battery that should
be charged for 15 hours before first use.
A battery symbol on the display (24) indicates the battery
charge.
Important:
If the battery charge is weak or the battery is
discharged, you cannot select a grade setting.
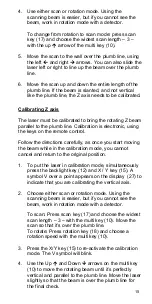
U
Charging the battery
1
.
Remove the cap on the jack located on the side of
the laser. Insert the charger plug.
2. Plug the charger into an electrical outlet (110 volts or
220 volts, depending on charger and country).
3. Charge for 15 hours.
There are two charging indicators: when the laser is
turned off, a green light blinks in the center of the laser
On / Off key (8). When the laser and remote control are
turned on, a symbol of a plug will blink on the display
(24).


