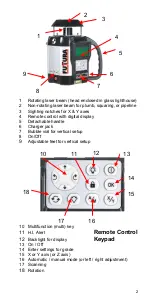
13
This will change the settings of the Y axis.
6. After completing the X calibration, simultaneously
press the backlight key (12) and X / Y key (15) to exit
calibration mode. This will also turn the laser off.
Turn the laser on again and check the Y axis; if Y is not
within spec, calibrate Y.
U
Checking Y axis
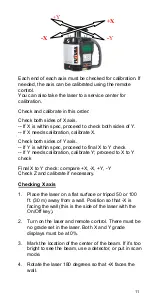
1. Rotate the laser 90 degrees so that -Y is facing the
wall (this is the side of the laser with the keypad).
2. Mark the location of the center of the beam.
3. Rotate the laser 180 degrees so that +Y faces the
wall.
4. Mark the location of the beam center near the first
mark.
5. At 100 ft., marks should be no more than ¼” apart.
At 50 ft., marks should be no more than 1/8” apart.
This is within the stated accuracy of
±
1/8” at 100 ft.
(
±
0.01%).
6. If the marks are close enough, Y axis is within
calibration.
Proceed to “Final X to Y Check.”
If the marks are not close enough, Y axis needs to be
calibrated.
U
Calibrating Y axis
The laser must be calibrated to bring the beam to the
center of the two Y marks. Calibration is electronic, using
the keys on the remote control.
Follow the directions carefully, as once you start moving
the beam while in the calibration mode, you cannot
cancel and return to the original position.
1. To put the laser in calibration mode, simultaneously
press the backlight key (12) and X / Y key (15). A
blinking symbol H over a point appears on the
display (27) to indicate that you are calibrating a
horizontal axis.


