


5
EN
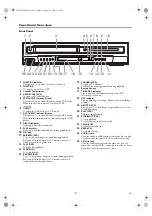
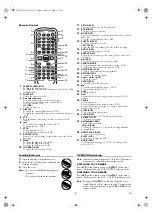
Functional Overview
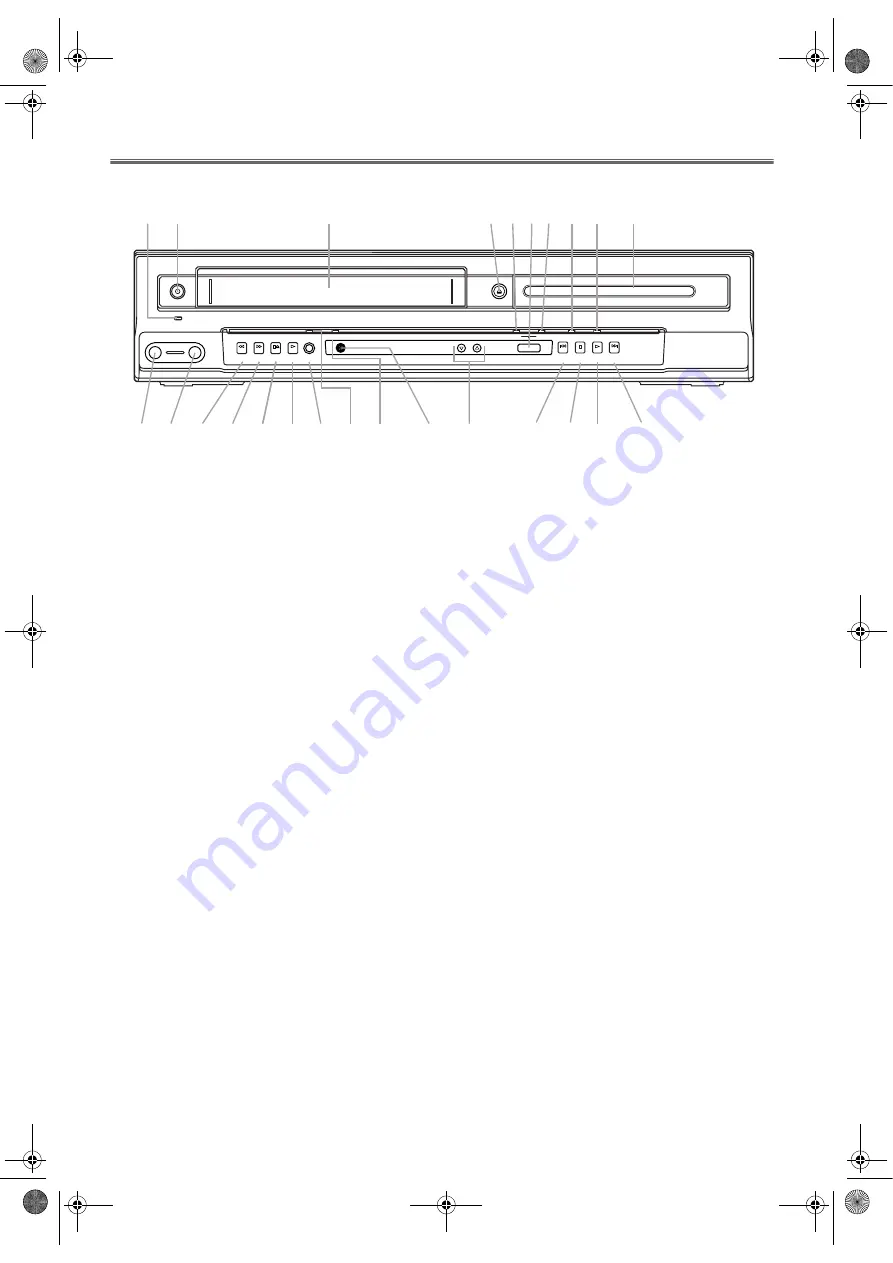
Front Panel
1.
FUNCTION indicator
The indicator is on when this unit is turned on.
2.
FUNCTION
To turn the unit ON or OFF.
3.
Cassette Compartment
4.
OPEN/CLOSE (DVD)
To open or close the disc tray.
5.
VCR OUTPUT indicator (Green)
The indicator is on when this unit is in the VCR mode.
Make sure that this indicator is on before VCR
operation.
6.
OUTPUT
To select the DVD mode or VCR mode.
7.
DVD OUTPUT indicator (Green)
The indicator is on when this unit is in the DVD mode.
Make sure that this indicator is on before using the DVD
player.
8.
DISC IN indicator
Lights up when a disc is inserted.
9.
PLAY indicator
Lights up when the inserted disc is being played back.
10.
Disc tray
11.
SKIP/FWD (DVD)
To go to the next chapter or track during playback.
Press and hold this button for 1.5 seconds or more to
search forward through the disc.
12.
PLAY (DVD)
To begin disc playback.
13.
STOP (DVD)
To stop playback.
14.
REV/SKIP (DVD)
To go to the previous chapters or tracks during playback.
Press and hold this button for 1.5 seconds or more to
search backward through the disc.
15.
CHANNEL
(VCR)
To change TV channels.
To adjust the tracking manually during playback.
16.
Remote Sensor
17.
TIMER REC indicator
Lights up when the timer recording or an OTR
recording has been set.
18.
REC indicator
Lights up during a recording. Flashes when a recording is
paused.
19.
REC/OTR (VCR)
Press once to start recording or repeatedly to start One-
Touch Recording.
20.
PLAY (VCR)
To begin tape playback.
21.
STOP/EJECT (VCR)
To stop playback.
To eject the tape in the Stop mode.
22.
F.FWD (VCR)
To fast forward the tape.
23.
REW (VCR)
To rewind the tape.
24.
AUDIO in jack
Connect an audio cable coming from the audio out jack
of a camcorder, another VCR, or an audio source here.
25.
VIDEO in jack
Connect a cable coming from the video out jack of a
camcorder, another VCR, or an audio-visual source (laser
disc player, video disc player, etc.) here.
AUDIO
VIDEO
REW
F.FWD STOP/EJECT PLAY
REC
REC/OTR
CHANNEL
VCR
OUTPUT
DVD
STOP
PLAY
PLAY
FUNCTION
OPEN/CLOSE
REV/SKIP
SKIP/FWD
DISC IN
TIMER REC
1 5
1 2
1 9
2 0
2 1
2 2
2 4
2 5
2 3
1 6
1 7
1 8
1 1
1 4 1 3
1
2
3
1 0
5
7
6
8 9
4
H9779ED(EN).fm Page 5 Monday, October 25, 2004 4:21 PM


