TX1320 M1
Upgrade and Maintenance Manual
305
System board and components
14.5.1 Preliminary steps
Ê
"Disabling BitLocker functionality" on page 73
Ê
"Disabling SVOM boot watchdog functionality" on page 74
Ê
"Locating the defective server" on page 44
Ê
"Shutting down the server" on page 52
Ê
"Disconnecting power cords" on page 53
Ê
Disconnect all external cables.
Ê
"Opening the server" on page 55
Ê
"Removing the system fan module" on page 153
14.5.2 Removing the defective system board
Ê
Remove all cables from the system board.
Ê
Remove the following components from the system board:
– Heat sink: see section
"Removing the processor heat sink" on page 225
I
Leave the processor on the defective board for now.
– Memory modules: refer to section
"Removing memory modules" on
page 218
I
Ensure to take note of the memory modules’ mounting positions
for reassembly.
– Expansion cards: refer to the section
"Removing expansion cards" on
page 178
I
Ensure to take note of the controllers’ mounting positions and
cable connections for reassembly.
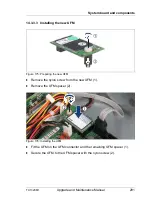
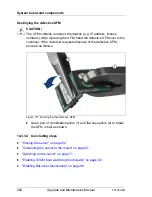
– UFM: refer to section
"Removing the UFM" on page 288
I
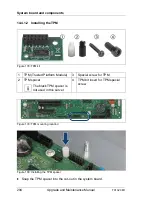
Remove the UFM spacer from the defective system board and
fasten it to the UFM with the UFM screw.
Содержание PRIMERGY TX1320 M1
Страница 18: ...Upgrade and Maintenance Manual TX1320 M1 Contents ...
Страница 42: ...42 Upgrade and Maintenance Manual TX1320 M1 Important information ...
Страница 106: ...106 Upgrade and Maintenance Manual TX1320 M1 Basic software procedures ...
Страница 150: ...150 Upgrade and Maintenance Manual TX1320 M1 Hard disk drives solid state drives ...
Страница 280: ...280 Upgrade and Maintenance Manual TX1320 M1 Front panel ...
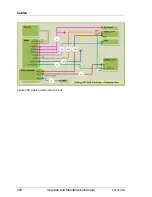
Страница 320: ...320 Upgrade and Maintenance Manual TX1320 M1 Cables Figure 200 Cabling with extension box ...

