130
Upgrade and Maintenance Manual
CX400
S1
Hard disk drives / solid state drives
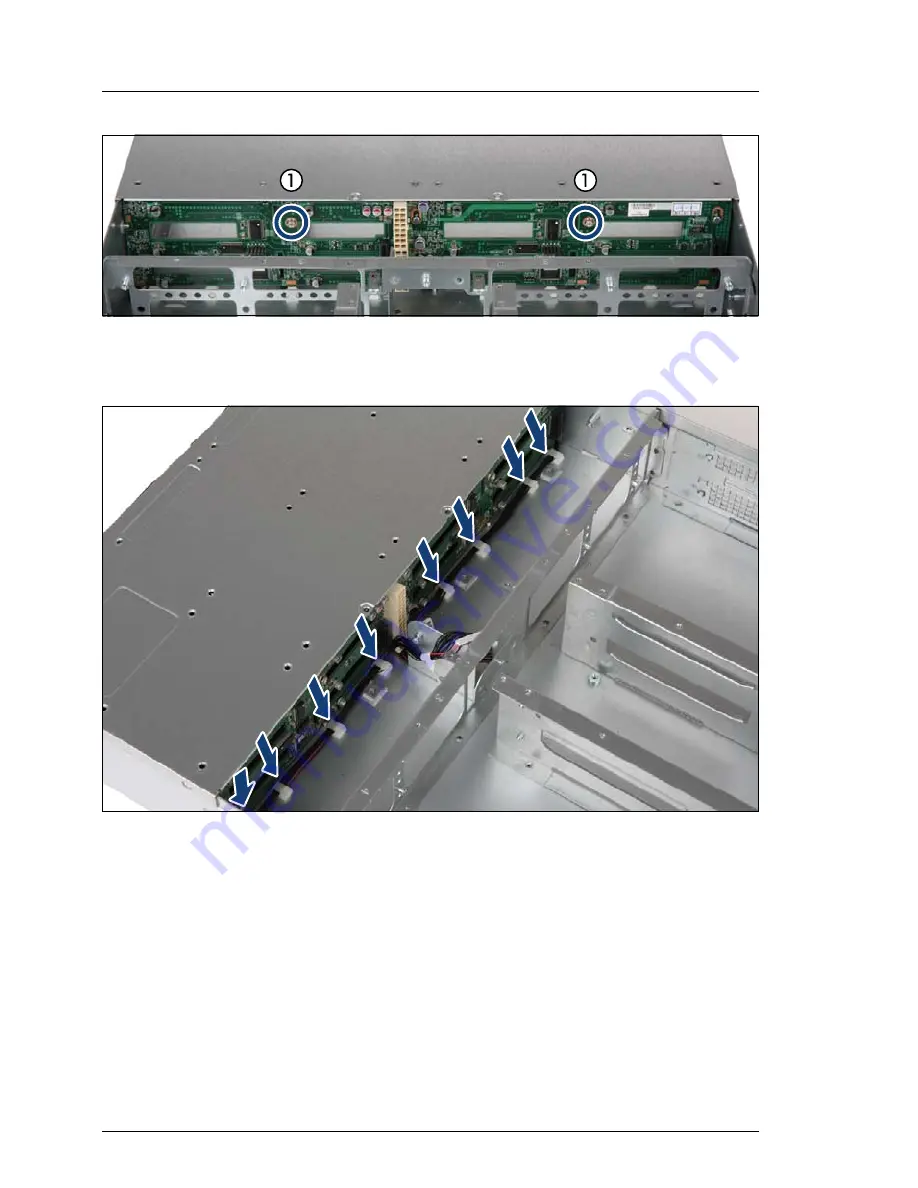
Figure 87: Installing the HDD SAS/SATA backplane (C)
Ê
Secure HDD SAS/SATA backplane with two screws (1).
Figure 88: Removing the front panel cable from the cable clamps
Ê
Secure both front panel cables with the cable clamps.
7.4.2.5
Concluding steps
Perform the following procedures:
Ê
Insert all linking boards as described in section
"Installing the linking board"
on page 168
.
Ê
"Installing the midplane" on page 155
Ê
"Installing the power distribution module" on page 57
Содержание PRIMERGY CX400 S1
Страница 12: ...12 Bearbeitungsstand Bestellnummer Content ...
Страница 14: ...14 Upgrade and Maintenance Manual CX400 S1 Version history ...
Страница 18: ...18 Upgrade and Maintenance Manual CX400 S1 Introduction ...
Страница 76: ...76 Upgrade and Maintenance Manual CX400 S1 Basic hardware procedures ...
Страница 132: ...132 Upgrade and Maintenance Manual CX400 S1 Hard disk drives solid state drives ...
Страница 194: ...194 Upgrade and Maintenance Manual CX400 S1 Cabling Figure 145 Midplane 1 MB1 2 MB2 3 J14 4 J16 5 MB4 6 MB3 7 J15 8 J13 ...
Страница 196: ...196 Upgrade and Maintenance Manual CX400 S1 Cabling 12 3 Cabling Figure 147 2 5 inch chassis ...
Страница 197: ...CX400 S1 Upgrade and Maintenance Manual 197 Cabling Figure 148 3 5 inch chassis ...
Страница 198: ...198 Upgrade and Maintenance Manual CX400 S1 Cabling ...


