48
L i f e B o o k N 6 4 0 0 S e r i e s U s e r ’ s G u i d e
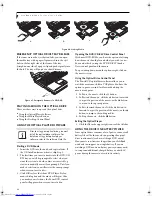
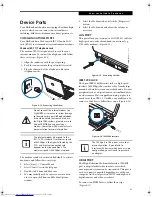
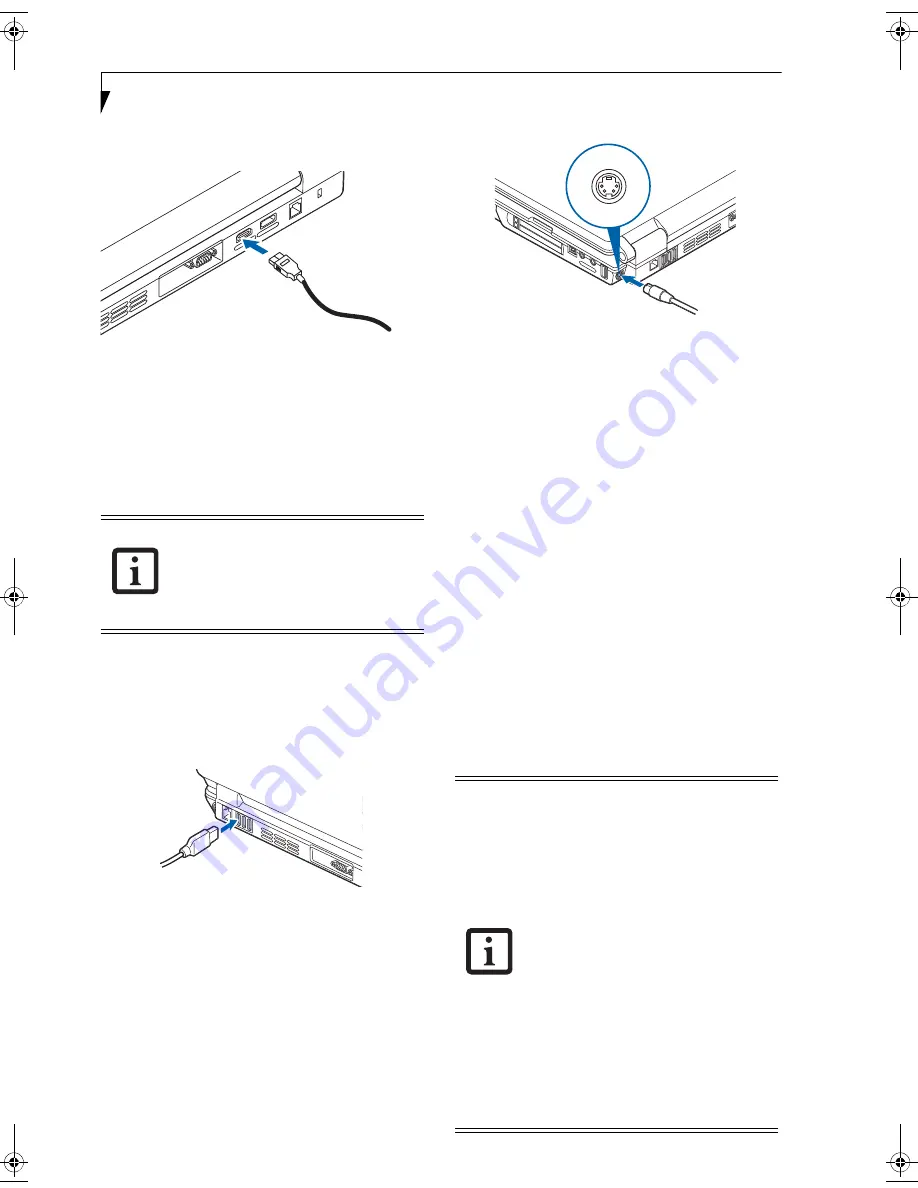
1. Align the connector with the port opening.
2.Push the connector into the port until it is seated.
Figure 4-17. HDMI Interface
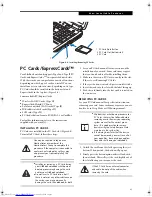
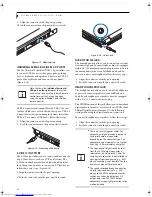
UNIVERSAL SERIAL BUS (USB) 2.0 PORTS
The five Universal Serial Bus (USB) 2.0 ports allow you
to connect USB devices such as game pads, pointing
devices, keyboards and speakers. There is one USB 2.0
port on the right side, and four on the rear panel.
(Figure 4-18)
.
USB 2.0 is downward-compatible with USB 1.1 devices,
so older USB devices will work with these ports. USB 2.0
is a much faster design, running forty times faster than
USB 1.1. To connect a USB device follow these steps:
1. Align the connector with the port opening.
2. Push the connector into the port until it is seated.
Figure 4-18. Connecting a USB Device
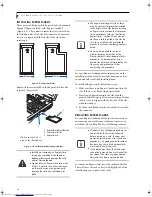
S-VIDEO OUT PORT
The S-Video port allows you to connect and use directly
any S-Video device, such as a VCR or television. The
S-Video standard provides for a higher quality picture
than Composite. In order to connect an S-Video device,
follow these easy steps:
(Figure 4-19)
1. Align the connector with the port opening.
2. Push the connector into the port until it is seated.
Figure 4-19. S-Video Jack
MICROPHONE JACK
The microphone jack allows you to connect an external
stereo microphone. Your microphone must be equipped
with a 1/8”(3.5 mm) mono mini-plug in order to fit into
the microphone jack of your LifeBook notebook. In
order to connect a microphone follow these easy steps:
1. Align the connector with the port opening.
2. Push the connector into the port until it is seated.
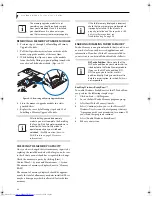
HEADPHONE/SPDIF JACK
The headphone jack allows you to connect headphones
or powered external speakers to your LifeBook note-
book. Your headphones or speakers must be equipped
with a 1/8” (3.5 mm) stereo mini-plug.
The SPDIF function of the jack allows you to download
digital audio to MiniDisc recorders. It uses SPDIF (Sony
Philips Digital Interface) format. Use the following
setting when using the digital audio-out connector.
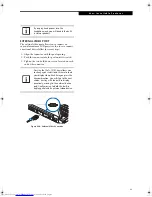
To connect headphones or speakers, follow these steps:
1. Align the connector with the port opening.
2. Push the connector into the port until it is seated
.
Note that only the
individual horizontal
USB port on the right rear
of the system
can be used to connect an infrared remote
control receiver that is required when
using the optional Media Center Edition
remote control.
■
There are several types of cables for
connecting a digital electronic device to
the digital audio-out connector,
depending on the connector type. The
connector on your computer is a Optical
Mini Plug (3.5mm diameter mini plug)
■
The frequency of digital sound output
from the SPDIF output connector is
selectable as 48.0 kHz or 44.1 kHz. If a
sampling rate converter is not installed in
your digital electronic device (e.g., MD
player), recording is not possible. See the
device user manual for more details.
■
The sound recorded through connecting
a digital electronic device (e.g., MD
player) to the SPDIF output connector
cannot be used as digital output. All
output data from the SPDIF output
connector has copyright protection infor-
mation included.
N6460-Baikal.book Page 48 Friday, June 1, 2007 2:50 PM
Содержание N6460 - LifeBook
Страница 1: ...C o p y r i g h t Fujitsu LifeBook N6460 Notebook User s Guide ...
Страница 2: ...C o p y r i g h t ...
Страница 8: ...L i f e B o o k N 6 4 0 0 S e r i e s U s e r s G u i d e ...
Страница 9: ...1 1 Preface ...
Страница 10: ...2 L i f e B o o k N 6 4 0 0 S e r i e s U s e r s G u i d e ...
Страница 12: ...4 L i f e B o o k N 6 4 0 0 S e r i e s U s e r s G u i d e ...
Страница 13: ...5 2 Getting to Know Your LifeBook Notebook ...
Страница 14: ...6 L i f e B o o k N 6 4 0 0 S e r i e s U s e r s G u i d e ...
Страница 31: ...23 3 Getting Started ...
Страница 32: ...24 L i f e B o o k N 6 4 0 0 S e r i e s U s e r s G u i d e ...
Страница 40: ...32 L i f e B o o k N 6 4 0 0 S e r i e s U s e r s G u i d e ...
Страница 41: ...33 4 User Installable Features ...
Страница 42: ...34 L i f e B o o k N 6 4 0 0 S e r i e s U s e r s G u i d e ...
Страница 58: ...50 L i f e B o o k N 6 4 0 0 S e r i e s U s e r s G u i d e ...
Страница 59: ...51 5 Troubleshooting ...
Страница 60: ...52 L i f e B o o k N 6 4 0 0 S e r i e s U s e r s G u i d e ...
Страница 73: ...65 6 Care and Maintenance ...
Страница 74: ...66 L i f e B o o k N 6 4 0 0 S e r i e s U s e r s G u i d e ...
Страница 78: ...70 L i f e B o o k N 6 4 0 0 S e r i e s U s e r s G u i d e ...
Страница 79: ...71 7 System Specifications ...
Страница 80: ...72 L i f e B o o k N 6 4 0 0 S e r i e s U s e r s G u i d e ...
Страница 85: ...77 8 Glossary ...
Страница 86: ...78 L i f e B o o k N 6 4 0 0 S e r i e s U s e r s G u i d e ...
Страница 93: ...85 Appendix A Integrated Wireless LAN User s Guide Optional Device ...
Страница 94: ...86 L i f e B o o k N 6 4 0 0 S e r i e s U s e r s G u i d e ...
Страница 104: ...96 L i f e B o o k N 6 4 0 0 S e r i e s U s e r s G u i d e ...
Страница 105: ...97 Appendix B Using the Fingerprint Sensor ...
Страница 106: ...98 L i f e B o o k N 6 4 0 0 N o t e b o o k A p p e n d i x B ...
Страница 114: ...106 L i f e B o o k N 6 4 0 0 N o t e b o o k A p p e n d i x B ...
Страница 115: ...107 Index ...
Страница 116: ...108 L i f e B o o k N 6 4 0 0 S e r i e s U s e r s G u i d e ...
Страница 120: ...112 L i f e B o o k N 6 4 0 0 S e r i e s U s e r s G u i d e ...


