background image

67

C a r e   a n d   M a i n t e n a n c e

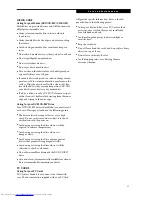
MEDIA CARE

Caring for your Media (DVD/CD-RW/CD-ROM)

Media discs are precision devices and will function reli-
ably if given reasonable care.

Always store your media disc in its case when it 
is not in use.

Always handle discs by the edges and avoid touching 
the surface.

Avoid storing any media discs in extreme tempera-
tures.

Do not bend media discs or set heavy objects on them.

Do not spill liquids on media discs.

Do not scratch media discs.

Do not get dust on media discs.

Never write on the label surface with a ballpoint pen 
or pencil. Always use a felt pen.

If a media disc is subjected to a sudden change in tem-
perature, cold to warm condensation may form on the 
surface. Wipe the moisture off with a clean, soft, lint 
free cloth and let it dry at room temperature. DO NOT 
use a hair dryer or heater to dry media discs.

If a disc is dirty, use only a DVD/CD cleaner or wipe it 
with a clean, soft, lint free cloth starting from the inner 
edge and wiping to the outer edge.

Caring for your DVD/CD-RW Drive

Your DVD/CD-RW drive is durable but you must treat it 
with care. Please pay attention to the following points:

The drive rotates the compact disc at a very high 
speed. Do not carry it around or subject it to shock 
or vibration with the power on.

Avoid using or storing the drive where it will be 
exposed to extreme temperatures.

Avoid using or storing the drive where it is
damp or dusty.

Avoid using or storing the drive near magnets or 
devices that generate strong magnetic fields.

Avoid using or storing the drive where it will be 
subjected to shock or vibration.

Do not disassemble or dismantle the DVD/CD-RW 
drive.

Occasional use of a commercially available lens cleaner 
kit is recommended to maintain your drive.

PC CARDS

Caring for your PC Cards 

PC Cards are durable, but you must treat them with 
care. The documentation supplied with your PC Card

will provide specific information, but you should
pay attention to the following points:

To keep out dust and dirt, store PC Cards in their
protective sleeves when they are not installed in
your LifeBook notebook.

Avoid prolonged exposure to direct sunlight or
excessive heat.

Keep the cards dry.

Do not flex or bend the cards, and do not place heavy 
objects on top of them.

Do not force cards into the slot.

Avoid dropping cards, or subjecting them to
excessive vibration.

Содержание LifeBook P-2040

Страница 1: ...tion technology that is protected by method claims of certain U S patents and other intellectual property rights owned by Macrovision Corporation and other rights users Use of this copyright protection technology must be authorized by Macrovision Corporation and is intended for home and other limited viewing uses only unless authorized by Macrovision Corporation Reverse engineering or disas sembly...

Страница 2: ...l In most but not all areas the sum of the RENs of all of the devices should not exceed five 5 To be certain of the number of devices you may connect to your line as determined by the RENs contact your local telephone company If this equipment causes harm to the telephone network your telephone company may discontinue your service temporarily If possible they will notify you in advance If advance ...

Страница 3: ...seaux de télécommu nications Le département ne garantit pas le fonctionne ment de l équipement à la satisfaction de l utilisateur La série LifeBook notebook e possède un modem interne conforme aux normes de certification d Industrie Canada pour protéger les réseaux de télécommunica tions et satisfaire aux normes de sécurité Avant de connecter cet équipement à une ligne téléphonique l utilisateur d...

Страница 4: ...ns Only C A U T I O N To reduce the risk of fire use only 26AWG or larger telecommunications line cord C A U T I O N For continued protection against risk of fire replace only with the same type and rating fuse C A U T I O N Danger of explosion if Lithium clock battery is incor rectly replaced Replace only with the same or equiva lent type recommended by the manufacturer Dispose of used batteries ...

Страница 5: ... Point Pointing Device Clicking 15 Double Clicking 15 Dragging 15 Quick Point Device Control Adjustment 16 Volume Control Controlling the Volume 17 Flexible Bay Devices Removing and Installing Modular Devices 18 LifeBook Application Panel Application Launch Buttons 20 E mail Notification LED 20 Desktop Control Panel 20 Using the E mail Notification LED 21 Using the CD Player 21 3 Power Sources Con...

Страница 6: ... 45 S Video Out Port 45 Universal Serial Bus Ports 45 Headphone Jack 45 Microphone Jack 46 Mini VGA Port 46 Optical Digital Audio Out Connector 46 5 Troubleshooting Fujitsu Service Assistant 49 Identifying the Problem 49 Specific Problems 49 Troubleshooting Table 50 Power On Self Test Messages 59 Emergency DVD Tray Release 60 Modem Result Codes 60 Restoring Your Pre installed Software Drive Image ...

Страница 7: ...1 Preface ...

Страница 8: ...L i f e B o o k P S e r i e s ...

Страница 9: ... E mail 8fujitsu fujitsupc com Web site http www fujitsupc com Before you place the call you should have the following information ready so that the customer support representative can provide you with the fastest possible solution Product name Product configuration number Product serial number Purchase date Conditions under which the problem occurred Any error messages that have occurred Hardware...

Страница 10: ...2 L i f e B o o k P S e r i e s S e c t i o n O n e ...

Страница 11: ...3 2 Getting to Know Your LifeBook Notebook ...

Страница 12: ...4 L i f e B o o k P S e r i e s S e c t i o n T w o ...

Страница 13: ...alled Weight Saver Phone Modem RJ 11 telephone cable Mini VGA cable Driver and Application Restore CD Getting Started Guide User s Guide this document International Limited Warranty Brochure Certification of Authenticity with operating system manual Premium Care registration card and envelope Fujitsu Service Assistant flyer Fujitsu Service Assistant installation CD Depending upon the configuration...

Страница 14: ...button See Quick Point Pointing Device on page 15 for more information Keyboard A full size keyboard with dedicated Windows keys See Keyboard on page 13 for more information Suspend Resume Power On Button The Suspend Resume Power On button allows you to suspend notebook activity without powering off resume your LifeBook notebook from suspend mode and power on your notebook when it has been shut do...

Страница 15: ...led the weight saver should be installed See Flexible Bay Devices on page 18 for more information Flexible Bay Eject Lever The Flexible Bay eject lever releases the Flexible Bay device DVD CD RW Drive Eject Button The DVD CD RW Drive eject button releasing the drive tray under normal circumstances Emergency CD Tray Release The Emergency CD Tray Release allows you to open the CD tray without poweri...

Страница 16: ... remove PC Cards from the PC Card slot See PC Cards on page 41 for more information IEEE 1394 Jack The 1394 jack is used to connect between your LifeBook and a peripheral such as a digital video camera See IEEE 1394 Jack on page 45 for more information Anti theft Lock Slot The anti theft lock slot allows you to attach an optional physical lock down device Mini VGA Jack The mini VGA jack allows you...

Страница 17: ...one jack is for attaching a telephone line to the internal multinational 56K modem See Modem RJ 11 Telephone Jack on page 45 for more information LAN RJ 45 Jack The internal LAN RJ 45 jack is used for an internal Fast Ethernet 10 100 Base TX connection See Internal LAN RJ 45 Jack on page 45 for more infor mation DC Power Jack The DC power jack allows you to plug in the AC adapter or the optional A...

Страница 18: ...battery when stored over a long period of time or for swapping a discharged battery with a charged Lithium ion battery See Lithium ion Battery on page 35 for more information Main Unit and Configuration Label The configuration label shows the model number and other information about your LifeBook notebook In addition the configuration portion of the label has the serial number and manufacturer inf...

Страница 19: ...rned off the power switch AC ADAPTER INDICATOR The AC Adapter indicator states whether your notebook is operating from the AC adapter the Auto Airline adapter or the batteries This icon has two different states that can tell you what power source your LifeBook notebook is using On This means that either of the adapters are currently in use Off Power is only coming from the batteries and you do not...

Страница 20: ... tion HARD DRIVE OR REMOVABLE MEDIA DRIVE ACCESS INDICATOR The Hard Drive Access indicator states whether your internal hard drive is being accessed PC CARD ACCESS INDICATOR The PC Card Access indicator states whether or not your notebook is accessing a PC Card The indicator will flash if your software tries to access a PC Card even if there is no card installed See PC Cards on page 41 for more in...

Страница 21: ...keys on the keyboard perform dual functions as both standard character keys and numeric keypad keys NumLk can be activated by pressing the NumLk keys Turning off the NumLk feature is done the same way Once this feature is activated you can enter numerals 0 through 9 perform addition subtraction multiplication or division and enter decimal points using the keys designated as ten key function keys T...

Страница 22: ... spacing on the display When it is enabled displays with less than 1280 x 768 or 800 x 600 pixel resolution will still cover the entire screen Fn F6 Pressing F6 repeatedly while holding Fn will lower the brightness of your display Fn F7 Pressing F7 repeatedly while holding Fn will increase the brightness of the display Fn F8 Pressing F8 repeatedly while holding Fn will decrease the volume of your ...

Страница 23: ...ICKING Clicking means pushing and releasing a button To left click move the cursor to the item you wish to select press the top button once and then immediately release it To right click move the cursor to the item you wish to select press the bottom button once and then imme diately release it Figure 2 13 Figure 2 13 Clicking DOUBLE CLICKING Double clicking means pushing and releasing the top but...

Страница 24: ...operation which you can adjust Buttons This tab lets you set up the buttons for right or left handed operation in addition to setting up the time interval allowed between clicks in double clicking Pointers This tab lets you set up the scheme for the cursor depending on its functionality Motion This tab lets you set up a relation between the speed of your finger motion and the speed of the cursor I...

Страница 25: ...individual applications Certain external audio devices you might connect to your system may have hardware volume controls Each source discussed above puts an upper limit on the volume level that must then be followed by the other sources We recommend that you experiment with the various volume controls to discover the optimal sound level P O I N T Any software that contains audio files will also c...

Страница 26: ... Figure 2 18 1 Close any open files 2 Shut down your LifeBook notebook 3 Pull out the Flexible Bay eject lever This will push your device out slightly allowing you to remove the device 4 Slide your device out until it is clear of the bay This will require light force Figure 2 18 Removing Installing a device in the Flexible Bay 5 Slide the device you are installing into your notebook until it click...

Страница 27: ...lightly allowing you to remove the device 6 Slide your device out until it is clear of the bay This will require light force 7 Press the Suspend Resume button so that the computer goes into suspend state 8 Slide the device you are installing into your notebook until it clicks into place 9 It is now safe to turn your notebook back on 10 You can now access and use the device Your LifeBook notebook w...

Страница 28: ...w mail has arrived To use the E mail LED notification you must have access to a POP3 Server with no Security Password Authentication Contact your service provider to deter mine if they support POP3 without Security Password Authentication DESKTOP CONTROL PANEL To configure your LifeBook Application Panel with the Application Panel Setup 1 Click on Start 2 Windows 2000 only Click on Settings 3 Clic...

Страница 29: ...nnection with your provider check for and retrieve new mails terminate the connection and activate the blinking LED to alert you of new mail USING THE CD PLAYER Your LifeBook Application Panel utility includes a desktop media player panel You may use this panel to operate as a CD Player To use the desktop CD player panel 1 Click on Start 2 Click on Programs 3 Click on Lifebook Application Panel 4 ...

Страница 30: ...e Up Volume Down and Mute controls for the CD Player desktop control panel adjusts the volume of the CD audio line only It does not adjust your note book s master software volume control or the manual volume on the LifeBook notebook The CD Player desktop control panel is designed to be displayed in High Color 16 bit or in True Color 24 bit or more If you have your notebook s display set for 256 co...

Страница 31: ...23 3 Getting Started ...

Страница 32: ...24 L i f e B o o k P S e r i e s S e c t i o n T h r e e ...

Страница 33: ...apter into an AC electrical outlet Figure 3 1 Connecting the Optional Auto Airline Adapter 1 Plug the DC output cable into the DC power jack on your notebook 2 Plug the Auto Airline adapter into the cigarette lighter of an automobile with the ignition key in the On or Accessories position OR 3 Plug the Auto Airline adapter into the DC power jack on an airplane seat Switching from AC Adapter Power ...

Страница 34: ...Pressing repeatedly will lower the brightness of your display Fn F7 Pressing repeatedly will increase the brightness of the display Using the Power Management Utility Windows 2000 only Adjusting the brightness using the Power Management changes the setting permanently 1 Double click the Battery icon in the lower right corner of your display This will open the BatteryAid Properties dialog box 2 Sel...

Страница 35: ...rating system s opening screen The boot sequence is executed when You turn on the power to your LifeBook notebook You restart your notebook from the Windows Shut Down dialog box The software initiates a system restart Example When you install a new application You reset the system by pressing the three keys CTRL ALT DEL BIOS SETUP UTILITY The BIOS Setup Utility is a program that sets up the operat...

Страница 36: ...ctly to the Condition of Use page Registration If your connection is successful you will go to the Registration Confirmation page On this page simply enter the requested information and then check the box at the bottom to register your copy of Windows with Microsoft Once you have finished click the Next button to continue You will then go through the Fujitsu registration process Follow the instruc...

Страница 37: ...either Fax to 1 800 577 9989 Mail to Fujitsu PC Corporation 750 139th Ave San Leandro CA 94578 Attn Warranty Department You may also register on our Web site www fujitsupc com support You will need to be set up with an Internet Service Provider ISP to use this option INSTALLING CLICK ME WINDOWS 2000 ONLY The first time you boot up your system you will see an icon on the desktop called Click Me Whe...

Страница 38: ...of the other internal components except those necessary to maintain system memory and allow for restarting Your notebook can be put in Suspend mode by Pressing the Suspend Resume button when your system is turned on Selecting Standby from the Windows Shut Down menu Timing out from lack of activity Allowing the battery to reach the Dead Battery Warning condition Your LifeBook notebook s system memo...

Страница 39: ...ngs may also be changed in the BIOS RESTARTING THE SYSTEM If your system is on and you need to restart it be sure that you use the following procedure 1 Click the Start button and then click Shut Down 2 Select the Restart option from within the Windows Shut Down dialog box 3 Click OK to restart your notebook Your notebook will shut down and then reboot POWER OFF Before turning off the power check ...

Страница 40: ...32 L i f e B o o k P S e r i e s S e c t i o n T h r e e ...

Страница 41: ...33 4 User Installable Features ...

Страница 42: ...34 L i f e B o o k P S e r i e s S e c t i o n F o u r ...

Страница 43: ... will appear If you do not respond to the low battery message the batteries will continue to discharge until they are too low to operate When this happens your notebook will go into Suspend mode There is no guarantee that your data will be saved once the notebook reaches this point P O I N T S Actual battery life will vary based on screen bright ness applications features power management set ting...

Страница 44: ...of an additional battery you can have a fully charged spare to swap with one that is not charged There are two ways to swap batteries cold swapping and warm swapping Cold swapping Batteries To cold swap batteries in your battery bay follow these easy steps Figure 4 1 1 Have a charged battery ready to install 2 Shut down your notebook and disconnect the AC adapter 3 Slide the battery bay release bu...

Страница 45: ...lled formatting or initial izing a disk You will need to format new disks unless they are preformatted Please refer to your operating system manual for step by step instructions on formatting a disk To prevent accidental erasure of the data stored on a disk slide the write protect tab until a small hole is exposed This sets the disk into a protected state where nothing can be added or removed If y...

Страница 46: ...tray 3 Place the media into the tray label side up with the hole in the center of the disc Snap the disc onto the raised circle in the center of the tray 4 Gently push the holder tray back in until you hear a click Media Holder Tray Media Eject Button P O I N T S Prior to using your DVD CD RW Combo Drive you must install the DVD CD RW drive software Refer to the applicable readme file on the Appli...

Страница 47: ... click on the movie screen to open a dropdown menu for options 2 Select View then Player for all the controls available This will open the control panel into the bottom of the screen Using the DVD CD RW Drive Control Panel The DVD CD RW Combo Drive software allows you to watch the movie much like a VCR player You have the option to pause rewind fast forward and stop the movie at any point 1 To Pau...

Страница 48: ... mode 7 Restart your DVD CD RW drive locate and skip to the chapter of the movie you were last watching 8 Continue watching your DVD movie AUTO INSERT NOTIFICATION FUNCTION The Auto Insert Notification function allows your Life Book notebook to automatically start a DVD CD as soon as it is inserted in the DVD CD RW drive and the tray is closed Your notebook will begin playing an audio DVD CD or wi...

Страница 49: ...ebook REMOVING PC CARDS To remove a PC Card follow these easy steps 1 See your PC Card manual for specific instructions on removing your card Some PC Cards may require your notebook to be in Suspend Mode or Off while removing them 2 Push the Eject button in until it is flush with the notebook This will push the PC Card slightly out of the slot allowing you to remove the card Eject Button PC Card S...

Страница 50: ...er remove the screw from the hole indicated Figure 4 3 Figure 4 3 Removing screw from bottom 4 Turn the system over and open the top cover all the way so that it is lying flat on the work surface 5 Pry the spacer panel in front of the keyboard away from the system Figure 4 4 Figure 4 4 Lifting the spacer panel 6 Slide the keyboard forward slightly until it disen gages and can be lifted freely Figu...

Страница 51: ...me time Figure 4 10 Figure 4 10 Removing a memory module 3 While holding the clips out remove the module from the slot by lifting it up and pulling towards the back of your LifeBook notebook 4 Store the memory upgrade module in a static guarded sleeve 5 Replace the keyboard by following steps 10 and 11 of Installing a Memory Upgrade Module CHECKING THE COMPUTER RECOGNITION OF NEW MEMORY CAPACITY O...

Страница 52: ...of RAM for Code Morphing Software CMS For more information on CMS click on the Technology link on the refer to the Transmeta web site at www transmeta com P O I N T If the total memory displayed is incorrect check that your memory upgrade module is properly installed If the module is properly installed and the capacity is still not correctly recognized see the Troubleshooting sec tion starting on ...

Страница 53: ...r fast transfer of digital files and data S VIDEO OUT PORT The S Video port allows you to connect and use directly any S Video device such as a VCR or television The S Video standard provides for a higher quality picture than NTSC or PAL In order to connect an S Video device follow these easy steps See figure 2 7 on page 9 for location 1 Align the connector with the port opening 2 Push the connect...

Страница 54: ... 5 Click on the Audio tab and select Enable S PDIF output 6 Click on the Apply button P O I N T If you plug headphones into the headphone jack the built in stereo speakers will be disabled P O I N T Pressing the Fn F10 keys allows you to change your selection of where to send your display video Each time you press the key combination you will step to the next choice starting with the built in disp...

Страница 55: ...47 5 Troubleshooting ...

Страница 56: ...48 L i f e B o o k P S e r i e s S e c t i o n F i v e ...

Страница 57: ... also disconnect such devices thus eliminating them as possible causes of failure 5 Turn on your notebook Make sure it has been off at least 10 seconds before you turn it back on 6 Go through the boot sequence 7 If the problem has not been resolved refer to the Troubleshooting Table that follows for more detailed troubleshooting information 8 If you are still having problems after referring to the...

Страница 58: ...nfigured correctly Refer to your application and operating system documentation for help DVD CD RW Drive Problems LifeBook notebook fails to recognize DVD CD RW drive Protective sheet is still in the DVD CD RW drive tray Replace DVD CD RW disc in tray DVD CD RW disc is not pushed down onto raised center circle of the drive Open DVD CD RW tray and re install DVD CD RW disc properly DVD CD RW drive ...

Страница 59: ...ctly set for your internal Primary Master or optional second hard drive Primary Slave Revise BIOS settings to set both Primary Master and Primary Slave correctly See BIOS Setup Utility on page 27 for more information The wrong drive designator was used by an application when a bootable CD ROM was used to start the notebook Verify drive designator used by application is in use by the operating syst...

Страница 60: ...e Check for Power On Self Test POST messages See Power On Self Test Messages on page 59 for more information Modem Problems Messages about modem operation Messages about modem operation are generated by whichever modem application is in use See your application software documentation for additional information USB Device Problems You have installed a USB device but your LifeBook notebook does not ...

Страница 61: ...s Indicator Panel to determine the presence and condition of the batteries See Status Indicator Panel on page 11 for more information Install a charged battery or a Power adapter The primary battery is installed but is faulty Use the Status Indicator panel to verify the presence and condition of the batteries See Status Indicator Panel on page 11 for more information If a battery is indicating a s...

Страница 62: ...on See Power Sources on page 25 for more information You have a battery failure Verify the condition of the batteries using the Status Indicator panel and replace or remove any batteries that are shorted See Status Indicator Panel on page 11 for more information Your power adapter has failed or lost its power source Make sure the adapter is plugged in and the outlet has power Your LifeBook noteboo...

Страница 63: ...ugh Hold the button longer This may need to be a few seconds if your application is preventing the CPU from checking for button pushes There may be a conflict with the application software Close all applications and try the button again The system powers up and displays power on informa tion but fails to load the operating system The boot sequence settings of the setup utility are not compatible w...

Страница 64: ...ll step to the next choice The choices in order are built in display only external monitor only both built in display and external monitor The built in display is blank when you turn on your LifeBook notebook continued The angle of the display and the brightness settings are not adequate for your lighting conditions Move the display and the brightness control until you have adequate visibility The...

Страница 65: ...o interfere with your operation needs Display is faulty contact your support representative The application display uses only a portion of your screen and is surrounded by a dark frame You are running an application that does not support 800 x 600 1024 x 768 pixel resolution display and display compres sion is enabled Display compression gives a clearer but smaller display for applications that do...

Страница 66: ...Support portions of the Specifications section See Specifications on page 71 for more information Miscellaneous Problems An error message is displayed on the screen during the operation of an application Application software often has its own set of error message displays See your application manual and help displays screens for more information Not all messages are errors some may simply be statu...

Страница 67: ... system there may be a serious fault which might cause you to lose data if you continue Contact your support representative Incorrect Drive A type run SETUP Type of floppy drive A not correctly identified in Setup This means that the floppy disk drive type identified in your setup utility does not agree with the type detected by the Power On Self Test Run the setup utility to correct the inconsist...

Страница 68: ...orrupted or modified incorrectly perhaps by an application program that changes data stored in BIOS memory Run Setup and reconfigure the system System RAM Failed at offset nnnn System memory failed at offset nnnn of in the 64k block at which the error was detected This means that there is a fault in your built in memory If you continue to operate you risk corrupting your data Contact your support ...

Страница 69: ...he C partition must be a FAT FAT32 or NTFS partition and it must be directly before the backup partition on your hard disk 1 At the Drive Image Special Edition main screen click Options Create New Backup There is also a button on the main DISE screen that performs the same function 2 You will be prompted to type a password Type a password or leave the password fields blank then click OK DISE displ...

Страница 70: ...62 L i f e B o o k P S e r i e s S e c t i o n F i v e ...

Страница 71: ...63 6 Care and Maintenance ...

Страница 72: ...64 L i f e B o o k P S e r i e s S e c t i o n S i x ...

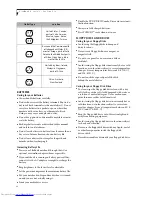
Страница 73: ...cleaners Storing your LifeBook notebook If storing your notebook for a month or longer turn your LifeBook notebook off and remove all Lithium ion batteries Store your notebook and batteries separately If you store your LifeBook with a battery installed the bat tery will discharge and battery life will be reduced In addition a faulty battery might damage your Life Book Store your Fujitsu LifeBook i...

Страница 74: ...r your Floppy Disks Avoid using the floppy disks in damp and dusty locations Never store a floppy disk near a magnet or magnetic field Do not use a pencil or an eraser on a disk or disk label Avoid storing the floppy disks in extremely hot or cold locations or in locations subject to severe temperature changes Store at temperatures between 50º F 10ºC and 125ºF 52ºC Do not touch the exposed part of...

Страница 75: ...ou must treat it with care Please pay attention to the following points The drive rotates the compact disc at a very high speed Do not carry it around or subject it to shock or vibration with the power on Avoid using or storing the drive where it will be exposed to extreme temperatures Avoid using or storing the drive where it is damp or dusty Avoid using or storing the drive near magnets or devic...

Страница 76: ...68 L i f e B o o k P S e r i e s S e c t i o n S i x ...

Страница 77: ...69 7 Specifications ...

Страница 78: ...70 L i f e B o o k P S e r i e s S e c t i o n S e v e n ...

Страница 79: ...in color flat panel TFT active matrix LCD display with simultaneous display capability Video Color and Resolution 10 6 TFT SXGA Internal 1280 x 768 pixel resolution 16M colors External 1280 x 1024 pixel resolution 16M colors Simultaneous Video Yes 1024 x 768 16M colors XGA SVGA and VGA compatible Video RAM ATI Rage Mobility M with 4MB embedded Video RAM AUDIO SigmaTel STAC9757T codec with 16 bit s...

Страница 80: ...ion key Key pitch 17 mm Key stroke 2 mm Built in Quick Point pointing device with left and right buttons and scroll button Built in Palm Rest External Keyboard Support USB compatible External Numeric Keypad Support USB compatible External Mouse Support USB compatible POWER Batteries One main Lithium ion battery rechargeable 10 8V 1900 mAh Optional high capacity Lithium ion battery recharge able 10...

Страница 81: ...e through the help system of the software We recommend that you review these manuals for general information on the use of these applications Drive Image Special Edition DISE by PowerQuest DISE is used to restore the factory image and restore the system to its original state For future backup a section of your hard drive contains an image of the original installed software and utilities If necessa...

Страница 82: ... solving most problems you might encounter The Fujitsu Service Assistant is an interactive support tool that provides automated diagnosis and solutions for your hardware and software problems Fujitsu Service Assis tant is pre installed on systems with Windows 2000 in systems with Windows XP Home it can be loaded from the Fujitsu Service Assistant CD New support information for the Fujitsu Service ...

Страница 83: ...75 8 Glossary ...

Страница 84: ...76 L i f e B o o k P S e r i e s S e c t i o n E i g h t ...

Страница 85: ... information Cache Memory A block of memory built into the micro processor which is much faster to access than your system RAM and used in specially structured ways to make your overall data handling time faster CardBus A faster 32 bit version of the PC Card interface which offers performance similar to the 32 bit PCI architecture CD ROM Compact disc read only memory This is a form of digital data...

Страница 86: ...111 in binary 47 in decimal I O Input Output Data entering and leaving your LifeBook notebook in electronic form I O Port The connector and associated control circuits for data entering and leaving your LifeBook notebook in elec tronic form IDE Intelligent Drive Electronics A type of control interface for a hard drive which is inside the hard drive unit IEEE 1394 A type of data transfer protocol t...

Страница 87: ... external devices such as keyboards and monitors RAM Random Access Memory A hardware component of your LifeBook notebook that holds binary information both program and data as long as it has the proper power applied to it RAM Module A printed circuit card with memory and associated circuitry which allows the user to add additional memory to the computer without special tools Reset The act of reloa...

Страница 88: ...s standard that allows for fast data transfer A single USB port can be used to connect up to 127 peripheral devices such as mice modems and scanners VGA Video Graphics Array A video display standard originally introduced by IBM with the PS 2 series of personal computers VRAM Video Random Access Memory A memory dedicated to video display data and control WFM Wired for Management is Intel s broad ba...

Страница 89: ...Speakers 50 C Cache Memory 77 CapsLock 12 CD ROM problems 50 Click Me 29 Closed Cover Switch 6 Cold swap 18 Cold swapping 36 Configuration Label 10 Contact Information 1 Control 39 cursor control button 6 Cursor Keys 13 D DC Output Cable 25 DC Power Jack 9 25 DC power jack 9 Device Ports 45 DIMM 42 DISE 61 Disk care 66 Display Panel 6 26 adjusting 26 brightness 26 closing 26 latch 6 opening 26 pow...

Страница 90: ...14 F11 14 F3 14 F4 14 F5 14 F6 14 F7 14 F8 14 F9 14 FN 14 H Hard Disk Drive access indicator 12 problems 51 Hard Disk Timeout 31 Headphone Jack 9 45 Hibernation Feature 30 disable enabled 30 I IEEE 1394 Jack 8 45 Internal LAN Jack 45 K Keyboard 6 13 cursor keys 13 function keys 13 numeric keypad 13 problems 51 windows keys 13 L LAN RJ 45 jack 9 LifeBook Application Panel 6 20 M Media Player care 6...

Страница 91: ...ol adjustment 16 double clicking 15 dragging 15 Quick Point Pointing Device 6 R Registration 28 29 Restarting 31 Restoring your hard disk 61 RJ 11 45 RJ 45 45 S ScrLk 12 SDRAM 42 Serial Port 79 Software 38 Specifications 71 Standby Mode 31 Status Indicator Panel 6 11 Stereo Speakers 6 Suspend 79 Suspend Mode 30 Suspend Resume Button 30 Suspend Resume Power On Button 6 S Video Out Port 45 S Video P...

Страница 92: ...84 L i f e B o o k P S e r i e s ...

Отзывы: