66
6
67
CONNECTING AT PC-CAMERA MODE
PC
(USB)
socket
(USB)
socket
DC IN 3V
socket
Camera
2
1
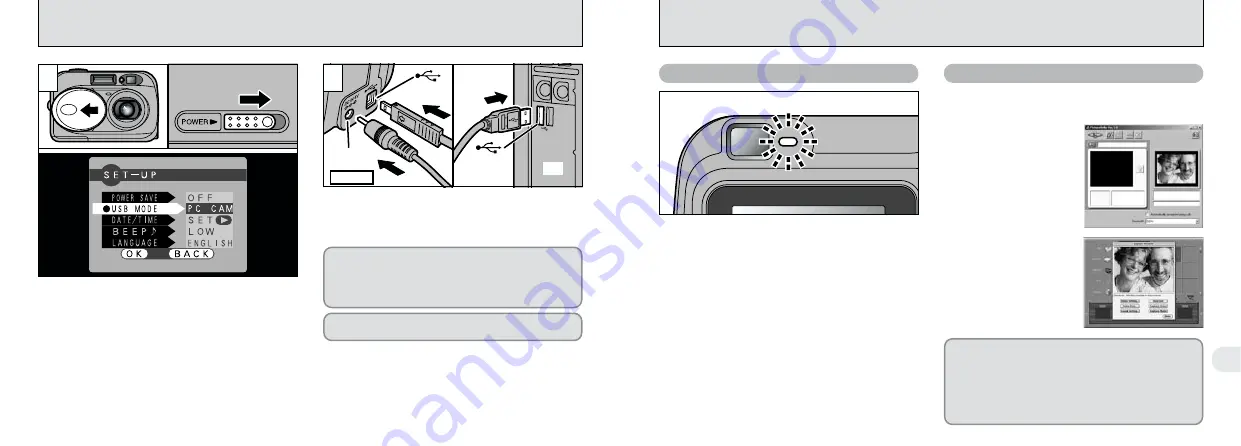
Open the lens cover.
2
Slide the Power switch sideways to switch the
camera on.
3
Set the “USB MODE” setting in the “SET–UP”
menu to “PC CAM” (
➡
P.58).
4
Slide the Power switch sideways to switch the
camera off.
1
Switch your computer on.
2
Use the special USB cable to connect the camera to
your computer.
3
Switch the camera on.
Always use the prescribed procedure when
disconnecting or switching off the camera (
➡
P.68).
If you are connecting your camera to a Windows PC
for the first time, the “Add New Hardware Wizard”
window opens and driver software installation
begins (
➡
Software Quick Start Guide booklet).
●
!
You should use the AC power adapter when the camera
is connected to your computer (
➡
P.21). Loss of power
during data transmission can prevent successful data
downloading.
●
!
Ensure that you insert the USB cable plugs into the
correct sockets.
●
!
Push the cable plugs firmly into the connector sockets.
●
!
Do not close the lens cover while the camera and
PC are communicating. If you close the lens cover,
the “
¥
” warning is displayed and
communication is interrupted.
●
!
Do not disconnect the USB cable when the camera
is communicating with the computer. See P.68 for
information on the disconnection procedure.
i
The viewfinder lamp alternately blinks green
and orange while the camera is communicating
with your computer.
i
The lens is fixed at the wide-angle zoom setting.
i
“PC CAM” appears on the LCD monitor.
i
Power Save/Auto Power Off does not function
when a USB connection is being used.
i
FinePixViewer automatically starts up and the
Picture Hello window opens (Windows only).
i
You can use software
such as VideoImpression
to view live images.
Camera Operation
Computer Operation
✽
Screen for Windows 98 SE
✽
Macintosh screen
If the above operations do not occur, you do not
have the required software programs or drivers
installed on your computer. Refer to the Software
Quick Start Guide booklet and complete the
required computer setup procedures. Then
reconnect the camera to your computer.
1
0
1
0
2
0
3
0
4


