background image

Creating Folders

77

Ba
sic

 O

p

e

ra

tio

n

3

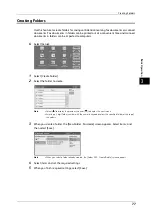
Creating Folders

Use this feature to create folders for saving confidential incoming fax documents or scanned 
documents. Fax documents in folders can be printed out at a convenient time and scanned 
documents in folders can be imported to computers.

4

Select [Setup].

1

Select [Create Folder].

2

Select the folder to create.

Note

Select[

]to display the previous screen or[

]to display the next screen.

Entering a 3-digit folder number with the numeric keypad displays the specified folder at the top of 
the column.

3

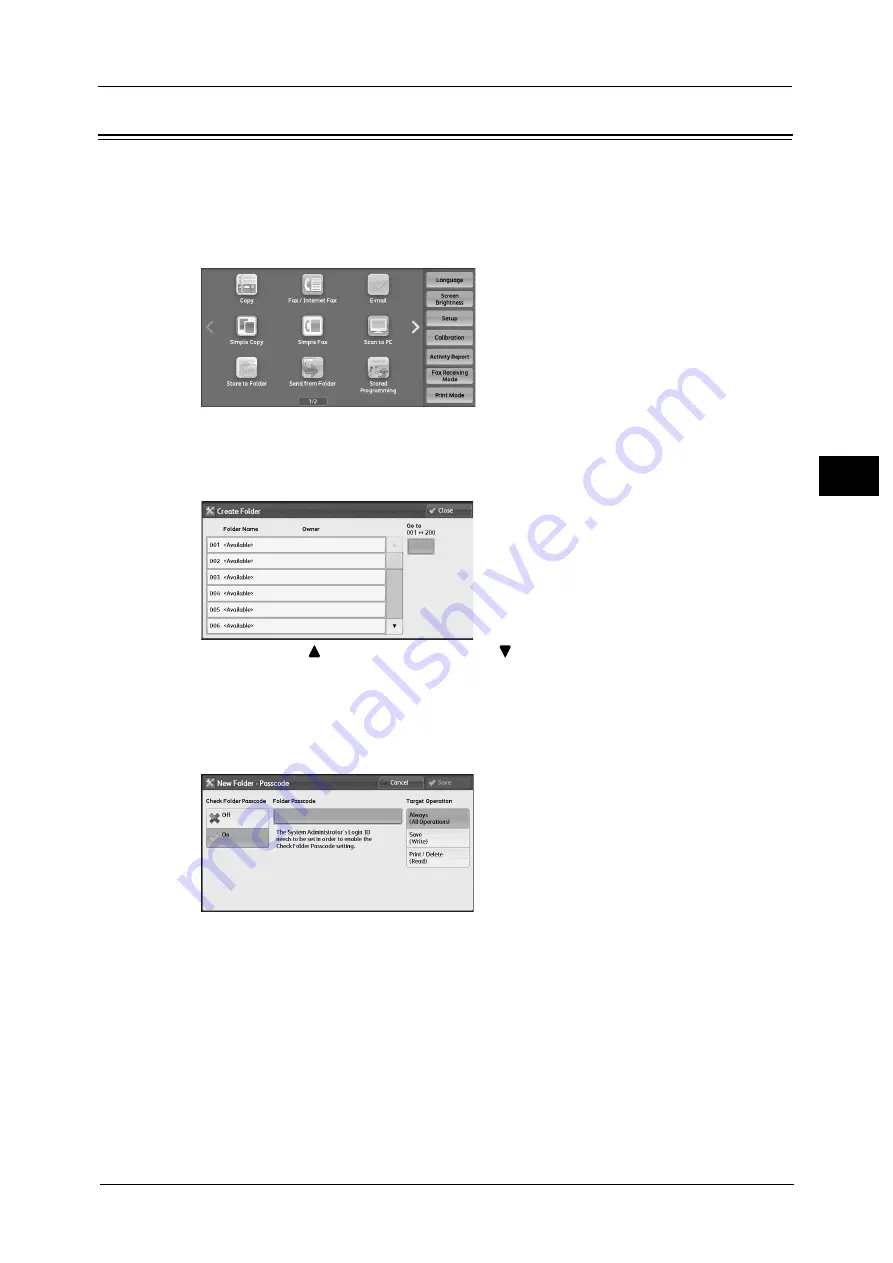
When you create a folder, the [New Folder - Passcode] screen appears. Select items, and 
then select [Save].

Note

When you select a folder already created, the [Folder XXX - Create/Delete] screen appears.

4

Select items and set the required settings.

5

When you finish required settings, select [Save].

Содержание DocuCentre-VI C2264

Страница 1: ...DocuCentre VI C2264 Quick Reference for English Speaking Users...

Страница 2: ...i Xerox is not responsible for any direct and indirect damages arising from or caused by such data loss Important 1 This manual is copyrighted with all rights reserved Under the copyright laws this ma...

Страница 3: ...pecific chemical substances defined 26 Illegal Copies and Printouts 30 2 Product Overview 33 Machine Components 34 Control Panel 42 Power Source 45 Switching the Main Power On 45 Switching the Power O...

Страница 4: ...nning Features 75 Creating Folders 77 Changing the Default Settings 78 4 Paper and Other Media 79 Usable Paper 80 Weights of Usable Paper 80 Supported Paper Types 80 Unusable Paper 81 Loading Paper 82...

Страница 5: ...rays 1 to 4 109 Paper Jams in Tray 5 Bypass Tray 109 Paper Jams in Duplex Module 111 Paper Jams in Finisher A1 111 Paper Jams in Finisher B1 112 Document Jams 114 Duplex Automatic Document Feeder B1 C...

Страница 6: ...Table of Contents 6...

Страница 7: ...ains descriptions about how to use this document as well as cautions on using the product safely and legally z Preface 8 z Using This Guide 9 z Conventions 10 z Safety Notes 12 z Regulation 24 z Envir...

Страница 8: ...th anti counterfeit features in some rare cases certain kinds of documents may be unable to copy Fuji Xerox Co Ltd Fuji Xerox shares the global concern about environmental conservation and has integra...

Страница 9: ...em network system and the personal computer respectively Organization This guide consists of the following chapters Chapter 1 Before Using the Machine Explains how to use this guide safety information...

Страница 10: ...the tray Short Edge Feed SEF When loading documents short edge feed into the document feeder load with one of the short edges facing into the document feeder The long edges appear on the top and bott...

Страница 11: ...rmation on cleaning the document glass refer to Maintenance P 100 Important Important is statement that provide important information For example Important Do not switch off the main power immediately...

Страница 12: ...item that if not followed strictly can lead death or severe or fatal injuries and the possibility to do it is comparatively high Used for items that if not followed strictly can lead to severe or fat...

Страница 13: ...ounded electrical outlet To prevent overheat and a fire accident do not use an extension cord a multi plug adaptor or a multiple connector Consult Fuji Xerox Customer Support Center to check if an out...

Страница 14: ...acked or worn down Once you notice any unusual condition switch off and unplug this product first and contact Fuji Xerox Customer Support Center Do not locate this product where people might step on o...

Страница 15: ...c document feeder 1086 916 1567 100 100 659 408 400 70 Unit mm The company batch size 3 mm is not included in the measurements 1130 960 1567 100 100 659 408 400 70 Unit mm The company batch size 3 mm...

Страница 16: ...sher A1 optional and the side tray optional 1130 960 1013 1567 100 100 659 408 400 70 Unit mm The company batch size 3 mm is not included in the measurements 1156 1036 1567 50 100 659 408 400 70 Unit...

Страница 17: ...ptional z With the Booklet Maker Unit for Finisher B1 optional 1693 1573 1567 50 100 659 408 400 70 Unit mm The company batch size 3 mm is not included in the measurements 1736 1616 1567 50 100 659 40...

Страница 18: ...e Otherwise it may fall over and cause injuries Always lock the wheels of this product after installation Otherwise it may fall over or slide and cause injuries To bundle wires and cables always use t...

Страница 19: ...ce becomes activated z Any liquid is spilled into the product z The product is soaked in water z Any part of the product is damaged Do not insert any object into slots or openings of this product Do n...

Страница 20: ...bedded in this product If current leakage occurs the ground fault interrupter automatically cuts off power circuit to prevent electric shock and a fire accident The ground fault interrupter is normall...

Страница 21: ...the product immediately and contact Fuji Xerox Customer Support Center Never touch the paper output area of the finisher during operation It may cause injuries Be careful in removing jammed staples B...

Страница 22: ...artridge no longer needed contact Fuji Xerox Customer Support Center for its take back Never throw a waste toner bottle into an open flame Remaining toner in the cartridge may catch fire and cause bur...

Страница 23: ...Location of Warning and Caution Labels Always follow all warning instructions marked on or supplied with this product To avoid the risk of burn injuries and electric shock never touch the area with th...

Страница 24: ...erwise radio interference may occur and cause malfunction of cardiac pacemakers and defibrillators Consult medical electrical equipment manufacturers for the use of this product in proximity to medica...

Страница 25: ...product have been used for the test z Fuji Xerox will store the spare parts necessary to maintain the function of this product for 7 years after the production termination of this product z For enviro...

Страница 26: ...by the Industrial Safety and Health Law and or the Law Concerning Reporting etc of Releases to the Environment of Specific Chemical Substances and Promoting Improvements in Their Management PRTR Law...

Страница 27: ...Safety Data Sheet SDS an index for characteristics and handling of the specific chemical substances defined 27 Before Using the Machine 1 2017 3 8 mg 2 mg ACGIH 2017 10 mg 3 mg pH...

Страница 28: ...1 Before Using the Machine 28 Before Using the Machine 1...

Страница 29: ...Registry Number R is a Registered Trademark of the American Chemical Society 1 IARC Monographs on the Evaluation Carcinogenic Risks to Humans WHO IARC National Toxicology Program NTP Report on Carcino...

Страница 30: ...nt sheets warehouse certificates vouchers gift certificates train tickets commuter tickets tokens discount coupons public lottery tickets betting tickets etc 2 Forgery of documents and counterfeiting...

Страница 31: ...private library a school attached institution a public museum various public data centers and a research organization aimed at obtaining public benefit etc Making quotations from copyrighted works pr...

Страница 32: ...1 Before Using the Machine 32 Before Using the Machine 1...

Страница 33: ...the machine such as the names of each component switching on and off of the machine and the operation of the touch screen and power saver settings z Machine Components 34 z Control Panel 42 z Power So...

Страница 34: ...l P 42 4 Exit 2 Tray Outputs are delivered here by separating the center tray into two levels Note When the Exit 2 Tray is installed select Installed in Extra Center Tray in the System Administration...

Страница 35: ...C Open this cover to clear paper jams 2 Top left cover A Open this cover by pressing the release lever to clear paper jams 3 Bottom left cover B Open this cover to clear paper jams 4 Adjusting foot Pr...

Страница 36: ...Power Source P 45 3 Drum cartridges R1 Black R2 Cyan R3 Magenta R4 Yellow Contains photoconductors and development units Drum cartridges are arranged in order R1 Black R2 Cyan R3 Magenta R4 Yellow fr...

Страница 37: ...e LINE 2 and LINE 3 are not available 7 Waste toner container R5 Collects waste toner 8 Fusing unit R8 Fuses toner on paper Do not touch this unit as it is extremely hot No Name marked on the cover of...

Страница 38: ...this lever to clear paper jams 2 Left cover Open this cover to clear paper jams 3 Inner cover Open this cover to clear paper jams 4 Document guides Use these guides to align the edges of documents 5...

Страница 39: ...r No Component Function 1 Center tray Copies or prints are delivered here 2 Finisher A1 optional Staples copies or prints 3 Staple cartridge Contains staples Remove this cartridge when replacing or ad...

Страница 40: ...paper jams 6 Finisher tray Stapled or creased outputs are delivered here 7 Creaser unit Creases outputs in half 8 Staple cartridge Contains staples 9 Front cover Open this cover when clearing paper j...

Страница 41: ...a connecting cord dedicated to the machine Do not connect this cord to any other devices than the machine 14 Center tray Top cover of the finisher transport Copies and prints are delivered here when t...

Страница 42: ...tton Press this button to check or cancel the current job to check or print stored jobs or to check completed jobs 5 Machine Status button Press this button to check the machine status and meters to c...

Страница 43: ...fax or e mail 15 C Clear button Press this button to cancel a numerical value you have entered with the numeric keypad 16 Dial Pause button Press this button to insert a pause into a destination numb...

Страница 44: ...re are two ways in which address numbers and stored programs are assigned to the one touch buttons Select either of the following z Type 1 The buttons 1 to 52 are used for address numbers and they cor...

Страница 45: ...ff Do not switch the main power off except when you connect a cable to the machine or clean the machine Switching off the main power may erase the data in the memory when using the Fax service Switchi...

Страница 46: ...to save power consumption while the machine is not in use For information on the Power Saver feature refer to Power Saver Modes P 49 Important If the power is switched off all the services of the mac...

Страница 47: ...sing data may be erased While data is being received While a job is being printed While a job is being copied While a job is being scanned When switching the power off wait 5 seconds after outputs hav...

Страница 48: ...ause a machine malfunction Switch the main power off first when unplugging the power cord Unplugging the power cord with the main power on may damage the hard disk and the memory or cause a machine ma...

Страница 49: ...is authenticated the machine exits the authentication mode During operation of the Warmer mode the machine does not enter the Sleep mode When the Power Saver button is pressed the machine enters the P...

Страница 50: ...r the Low Power mode and the Sleep mode the machine directly enters the Sleep mode without entering the Low Power mode first When the machine operates normal printing Sample Set print or printing rece...

Страница 51: ...e Low Power mode Note The default value for From Last Operation to Low Power Mode is 1 minutes You cannot disable the Low Power mode From Last Operation to Sleep Mode Set the time to elapse from the l...

Страница 52: ...Overview 2 Adjusting Screen Brightness You can adjust the screen brightness of the screen on the Services Home screen 1 Select Screen Brightness on the Services Home screen 2 Press or to adjust the sc...

Страница 53: ...describes basic operation about the machine z Copying Procedure 54 z Fax Internet Fax Procedure 62 z Print Procedure 67 z Scanning Procedure 68 z Other Scanning Features 75 z Creating Folders 77 z Ch...

Страница 54: ...om 125 x 85 mm Standard size A5 A5 to 297 x 432 mm Standard size A3 11 x 17 The document feeder automatically detects standard size documents For non standard size documents enter the size on the Orig...

Страница 55: ...t Always close the document cover after using the document glass The document glass automatically detects standard size documents For non standard size documents enter the size on the Original Size sc...

Страница 56: ...o services are available to copy documents Simple Copy Allows you to only select basic features to copy documents Copy Allows you to make detailed settings to copy documents The following describes ho...

Страница 57: ...es as necessary Step 3 Entering a Quantity You can enter up to 999 sets 1 Enter the number of copies using the numeric keypad The number of copies entered appears on the upper right of the touch scree...

Страница 58: ...e current document is being scanned This allows you to scan the documents as a single set of data 2 Select Next Original while scanning is in progress Note When using the document feeder load the next...

Страница 59: ...If copies are not output after you start the copy job the job may be in pending status Use the following procedure to confirm the job status 1 Press the Job Status button 2 Confirm the job status Note...

Страница 60: ...cel a copy job in progress use the following procedure 1 Press either the Stop button on the control panel or Delete on the touch screen 2 Select Delete If Delete does not appear on the screen 1 Press...

Страница 61: ...Operation 3 2 Select the job to cancel Note Select to return to the previous screen or to move to the next screen Scroll the list by drag or flick operation to switch the screen to be displayed 3 Sel...

Страница 62: ...ow to obtain a fax driver contact your Fuji Xerox Customer Support Center For information on using Direct Fax from PC clients refer to Fax Driver Help Some of the features described in this section ar...

Страница 63: ...to be displayed on the screen depend on your machine configuration When the Authentication or Accounting feature is enabled a user ID and passcode may be required Ask your system administrator for the...

Страница 64: ...ent to multiple destinations in a single operation If you need to insert a pause in a fax number for example when using a calling card press the Dial Pause button When you dial manually Dial Pause is...

Страница 65: ...and the time of Auto Clear lapsed without any operation you can set whether or not to continue the job 3 Load the next document Press the Start button If you have more documents repeat steps 3 and 4 4...

Страница 66: ...ay the Job Status screen To exit the Job Status screen press the Services Home button 3 Press the C Clear or Clear All button on the control panel to delete the suspended fax Internet Fax job still be...

Страница 67: ...tact your Fuji Xerox Customer Support Center The printing procedure depends on the application software you use For more information refer to the documentation provided with the application 1 Select P...

Страница 68: ...w to load the documents refer to Step 1 Loading Documents P 54 Important Precautions for scanning from a computer When you are away from the machine to operate a computer with the documents left on th...

Страница 69: ...a USB memory device Store Send Link Scans a document and temporarily saves the scanned data on the machine The user is notified by e mail of the URL to the location where the scanned data is stored Th...

Страница 70: ...Step 3 Starting the Scan Job The following describes how to start a scan job Important If the document has been loaded in the document feeder do not hold down the document while it is being conveyed...

Страница 71: ...nning the first document When Next Original is displayed on the screen shown on the right and no operation is performed for a certain period of time the machine automatically assumes that there are no...

Страница 72: ...lity 3 Stored File Manager 3 Note If you used another directory for installation specify the directory instead 2 From the displayed list click the scanner name of the machine and click Next Note If no...

Страница 73: ...ration Drag and drop the file to the save location such as the desktop The dropped file is stored in the folder Note The file can be imported by copy and paste operation The file to be pasted remains...

Страница 74: ...3 2 Select Delete If Delete does not appear on the screen 1 Press the Job Status button 2 Select the job to cancel 3 Select Delete 4 Select Delete Important If you cancel the job the scanned data stor...

Страница 75: ...ath of the directory for saving files If you select a server from the address book the preset location is displayed To change the location select Keyboard and use the displayed keyboard User Name Ente...

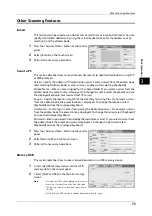
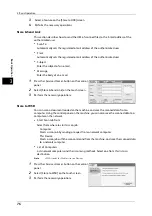
Страница 76: ...creen 3 Perform the necessary operations Store to WSD You can scan a document loaded on the machine and save the scanned data from a computer Using the control panel on the machine you can also save t...

Страница 77: ...reate Folder 2 Select the folder to create Note Select to display the previous screen or to display the next screen Entering a 3 digit folder number with the numeric keypad displays the specified fold...

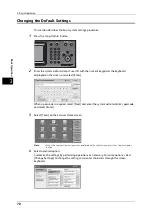
Страница 78: ...nter When a passcode is required select Next and enter the system administrator s passcode and select Enter 3 Select Tools on the Services Home screen Note When the Services Home screen is not display...

Страница 79: ...media into the machine and about basic instructions for using the machine z Usable Paper 80 z Loading Paper 82 WARNING Do not use conductive paper such as origami paper carbonic paper or conductively...

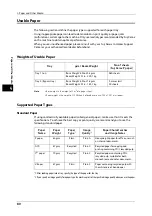
Страница 80: ...achieve the best copy or print quality we recommend you to use the following standard paper 1 After loading paper into a tray specify the type of the paper for the tray 2 Ifyouspecifyanimagequalityfor...

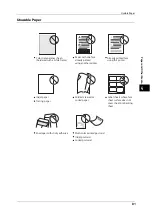
Страница 81: ...aper Folded creased or curled paper Label sheets whose face sheet surface does not cover the entire backing sheet Envelopes with sticky adhesive Inkjet postcard Curled postcard Multi color printed pos...

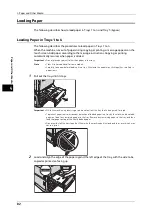
Страница 82: ...for some models Carefully fan paper before loading it in a tray Otherwise the paper may stick together resulting in paper jams 1 Pull out the tray until it stops Important While the machine is process...

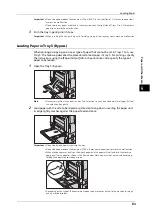
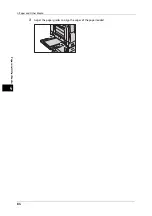
Страница 83: ...ng the Paper Output tab in the print driver Also specify the type of paper to be loaded 1 Open the Tray 5 Bypass Note If necessary pull out the extension tray The extension tray can be extended in two...

Страница 84: ...4 Paper and Other Media 84 Paper and Other Media 4 3 Adjust the paper guides to align the edges of the paper loaded...

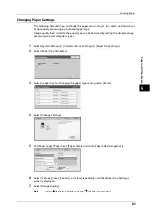
Страница 85: ...essing to particular paper types 1 Select System Settings Common Service Settings Paper Tray Settings 2 Select Paper Tray Attributes 3 Select a paper tray for changing the paper type setting under Ite...

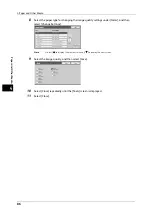
Страница 86: ...changing the image quality settings under Items and then select Change Settings Note Select to display the previous screen or to display the next screen 9 Select the image quality and then select Save...

Страница 87: ...Maintenance This chapter describes how to replace consumables z Replacing the Toner Cartridge 89 z Replacing the Staple Cartridge 91 z Emptying the Punch Waste Container 96 z Executing Calibration 98...

Страница 88: ...act Fuji Xerox Customer Support Center for its take back z Never throw a waste toner bottle into an open flame Remaining toner in the cartridge may catch fire and cause burn injuries or explosion If y...

Страница 89: ...machine is on Copy or print density may decrease slightly after the message Please order XXX appears on the touch screen When the machine is in the Power Saver mode exit the Power Saver mode by pressi...

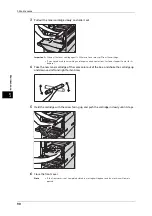
Страница 90: ...er needed contact our Customer Support Center for its disposal 4 Take the new toner cartridge of the same color out of the box and shake the cartridge up and down and left and right for ten times 5 Ho...

Страница 91: ...ded by Fuji Xerox When the machine is in the Power Saver mode exit the Power Saver mode by pressing the Power Saver button and the Machine Status button on the control panel before you replace the sta...

Страница 92: ...B1 is installed and the staple cartridge needs to be replaced a message appears on the touch screen When this message appears load a new staple case into the staple cartridge Important The use of sta...

Страница 93: ...dle and pull out the staple cartridge holder to the right towards you 3 Take the staple cartridge out of the finisher Note The staple cartridge is firmly inserted A slight force is required to pull th...

Страница 94: ...ge appears on the touch screen When this message appears load a new staple case into the staple cartridge Important The use of staple cartridges not recommended by Fuji Xerox may degrade quality and p...

Страница 95: ...e out of the finisher 3 Hold the tabs on both sides of a new staple cartridge and insert it into the original position until it clicks 4 Repeat steps 2 and 3 to replace the other staple cartridge 5 Cl...

Страница 96: ...ion Important Empty the hole punch waste container when the machine is on If you empty the container while the machine is off the machine does not recognize that the container has been emptied When th...

Страница 97: ...t the emptied hole punch waste container into the finisher until it stops 5 Close the front transport cover and then close the top transport cover of the finisher Note If the cover is not completely c...

Страница 98: ...et select from Copy Print Jobs Copy Jobs Only Print Jobs Only and None When Copy Print is not selected for Target calibration is not valid for the mode not listed in Target 3 Select Start Note The mes...

Страница 99: ...to complete calibration A screen showing the result appears 7 Select Confirm 8 To continue calibration for other screen types repeat steps 3 to 8 9 Select Close repeatedly until the Services Home scr...

Страница 100: ...5 Maintenance 100 Maintenance 5...

Страница 101: ...ages and problems It also contains troubleshooting steps to help resolve problems Refer to the information contained in this chapter to resolve any troubleshooting issues z Fault Clearance Procedure 1...

Страница 102: ...the screen messages and animated graphics and clear the fault in the order specified z If the problem is not solved by following the screen messages and graphics contact the System Administrator for a...

Страница 103: ...ft Cover B 4 Tray Model 106 Paper Jams in Top Left Cover C 107 Paper Jams in Trays 1 to 4 109 Paper Jams in Tray 5 Bypass Tray 109 Paper Jams in Duplex Module 111 Paper Jams in Finisher A1 111 Paper J...

Страница 104: ...er belt If you touch the belt the image quality might be deteriorated or the belt may be damaged and need replacement 1 Open Tray 5 When the Side Tray optional is installed Remove paper from the Side...

Страница 105: ...fusing unit as it may result in burn injury Note If the paper is torn make sure no piece of paper remains inside the machine 6 Return the lever A1 to its original position to close the fusing unit co...

Страница 106: ...left cover B gently Paper Jams in Bottom Left Cover B 4 Tray Model The following describes how to clear paper jams occurring in the bottom left cover 1 Gently open the bottom left cover B while pulli...

Страница 107: ...images might be shifted on the Transfer Belt If you touch the belt the image quality might be deteriorated or the belt may be damaged and need replacement 1 Open Tray 5 When the Side Tray optional is...

Страница 108: ...ting 6 4 Remove the jammed paper Note If the paper is torn make sure no piece of paper remains inside the machine 5 Close the top left cover C 6 Push the center of the top left cover A and close the c...

Страница 109: ...e paper jam location the jammed paper may be torn and the pieces may remain inside the machine This may cause machine malfunctions therefore always check where the paper jam occurred first 2 Remove th...

Страница 110: ...e center of the cover 4 Check the back of Tray 5 around the paper feed entrance and remove the jammed paper Important When two or more sheets of paper are loaded remove all of the sheets from the tray...

Страница 111: ...3 Close the cover A and then close Tray 5 Paper Jams in Finisher A1 The following describes how to clear paper jams occurring in the Finisher A1 optional The following shows the reference section for...

Страница 112: ...ay result in burn injury Note If the paper is torn make sure no piece of paper remains inside the machine 3 Close the top left cover gently by pressing on the center of the cover 4 Check the back of T...

Страница 113: ...in the Center Unit 1 Lift the top cover and open Note The top cover cannot be detached from the machine 2 Remove the jammed paper Note If the paper is torn make sure no piece of paper remains inside...

Страница 114: ...ocument Feeder B1 C Optional 1 Pull up the handle of the top cover of the document feeder and then open the top cover until it stops Note When you fully open the cover it enters a fixed position Open...

Страница 115: ...lift the document feeder gently and remove the document if it is there and then close the document feeder 9 If you still cannot find the document in step 8 lift the document feeder tray and remove th...

Страница 116: ...ust the copy density The copy is too light Is the document faint Is the copy density set to Lighten The copy is slightly misaligned Are the paper edges aligned and the leading edge adjusted to the tra...

Страница 117: ...to calibration Refer to Executing Calibration P 98 Is the machine set where it is exposed to direct sunlight If the document glass is exposed to strong light when you turn the machine on or cancel the...

Страница 118: ...new one Contact our Customer Support Center White dots appear in black filled areas The paper is unsuitable Load suitable paper Refer to Loading Paper P 82 The drum cartridge has deteriorated or is d...

Страница 119: ...g Paper P 82 Power supply or high voltage power supply may have malfunctioned Contact our Customer Support Center White areas or white or colored stripes appear The paper is damp Replace the paper wit...

Страница 120: ...stomer Support Center Clean the charge corotron If the problem still persists the drum cartridge needs to be replaced Contact your Fuji Xerox Customer Support Center No toner remains in the toner cart...

Страница 121: ...pport Center if the problem persists after you have tried the following solutions Important Even if the sheets have been stapled together properly staples may rise up depending on the way you handle t...

Страница 122: ...e that the machine is not operating and open the finisher front cover 2 Take the staple cartridge out of the machine Note The staple cartridge is firmly inserted A slight force is required to pull the...

Страница 123: ...ver is not completely closed a message will appear and the machine remains paused If you cannot remove jammed staples even after you perform the above procedure contact our Customer Support Center Sta...

Страница 124: ...l out the staple cartridge to the right towards you 3 Move up the staple cartridge and then take it out of the machine 4 After you take out the staple cartridge check inside of the finisher for any re...

Страница 125: ...up in step 5 to the original position 2 7 Push the staple cartridge into the machine until it clicks into place 8 Close the finisher front cover Note If the finisher front cover is not completely clo...

Страница 126: ...6 Troubleshooting 126 Troubleshooting 6...

Страница 127: ...91 111 122 Finisher B1 40 92 96 112 123 folder 77 H hole punch waste container 96 I image quality trouble 116 L loading paper 82 low power mode 49 M main power switch 45 main unit 34 maintenance 87 P...

Страница 128: ...Index 128 Index toner cartridge 89 top left cover 104 107 tray 5 Bypass 83 trays 1 to 4 82 U unusable paper 81 usable paper 80 W weights of usable paper 80...

Страница 129: ...uick Reference for English Speaking Users ME8463E1 1 Edition 1 August 2018 Fuji Xerox Co Ltd Copyright 2018 by Fuji Xerox Co Ltd For details on maintenance operation and services coverage period charg...

Отзывы: