


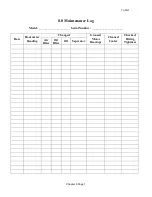

Curtis-Toledo Rotary Compressor
CAP862
Operations and Maintenance Manual
Chapter 6 Page 2
6.2 Air Filter
The air filter is the primary protection of the compressor from harmful dirt being ingested
into the oil system. It needs to be looked at weekly for clogging or holes. The period for
these inspections is dependent on the environment the machine is in (at least 2000 hours).
Element Inspection and Replacement
1.
Switch off the unit, disconnect the power, and lock and tag to prevent accidental starting.
2.
Allow one minute after stopping for the system to settle and the pressure to be relieved.
3.
Loosen the wingnut that secures the cover, and remove the cover.
4.
Loosen the wingnut that secures the element and remove the element.
5.
Place a bright light inside the element to inspect for damage or leak holes. Discard any
element that shows the slightest hole.
6.
Inspect all the gaskets and gasket contact surfaces of the housing. Correct any faulty
conditions immediately.
7.
Clean the housing with a damp cloth. Do not attempt to blow out dirt with compressed
air.
8.
Place a new element in the housing and re-secure in place with the wingnut.
9.
Replace the cover and tighten the wingnut.
10.
Reset the filter service advisory in the controller and the machine will be ready for
operation.
6.3 Oil Filter
The oil filter in the compressor system is a full flow replaceable canister type. Initially the
filter should be replaced after 500 hours of operation, then every 2000 hours. This element
protects the compressor bearings from grit and dirt ingression throughout the system. A dirty
filter will cause an oil flow restriction that can result in high oil temperature and a unit
shutdown.
DA GER
Hot oil under pressure will cause severe injury, death, or property damage.
Be sure the compressor is shutdown and pressure relieved before attempting to
remove the oil filter, separator, oil fill, or change the oil.
Oil Filter Replacement
1.
Switch off the unit, disconnect the power, and lockout and tag to prevent accidental
starting.
2.
Allow one minute after stopping for the system to settle and the pressure to be relieved.
3.
Using a strap wrench, remove the old element and gasket.
4.
Clean the gasket surface with a clean rag.
5.
Apply a light film of oil to the new gasket.
6.
Hand tighten the new element until the new gasket is seated in the gasket groove.
7.
Continue tightening by hand an additional ½ to ¾ turn.
8.
Reconnect power and reset filter service advisory.
9.
Restart the machine to check for leaks.
Содержание SE Series
Страница 42: ...CAP862 Chapter 8 Page 2 OTES ...