05
27
DVD
Installation
02
14
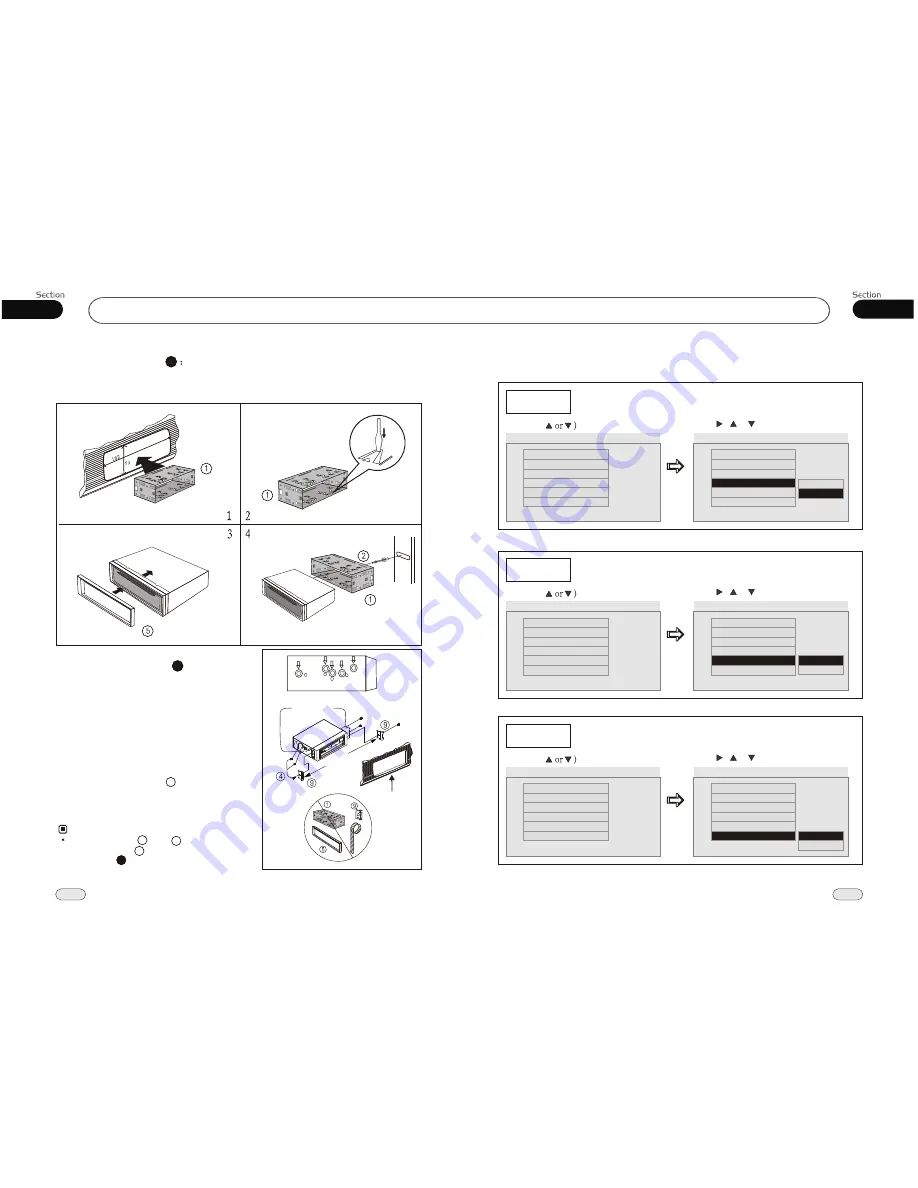
Installation Method DIN Front-Mount
1
1
Bend these claws
outward for a tight fit,
if necessary.
To support the unit
Fire Wall
Installation Method
2
Installation using the screw holes at
sides of the unit.
the
1. Remove the hooks on both sides.
2. Select a position where the screw holes
of the mounting bracket supplied with
the car and the
holes of the main
unit
(are fitted), and
screws (see at 2 places
on each side. And then fasten them to
the car.
screw
become aligned
tighten the
4
Outer Trim Frame Hook
Mounting Sleeve are not used
and
for installa-
tion method
5
1
9
2
NOTE
:
Bracket supplied
to your car
Bracket supplied
to your car
Ho
ok
Ho
ok
Dashboard
or Console
Dashboard
or Console
--General Setup Page--
Captions
Example showing how to set captions on/off:
(Press
(Press , or , then press ENTER)
--General Setup Page--
TV Display
Angle Mark
OSD Lang
Captions
Screen Saver
Wide
On
Eng
Off
On
Go To General Setup Page
--General Setup Page--
TV Display
Angle Mark
OSD Lang
Captions
Wide
On
Eng
Off
Screen Saver
On
Closed Captions
Off
On
Logo Type
Def
Screen Saver
Example showing how to set Screen Saver on/off:
(Press
(Press , or , then press ENTER)
--General Setup Page--
TV Display
Angle Mark
OSD Lang
Captions
Screen Saver
Wide
On
Eng
Off
On
Go To General Setup Page
--General Setup Page--
TV Display
Angle Mark
OSD Lang
Captions
Screen Saver
Wide
On
Eng
Off
On
Screen Saver
On
Off
Logo Type
Def
Logo Type
Example showing how to set Logo Type:
(Press
(Press , or , then press ENTER)
--General Setup Page--
TV Display
Angle Mark
OSD Lang
Captions
Screen Saver
Wide
On
Eng
Off
On
Go To General Setup Page
--General Setup Page--
TV Display
Angle Mark
OSD Lang
Captions
Screen Saver
Wide
On
Eng
Off
On
Logo Type
Default
Captured
Logo Type
Def
Logo Type
Def
Logo Type
Def
Logo Type
Def


